Table of Contents >> Show >> Hide
- What Makes Hand Sanitizer “Work” (and Why Gel Can Trick You)
- Safety First: What Not to Do (So You Don’t Become a Cautionary Tale)
- Ingredients & Tools for DIY Gel Alcohol Hand Sanitizer
- The Most Important Part: Calculate Final Alcohol Percentage
- DIY Recipe #1: Easy Aloe Gel Alcohol Hand Sanitizer (Best for Small Batches)
- DIY Recipe #2: Clear “Real Gel” Sanitizer Using Carbomer (More Precise)
- How to Use Gel Alcohol Hand Sanitizer Correctly
- Storage, Shelf Life, and Travel Tips
- Troubleshooting: Fixing the Usual DIY Sanitizer Problems
- Real-World “Been There” Lessons (So You Don’t Learn the Hard Way)
- Conclusion
Sometimes life hands you… not lemons, but an empty sanitizer bottle at the exact moment you touch a shopping cart that feels like it’s been through a toddler parade. If you need a DIY gel alcohol hand sanitizer in a pinch, you can make onebut the details matter, because “close enough” is how you end up with fancy-smelling hand goop that doesn’t actually sanitize.
This guide walks you through how to make gel alcohol hand sanitizer that stays effective, how to calculate alcohol percentage (the part most DIY recipes get wrong), and how to use and store it safely.
What Makes Hand Sanitizer “Work” (and Why Gel Can Trick You)
Alcohol-based hand sanitizer works by using alcohol (typically ethanol or isopropyl alcohol) to inactivate many germs. The catch: it needs enough alcohol to do the job. If the final product drops below an effective concentration, you’re basically just moisturizing your hands with vibes.
The key number: 60% alcohol
For consumer use, guidance commonly points to sanitizers that contain at least 60% alcohol. Below that, performance drops fast.
When sanitizer is the wrong tool
- Dirty or greasy hands: Use soap and water. Sanitizer struggles when there’s visible grime or grease.
- Norovirus situations: Handwashing is your best friend. Alcohol sanitizers may not reliably handle norovirus, so wash up when you can.
Gel vs. liquid: convenience vs. math
Gel feels nicer (and is less likely to redecorate your shoes), but the thickener you add usually contains water. Water is fineuntil it dilutes alcohol below the effective zone. That’s why “two ingredients, eyeballed” can go sideways.
Safety First: What Not to Do (So You Don’t Become a Cautionary Tale)
Do not use methanol (wood alcohol)
Methanol is toxic and has been found in some contaminated products. It is not an acceptable ingredient for hand sanitizer. Only use ethanol (drinking alcohol/ethyl alcohol) or isopropyl alcohol (rubbing alcohol) from reputable sources.
Ventilation, flames, and “why is my kitchen on fire?”
- Alcohol is flammable. Mix away from heat sources, sparks, candles, and that one burner you swear is off.
- Use in a well-ventilated area, especially if you’re making a larger batch.
- Keep away from children and pets. Swallowing alcohol-based sanitizer can be dangerous; supervise kids during use.
Don’t add bleach or household cleaners
Hand sanitizer is not a chemistry set. Don’t “boost” it with bleach, ammonia, or random cleaning products. Stick to skin-safe ingredients.
Label it like a grown-up
If you’re bottling it, label it: “Alcohol-Based Hand Sanitizer – Flammable – For External Use Only.” Your future self (and anyone rummaging through your bag) will thank you.
Ingredients & Tools for DIY Gel Alcohol Hand Sanitizer
Choose your alcohol
- Isopropyl alcohol (rubbing alcohol): ideally 91% or 99% for gel recipes.
- Ethanol: high-proof ethyl alcohol can work, but availability varies by location.
Choose your gelling option
- Beginner-friendly gel base: Aloe vera gel (simple, accessible, but can dilute alcohol if you overdo it).
- Clear gel “lab-style” thickener: Carbomer (often sold as Carbopol 940/carbomer powder) + a neutralizer (commonly triethanolamine). This makes a more classic clear gel but requires careful measuring.
Optional skin-friendly add-ins (use a light hand)
- Glycerin (humectant): helps reduce dryness, but too much can make hands feel tacky and may reduce effectiveness if it displaces alcohol.
- Fragrance: If you must, keep it minimal. Many essential oils can irritate skinespecially on already-dry hands.
Tools
- Measuring cups or (better) a kitchen scale
- Mixing bowl + whisk or spatula
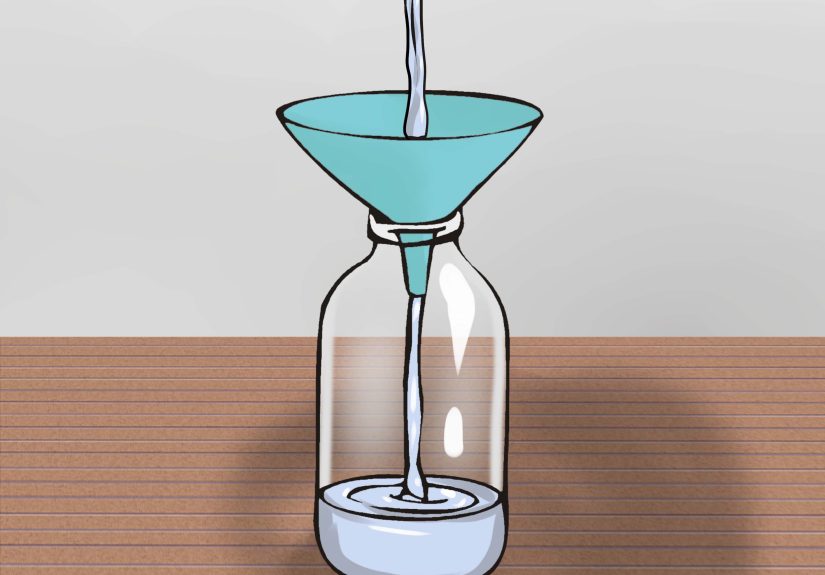
- Funnel
- Clean pump or squeeze bottles with tight lids
- Paper towels for inevitable drips (because DIY demands a sacrifice)
The Most Important Part: Calculate Final Alcohol Percentage
Here’s the simple formula DIY recipes often skip:
Final Alcohol % = (Alcohol % × Alcohol amount) ÷ (Total final amount)
Example: 91% isopropyl alcohol + aloe vera gel (2:1 ratio)
- Alcohol amount: 2 parts
- Gel amount: 1 part
- Total: 3 parts
Final % ≈ 0.91 × (2/3) = 0.607 → 60.7% (good target range).
Why 70% rubbing alcohol can fail in popular recipes
Some online advice suggests mixing two parts 70% rubbing alcohol with one part gel. Let’s do the math: Final % ≈ 0.70 × (2/3) = 46.7%which is below the effective threshold.
Quick ratio cheat sheet (approximate)
| Starting Alcohol | Safer Minimum Mix Ratio (Alcohol : Gel) | Why |
|---|---|---|
| 99% isopropyl | 2 : 1 | Ends around ~66% (room for gel) |
| 91% isopropyl | 2 : 1 | Ends around ~60%+ |
| 70% isopropyl | 6 : 1 (very little gel) | Otherwise you fall below 60% |
Tip: If you want a thicker gel, don’t “fix” thickness by adding more aloe. Fix thickness by using a better gelling method (see the carbomer recipe below) so your alcohol stays strong.
DIY Recipe #1: Easy Aloe Gel Alcohol Hand Sanitizer (Best for Small Batches)
This is the simplest “make it in your kitchen” method. It’s not perfect, but it can be reasonably effective when you keep the alcohol percentage high.
Ingredients (makes about 3/4 cup)
- 1/2 cup isopropyl alcohol 91% or 99%
- 1/4 cup aloe vera gel
- Optional: 1/2 teaspoon glycerin (or less)
Instructions
- Set up in a well-ventilated area, away from flames or heat.
- In a clean bowl, add the aloe vera gel first (it’s less splashy that way).
- Pour in the alcohol. Whisk until smooth and evenly mixed.
- If using glycerin, add a tiny amount and mix again. (More is not better. This is not pancake syrup.)
- Funnel into a clean pump or squeeze bottle. Cap tightly.
- Let it sit 30–60 minutes if bubbles formed, so it dispenses more neatly.
How it should look and feel
- Slightly runnier than store-bought gel is normal.
- If it separates, shake before each use (or reduce gel next time).
- If it’s super thick, you likely added too much gelyour alcohol % may be too low.
DIY Recipe #2: Clear “Real Gel” Sanitizer Using Carbomer (More Precise)
If you want that classic clear gel texture, carbomer can do it. This method is more “careful measuring” and less “kitchen vibes,” but it keeps the alcohol where it needs to be.
What you’ll need
- Alcohol: 91%–99% isopropyl alcohol (or high-proof ethanol)
- Carbomer powder (often sold as Carbomer/Carbopol 940)
- Distilled water (small amount, for hydration)
- Neutralizer (commonly triethanolamine) to form the gel
- Optional: a tiny amount of glycerin
Small-batch concept (why this works)
Carbomer thickens without needing a huge amount of gel base. You’re not pouring in 1/3 bottle of aloe (and accidentally watering down the alcohol). Instead, you hydrate a tiny amount of polymer and then gel it in a high-alcohol mixture.
Step-by-step (home-safe approach)
- Hydrate the carbomer: Sprinkle a small amount of carbomer into a small measured amount of distilled water while stirring to avoid clumps. Let it sit until fully hydrated (it will look cloudy and slightly thick).
- Add alcohol slowly: Stir in the alcohol gradually. Keep everything covered when not stirring to reduce evaporation.
- Neutralize to form gel: Add neutralizer drop-by-drop while stirring. The mixture will thicken as pH changes. Go slowlytoo much can make it stringy or unpleasant.
- Adjust texture: If it’s too thick, adjust with tiny amounts of alcohol (not water) to maintain strength.
- Bottle and label: Cap tightly, label clearly, and store away from heat.
How to Use Gel Alcohol Hand Sanitizer Correctly
Even the best sanitizer fails if you use a single sad droplet and declare victory. Use enough to cover both hands.
Technique
- Apply enough gel to cover all surfaces of your hands.
- Rub palms, backs of hands, between fingers, fingertips, and thumbs.
- Keep rubbing until hands are dry (often around 20 seconds).
Common mistakes
- Wiping it off early (you’re removing the active ingredient before it finishes the job).
- Using it on visibly dirty hands (wash instead).
- Forgetting fingertips and thumbs (the “greatest hits” of germ real estate).
Storage, Shelf Life, and Travel Tips
Storage rules
- Keep tightly capped to prevent alcohol evaporation.
- Store away from heat and direct sunlight.
- Keep out of children’s reach; supervise kids during use.
How long does DIY sanitizer last?
Alcohol itself is stable, but DIY mixes can lose strength if the bottle isn’t sealed well (alcohol evaporates faster than water). For best results:
- Make smaller batches more often.
- If the texture changes drastically, it smells “weak,” or it’s been sitting uncappeddiscard and remake.
Travel tip
Use a leak-resistant bottle, keep it in a separate zip bag, and don’t leave it in a hot car. Your sanitizer shouldn’t double as a science experiment.
Troubleshooting: Fixing the Usual DIY Sanitizer Problems
Problem: It’s too runny
- That’s normal for aloe-based mixes. Don’t “fix” it by adding a lot more gel (you’ll dilute the alcohol).
- If you need thicker gel, switch to a carbomer-based method.
Problem: It separated
- Shake before use.
- Next batch: whisk longer, and use a simpler gel (fragrance and add-ins can destabilize mixtures).
Problem: My hands feel dry and irritated
- Reduce fragrance or essential oils (common irritants).
- Use a small amount of glycerin, but don’t overdo it.
- Moisturize after the sanitizer dries (a plain, fragrance-free lotion helps).
Problem: I used 70% alcohol and it’s thickam I good?
Thickness is not effectiveness. Re-check the math. With 70% alcohol, most “gel-style” ratios drop below 60% unless gel is only a small fraction of the mixture.
Real-World “Been There” Lessons (So You Don’t Learn the Hard Way)
DIY sanitizer is one of those projects that looks cute on the internetuntil you’re holding a bowl of sticky gel, a funnel that suddenly forgets how funnels work, and a bottle that now has more bubbles than a kid’s birthday party. If you’ve ever tried making a gel alcohol hand sanitizer at home, you’ll recognize these very common moments.
First: the texture trap. People often assume that if it feels like store-bought gel, it must be just as effective. But effectiveness is about alcohol concentration and contact time, not vibes and viscosity. Many DIY attempts go wrong because someone adds extra aloe to “make it nicer,” and accidentally turns a sanitizer into a hand moisturizer with aspirations. A good rule is to decide your alcohol percentage first, then choose a gelling method that doesn’t force you to dilute it.
Second: the tiny squirt illusion. When you DIY, you’re more likely to ration it (“This is my precious homemade batch!”). But sanitizer needs enough product to cover both hands. People tend to miss fingertips, thumbs, and the webbing between fingersthe exact areas that touch doorknobs, phones, and the universe’s dirtiest object: the grocery cart handle. The practical fix is simple: use a pump bottle that dispenses a consistent amount, and rub until fully dry.
Third: evaporation is sneaky. Alcohol doesn’t politely announce that it’s leaving; it just slips out when caps are loose. In real life, that means your “strong” sanitizer can slowly weaken if it lives in a bottle that doesn’t seal well, especially if it’s stored warm (hello, car cup holder). People who DIY successfully tend to make smaller batches, cap them tightly, and store them like the flammable liquids they arenot next to the stove, not in direct sun, and not in a container that’s half-cracked from being sat on.
Fourth: the fragrance regret. A few drops of scent can feel harmless, but skin irritation is a common “surprise feature” of DIY sanitizer, especially when hands are already dry from frequent cleaning. If you want your sanitizer to be something you’ll actually use, keep it simple and fragrance-light. Many people end up happiest with a plain formula and a separate unscented lotion afterward.
Finally: the best sanitizer is the one you’ll use correctly. If DIY gel turns into a sticky mess you avoid, it’s not helping. If a simple aloe-based version is a little runny but easy to apply and stays above 60% alcohol, that’s a win. Think practical, not perfectand when you can, go back to soap and water like the hygiene MVP it is.
Conclusion
Making gel alcohol hand sanitizer at home is possible, but the “DIY” part doesn’t mean “do whatever.” Keep the final alcohol content at 60% or higher, avoid unsafe alcohols like methanol, label and store it properly, and use enough product to rub until dry. And whenever you can, remember the gold standard: soap, water, and a solid 20-second scrub.