Table of Contents >> Show >> Hide
- What You’ll Make
- Materials
- Origami Basics in 90 Seconds
- Step-by-Step: How to Fold a Simple Origami Tulip Flower
- Optional: How to Fold a Simple Origami Stem (With Leaf)
- Troubleshooting: Fix Common Origami Flower Problems
- Make It Look Better (Without Making It Harder)
- Where This “Simple Origami Flower” Actually Shines
- Experience Notes and Final Thoughts (Real-World Folding Wins)
If you’ve ever wanted to turn a plain square of paper into something that looks like it could belong in a tiny
fairy garden (or at least on your desk), this is your moment. In this step-by-step origami flower tutorial,
you’ll fold a classic origami tulipa simple, beginner-friendly paper flower that “pops” into shape
and instantly makes you feel like a wizard with stationery.
This guide blends common best practices from U.S.-based craft publishers, universities, and cultural institutions:
crisp creases, clean alignment, and a few sanity-saving troubleshooting tricks. No scissors. No glue (unless you
want a permanent bouquet). Just folds.
What You’ll Make
- Model: Traditional origami tulip blossom (inflatable)
- Optional add-on: A simple stem with a leaf
- Skill level: Beginner to confident beginner
- Time: About 5–12 minutes for the flower, 3–8 minutes for the stem
Materials
Best paper for an easy origami flower
- 2 square sheets (recommended): one for the flower, one for the stem
- Sizes that feel good: 6 in × 6 in or 5 in × 5 in for beginners (bigger = easier to handle)
- Paper type: origami paper, lightweight copy paper, or thin craft paper
Tip: If you only have printer paper (rectangle), trim it into a square first.
The “square paper” rule in origami isn’t snobberyit’s geometry.
Origami Basics in 90 Seconds
Two folds you’ll see everywhere
- Valley fold: fold the paper toward you so the crease forms a “valley” when opened.
- Mountain fold: fold the paper away from you so the crease forms a “mountain” when opened.
The secret ingredient: a sharp crease
Origami is basically “crease management.” Press folds firmly with your fingertip or nail, and
run along the crease once more after aligning edges. If your folds are mushy, your tulip will
look like it pulled an all-nighter.
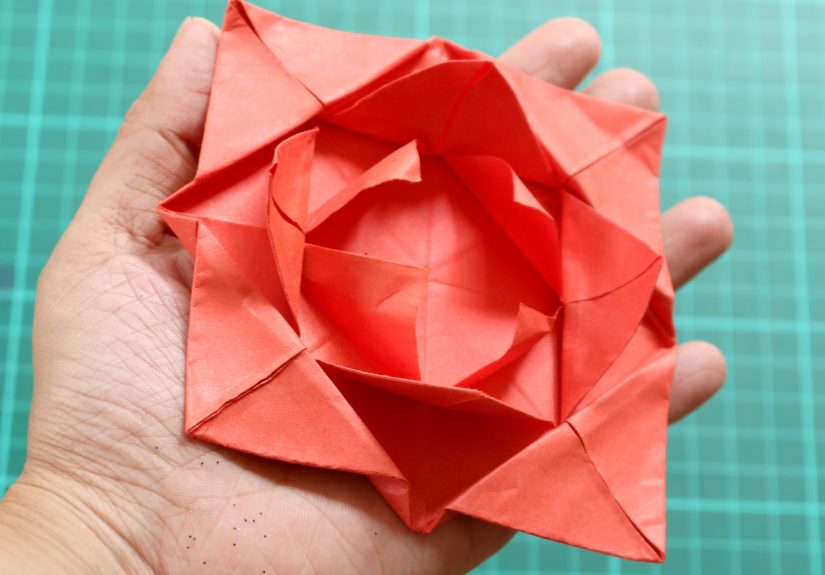
Step-by-Step: How to Fold a Simple Origami Tulip Flower
These steps create the tulip blossom. You’ll start with a square, make a collapsible base,
form locking flaps, then inflate the flower and shape the petals.
Part A: Make the “Waterbomb Base” (the foundation)
- Start color side up. Fold in half left-to-right. Crease. Unfold.
- Fold in half top-to-bottom. Crease. Unfold. (You now have a “+” crease.)
- Flip the paper over. Fold diagonally corner-to-corner. Crease. Unfold.
- Fold the other diagonal corner-to-corner. Crease. Unfold. (Now you have an “X” crease too.)
- Collapse the paper into a triangle. Bring the left and right edges inward as the top point
folds downyour creases will guide the paper to collapse neatly into a triangular base.
If your paper fights you on the collapse: you’re not doing it “wrong,” you’re just missing a crisp crease.
Re-crease the diagonals, then try collapsing again.
Part B: Form the tulip body
- Hold the triangle so the open ends (multiple layers) are at the bottom.
- Fold the bottom left corner up to meet the top point. Crease.
- Fold the bottom right corner up to meet the top point. Crease. (You’ll have a diamond shape.)
- Flip the model over and repeat: fold the bottom left corner up to the top point, then the bottom
right corner up to the top point.
Part C: Create the locking flaps (so it stays together)
- With the diamond in front of you, fold the right side over to the left like turning a page.
- Flip the model over left-to-right and again fold the right side over to the left. You’re stacking
the layers in a way that sets up the lock. - On the top layer, fold the right outer edge inward slightly past the center crease. Crease.
- Fold the left outer edge inward to match. Crease.
- Tuck and lock: take the left flap and gently insert it into the pocket of the right flap underneath.
(This is the move that makes the tulip hold its shape.) - Flip over and repeat the same two inward folds and tuck on the other side.
- At the bottom, fold the point up a small amount to mark a crease, then unfold it. This helps the
flower inflate evenly.
Part D: Inflate and shape the petals
- Find the small opening at the bottom of the model. Blow gently into the hole to inflate the tulip.
(Yes, really. Origami is classy like that.) - Use your fingers to square up the base and gently adjust the sides as the flower puffs into shape.
- Peel the petals down one at a time. Don’t yankthink “slow confidence,” like opening a stubborn
grocery bag without making it rip. - Keep shaping until the petals sit how you like: open, tight, or slightly flared.
Optional: How to Fold a Simple Origami Stem (With Leaf)
This stem is designed to fit into the bottom of the tulip. Use green paper if you want the full “paper garden” effect.
Stem steps
- Start with the white side up (or the side you want inside). Fold diagonally corner-to-corner and unfold.
This creates a center guideline. - Fold the left and right corners in to meet the center crease near the top, creating a long “kite” shape.
- Fold the lower left and right edges in to meet the center crease. Crease well.
- Repeat that same fold again: bring the new lower edges in to meet the center crease, making the stem narrower.
- Fold the bottom point up toward the top to shorten and reinforce the base.
- Fold the entire model in half lengthwise (left-to-right), so it becomes a long, slim stem.
- Gently pull the larger outer layer down and outward to form the leaf.
- Insert the thin end into the tulip’s bottom opening. If you want it permanent, add a tiny dot of gluebut the
friction-fit usually works.
Troubleshooting: Fix Common Origami Flower Problems
“My tulip won’t inflate.”
- Check the lock: if the tucked flap slipped out, re-tuck it before inflating.
- Re-open the base slightly: sometimes the hole is pinched shut by tight folds.
- Press the creases: inflation works best when folds are crisp and symmetrical.
“My petals look uneven.”
- Uneven petals usually come from edges not lining up earlier. You can still “style” itreal flowers aren’t perfect either.
- Peel petals down gradually and adjust each one a little at a time, rather than forcing one petal all the way down.
“The stem won’t fit.”
- Try trimming the stem paper size slightly smaller next time (for example, 5 in square stem with 6 in square flower).
- Compress the stem tip between your fingers to narrow it before inserting.
Make It Look Better (Without Making It Harder)
Small upgrades that add a lot
- Use two-tone paper so the inside of the petals has a surprise color.
- Scale it up (8 in squares) for teaching kids or folding with a groupbigger paper hides small mistakes.
- Make a bouquet by folding 3–7 tulips in coordinating colors and taping stems together.
- Add a message tag (a tiny rectangle folded into a mini card) for gifts, party favors, or place settings.
Where This “Simple Origami Flower” Actually Shines
The tulip is popular for a reason: it’s forgiving, recognizable, and it gives you a satisfying “ta-da” moment at the end.
Use it for classroom crafts, spring decorations, Mother’s Day cards, or as a low-cost desk companion that won’t die when
you forget to water it.
Experience Notes and Final Thoughts (Real-World Folding Wins)
The first time most people try an origami tulip, the paper feels like it has opinions. It won’t collapse into the base
cleanly, the points drift off-center, and the flower looks less like a tulip and more like a tiny paper hat that gave up
on its dreams. That’s normal. Origami is a skill where the “practice” part isn’t optionalit’s baked into the folds.
In group settings (classrooms, craft nights, family tables right before someone says “Let’s make decorations!”), the biggest
difference between “cute flower” and “crumpled mystery” is almost always crease quality. When folders take an extra second
to align edges and press down firmly, every later step becomes easier: the base collapses without wrestling, the locking tuck
slides in cleanly, and inflation turns into a satisfying pop instead of a sad wheeze.
Another common experience: people rush the “flip and repeat” steps because they feel repetitive. Ironically, those mirrored folds
are what make the model symmetrical. If you’ve ever inflated a tulip and noticed it bulges on one side, that’s usually a clue
that one side’s folds were a little off. The fix isn’t complicatedslow down on the second side and match angles as closely as
you can. Even a few millimeters matter, because paper remembers everything (and forgives nothing).
The inflation step is also a hilarious confidence test. Some folks blow too hard (paper jumps, flaps shift, panic ensues), while others
barely puff air in at all (nothing happens, suspicion arises). Gentle is the trick. Think “fog up glasses,” not “birthday candles at
a competitive party.” If you’re teaching kids, it helps to show them that the model needs a little finger support at the sides while
inflating so the base doesn’t collapse inward.
Paper choice changes the whole vibe. Lightweight origami paper inflates easily and shapes nicely, but it can show wrinkles if you overwork it.
Copy paper is sturdy and accessible, but it’s thicker, so the locks and tucks may feel tight. Many people find their “sweet spot” in slightly
thinner craft paper or standard origami paper around 70–90 gsm. Once you find a paper you like, folding becomes less about fighting material
and more about enjoying the processkind of like switching from a butter knife to an actual kitchen knife and suddenly remembering you’re capable.
Final pro-tip from real-life folding: if you want a bouquet that holds up on a shelf, add a tiny dot of glue inside the lock (or where the
stem inserts). Purists might gasp dramatically, but your flowers will survive car rides, curious pets, and the infamous “Let me see that!”
grab. And honestly, the best origami flower is the one that still looks good after someone picks it up.
When you’re done, you’ll have more than a paper tulipyou’ll have a repeatable little ritual. Fold one to relax. Fold five for a gift.
Fold ten and you’ve basically started a tiny paper greenhouse. Either way, you now know exactly how to fold a simple origami flower
step by stepand you can do it again whenever you need a quick win.