Table of Contents >> Show >> Hide
- What “Custom” Actually Means (So You Don’t Accidentally DIY Chaos)
- Architectural Magic: Trim and Paneling That Looks Like a Contractor Moved In
- 1) Picture-Frame Molding (a.k.a. “I Own a Historic Townhouse” Energy)
- 2) Board-and-Batten Accent Wall (Big Impact, Small Budget)
- 3) Beadboard Wallpaper That You Paint (Old-School Charm Without the Carpentry)
- 4) Crown Molding (The Room’s “Nice Hat”)
- 5) Level-Up Door and Window Trim with Layered Casing
- 6) Taller Baseboards Using a Base Cap + Shoe Molding
- 7) Chair Rail + Two-Tone Paint (Instant “Designed” Look)
- 8) Geometric Trim Focal Wall (Modern, Graphic, Shockingly Affordable)
- 9) Faux Ceiling Beams or “Coffer-Lite” Grid
- Built-Ins and Storage: The Stuff That Makes People Say “Wait, That Came With the House?!”
- 10) IKEA Billy Built-In Hack (The Budget Built-In Hall of Fame)
- 11) Stock Cabinets + Open Shelving = Custom “Library Wall”
- 12) Floating Shelves with a Clean Edge (No Brackets Allowed)
- 13) DIY Closet Shelves That Actually Fit Your Life
- 14) Entryway Drop Zone: Hooks, Shelf, and Bench Combo
- 15) Window Seat Using Base Cabinets (Storage + Cozy = Victory)
- 16) Banquette Bench for a Kitchen Nook (Restaurant Vibes, Home Budget)
- 17) Awkward-Nook Built-In: Under-Stairs, Alcoves, and “Why Is This Here?” Spaces
- Surface Upgrades: Big Visual Change Without a Full Renovation Spiral
- 18) Peel-and-Stick Wallpaper Accent Wall (Renter-Friendly Drama)
- 19) Peel-and-Stick Wallpaper on Furniture or Cabinets
- 20) Peel-and-Stick Backsplash (The “I Can’t Believe That’s Not Tile” Project)
- 21) Peel-and-Stick Floor Tiles for Small Spaces
- 22) Painted Pattern Wall: Stripes, Checkerboard, or Color Block
- 23) Tonal Paint Technique (“Color Capping” Without the Fancy Attitude)
- 24) Paint Trim and Doors Like a Designer Would
- 25) DIY Shaker Cabinet Makeover (New Doors? Not Necessary.)
- 26) Swap Cabinet Hardware (Small Change, Huge Payoff)
- 27) Upgrade Switch Plates + Add a Dimmer or Smart Switch (Instant “Adult Home” Move)
- How to Keep These DIY Projects Looking High-End (Even on a Budget)
- of Real-World DIY Experience (So You Don’t Learn the Hard Way)
- Conclusion
Want your home to look like you hired a designer… without hiring a designer… or selling a kidney? Welcome.
“Custom” isn’t a price tagit’s a vibe. And that vibe usually comes from three things: detail,
intentionality, and finishing work (yes, caulk counts as a personality trait).
Below are 27 budget-friendly DIY projects that punch way above their weight. Some are renter-friendly, some are
weekend-warrior classics, and all of them are designed to make your rooms feel tailoredlike they were built for
you, not for a random catalog photo from 2013.
What “Custom” Actually Means (So You Don’t Accidentally DIY Chaos)
A custom-looking room usually has architectural definition (trim, paneling, built-ins),
consistent finishes (matching hardware, cohesive paint sheen), and smart upgrades
(lighting and storage that feel intentional).
The secret sauce is less “buy new stuff” and more “make what you already have look on purpose.” That’s why so many
of these DIY home upgrades focus on surfaces, edges, and repetitionbecause the eye reads those as
craftsmanship.
- Start with one hero move per room. An accent wall + new hardware + new rugs + new lighting all at once = emotional damage.
- Match your finishes. If your knobs are matte black, don’t let your switch plates live in shiny-beige confusion.
- Use the right sheen. Walls and trim aren’t supposed to reflect light the same way. (Unless you’re going for “glossy haunted house.”)
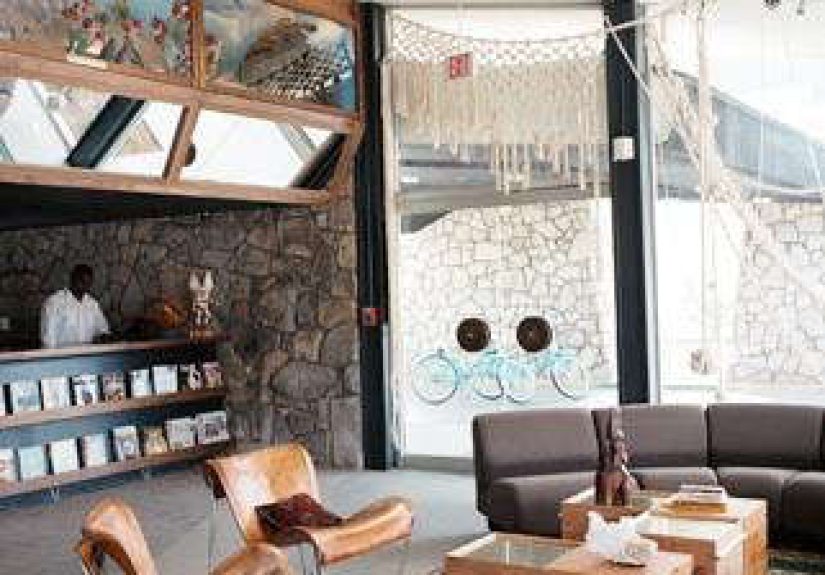
Architectural Magic: Trim and Paneling That Looks Like a Contractor Moved In
1) Picture-Frame Molding (a.k.a. “I Own a Historic Townhouse” Energy)
Add box trim to blank walls for instant depth. Keep spacing consistent, level everything carefully, then caulk and
paint for a seamless, built-in look. It’s dramatic in dining rooms, hallways, and bedroomsand surprisingly
forgiving once everything is the same color.
2) Board-and-Batten Accent Wall (Big Impact, Small Budget)
This classic wall treatment makes any room feel finished. Use MDF strips for a cost-effective option, plan your
spacing, attach with adhesive and nails, then caulk and paint. It’s basically the “before and after” of wall
upgrades.
3) Beadboard Wallpaper That You Paint (Old-School Charm Without the Carpentry)
Love beadboard but not the price or installation? Textured, paintable beadboard wallpaper can mimic the look, and
once it’s painted, most people will assume you did “real paneling.” Great for bathrooms, laundry rooms, and
cottage-style kitchens.
4) Crown Molding (The Room’s “Nice Hat”)
Crown molding is a classic custom upgrade that makes ceilings feel higher and rooms feel more complete. Use basic
profiles to keep costs down, mark studs, measure twice, and cut carefully. Paint it to match trim for that clean,
tailored finish.
5) Level-Up Door and Window Trim with Layered Casing
Builder-grade trim is usually thin and flat. You can “beef it up” by layering inexpensive trim profiles (like a
simple backband or edge molding). It’s one of those upgrades that quietly screams, “This house has standards.”
6) Taller Baseboards Using a Base Cap + Shoe Molding
Want chunky, high-end baseboards without ripping everything out? Add a base cap along the top edge and a shoe
molding at the floor. Painted together, it reads as one substantial, custom baseboardlike your walls got a glow-up.
7) Chair Rail + Two-Tone Paint (Instant “Designed” Look)
A chair rail creates structure, and two-tone paint makes it feel intentional. Try a lighter color on top and a
slightly deeper shade below (or reverse it for drama). The result: a room that looks styled, not “we moved in last week.”
8) Geometric Trim Focal Wall (Modern, Graphic, Shockingly Affordable)
Use thin molding strips to create a geometric pattern, then paint the whole wall one color for a sleek,
architectural effect. This works especially well in home offices and bedrooms where you want visual interest
without clutter.
9) Faux Ceiling Beams or “Coffer-Lite” Grid
Real beams can be pricey; faux beams or a simple grid built from lightweight wood strips can still deliver that
custom ceiling moment. Paint to match the ceiling for subtle textureor contrast for big, modern impact.
Built-Ins and Storage: The Stuff That Makes People Say “Wait, That Came With the House?!”
10) IKEA Billy Built-In Hack (The Budget Built-In Hall of Fame)
Turn inexpensive bookcases into a wall-to-wall built-in by adding trim, a base, and paint. The trick is to close
gaps, add crown or top trim, and anchor everything safely. It looks custom because it’s fittedwithout custom pricing.
11) Stock Cabinets + Open Shelving = Custom “Library Wall”
Use affordable base cabinets for the bottom (hello, hidden storage), then add shelves above. Finish with trim and
consistent paint. This works in living rooms, dining rooms, and officesanywhere you want storage that looks intentional.
12) Floating Shelves with a Clean Edge (No Brackets Allowed)
Floating shelves look higher-end when the brackets disappear. Use hidden-bracket hardware or a simple cleat
system, and choose thicker shelf material for that “built for the space” look. Bonus points for styling them like a grown-up.
13) DIY Closet Shelves That Actually Fit Your Life
Basic closets waste space. Add shelves and rods tailored to your wardrobe: double-hang for shirts, high shelves
for bins, and a dedicated spot for shoes. Even a small reach-in closet feels custom when it’s planned around how you live.
14) Entryway Drop Zone: Hooks, Shelf, and Bench Combo
Nothing says “custom home” like an entryway that isn’t a jacket avalanche. Add a simple shelf with hooks beneath,
baskets above or below, and a bench for shoes. Paint it the same color as the wall for a built-in effect.
15) Window Seat Using Base Cabinets (Storage + Cozy = Victory)
Base cabinets can become a window seat faster than you’d think. Add a wood top, trim the front, then a cushion.
It looks like an architectural featurebecause it is now. Great for breakfast nooks, bedrooms, and reading corners.
16) Banquette Bench for a Kitchen Nook (Restaurant Vibes, Home Budget)
Build a simple L-shaped bench with storage underneath (hinged tops or drawers if you’re fancy). Paint it to match
trim for that “this was always here” feel. Pair with a table and suddenly your kitchen is the favorite room.
17) Awkward-Nook Built-In: Under-Stairs, Alcoves, and “Why Is This Here?” Spaces
If your house has a weird nook, congratulationsyou own custom potential. Add shelves, a cabinet, or drawers. The
budget move is to use ready-made components and trim them out so they look designed, not improvised.
Surface Upgrades: Big Visual Change Without a Full Renovation Spiral
18) Peel-and-Stick Wallpaper Accent Wall (Renter-Friendly Drama)
Removable wallpaper can transform a room in a day. Choose higher-quality options to avoid bubbling or peeling, and
apply to smooth, clean walls. Try it behind a bed, in a powder room, or in a closet for a surprise “wow.”
19) Peel-and-Stick Wallpaper on Furniture or Cabinets
Line the back of a bookcase, wrap a drawer front, or give a cabinet door a pattern moment. It’s an easy way to
add personality without committing to permanent changes. Think of it as the accessory jewelry of home design.
20) Peel-and-Stick Backsplash (The “I Can’t Believe That’s Not Tile” Project)
Peel-and-stick backsplash tiles come in styles that mimic subway tile, stone, and even fancy patterns. Prep the
surface, plan your layout, and don’t stretch tiles during install. It’s one of the fastest ways to modernize a kitchen.
21) Peel-and-Stick Floor Tiles for Small Spaces
Updating floors sounds expensiveuntil you remember peel-and-stick tiles exist. They’re best for smaller areas
like laundry rooms, offices, and mudrooms where a quick refresh makes a huge difference. Clean the subfloor well and press firmly.
22) Painted Pattern Wall: Stripes, Checkerboard, or Color Block
Paint is the ultimate budget-friendly DIY. A taped stripe, a checkerboard, or even a half-wall color block reads
as custom because it looks planned. The key: crisp lines and a palette that plays well with your existing finishes.
23) Tonal Paint Technique (“Color Capping” Without the Fancy Attitude)
Use related shades in the same color familylighter on walls, deeper on trim or molding, and the boldest tone on
the ceiling. It adds depth and makes the room feel styled from floor to ceiling, even if the furniture is still “college-era sentimental.”
24) Paint Trim and Doors Like a Designer Would
Painting trim isn’t glamorous, but it’s transformative. Prep matters: fill holes, sand, caulk gaps, and use a
slightly higher sheen than your walls for durability. White is classic, but a moody trim color can make a room look bespoke.
25) DIY Shaker Cabinet Makeover (New Doors? Not Necessary.)
If your cabinets are flat-front, you can add thin trim pieces to create a Shaker-style frame, then prime and
paint. It’s a budget-friendly way to get that “new kitchen” feeling without… getting a new kitchen.
26) Swap Cabinet Hardware (Small Change, Huge Payoff)
New knobs and pulls are one of the quickest upgrades in any room with cabinetry. Use a hardware template or jig
for consistent placement, and match your metal finishes across the space. This tiny detail makes your home look cohesive on purpose.
27) Upgrade Switch Plates + Add a Dimmer or Smart Switch (Instant “Adult Home” Move)
Swap old switch plates for fresh ones that match your hardware finishes, then level up the lighting with a dimmer
(or a smart switch if you want app control). Always turn off power at the breaker and follow manufacturer instructions.
The result is subtlebut it reads custom every single day.
How to Keep These DIY Projects Looking High-End (Even on a Budget)
The difference between “custom” and “craft time” is usually the finish work. Here’s what makes a budget project
look expensive:
- Caulk is non-negotiable. If you can see gaps, the room can see them too.
- Consistency wins. Repeat the same trim style, paint sheen strategy, and hardware finish within a space.
- Don’t rush paint. Primer, cure time, and proper sheen choice matter more than people want to admit.
- Measure like you’re being graded. Because you are. By your own eyeballs. Forever.
of Real-World DIY Experience (So You Don’t Learn the Hard Way)
If you’ve ever started a “simple weekend project” on Saturday morning and found yourself eating dinner on the
floor on Sunday nightcongratulations. You’ve experienced the ancient DIY rite of passage known as
“Why Is This Taking So Long?”
Here’s what tends to happen in real homes: the projects that make a room feel custom are rarely complicated,
but they are detail-heavy. Molding, paneling, and built-ins don’t succeed because you own
expensive tools. They succeed because you slow down for the unsexy partslayout, leveling, filling, sanding,
and painting.
The first “aha” moment most people have is that straight lines are emotional. If picture-frame
molding boxes are off by even a little, your brain may not identify why it feels wrong… but it will.
The fix is simple: plan your spacing on paper (or painter’s tape on the wall), use a level obsessively,
and accept that measuring twice is cheaper than buying extra trim because your first cut was “optimistic.”
Next: paint sheen is the quiet MVP. A wall painted in a soft eggshell with trim in a more durable satin or
semi-gloss is one of those “designer moves” people feel instantly. When everything has the same sheen, rooms
can look flator weirdly shinydepending on lighting. Choosing the right sheen is basically choosing whether your
wall hides flaws gracefully or highlights them like an interrogation lamp.
Then there’s peel-and-stick everything. It’s amazing, it’s fast, and it can also humble you if you ignore prep.
Smooth, clean, fully cured paint matters. Grease, dust, and texture are the villains here. The good news is:
when you do prep properly and buy decent-quality materials, peel-and-stick wallpaper and tiles can look
shockingly legitand they’re perfect for experimenting with bold patterns in small spaces.
Finally, don’t underestimate the “small detail” projects. Swapping cabinet hardware, updating switch plates,
and adding a dimmer won’t feel dramatic while you’re doing them. But afterward, your house suddenly feels like it
has a point of view. Those little upgrades create consistency, and consistency reads as custom.
The best part? Once you finish one project cleanly, the next one gets easiernot because the work changes, but
because your standards do. You start seeing your home as a set of intentional choices. And that mindset is the
real upgrade.