Table of Contents >> Show >> Hide
- What a Stud Finder Is Actually “Finding”
- Before You Start: A 60-Second Setup That Prevents 60 Minutes of Frustration
- Step-by-Step: How to Use a Stud Finder on Drywall
- How to Find the Center of the Stud (So Your Screw Actually Hits It)
- Stud Spacing: Use the House’s “Rhythm” to Double-Check Your Result
- Using a Stud Finder for Real Projects
- Wire and Pipe Safety: Your Stud Finder Is Helpful, Not Psychic
- Troubleshooting: Why Your Stud Finder Is Lying to You (And How to Fix It)
- Special Wall Situations (Because Homes Love Plot Twists)
- The “Before You Drill” Checklist
- Conclusion: Make the Wall Work With You
- Real-World Experiences and Lessons From Using a Stud Finder (500+ Words)
If you’ve ever tried to hang something heavy on drywall, you already know the wall has two personalities:
“Sure, I can hold that!” and “Gravity is my love language.” A stud finder helps you meet the wall’s
responsible sidethe studsso your TV, shelves, mirror, or coat rack doesn’t become a surprise floor décor item.
This guide walks you through using a stud finder the right way (the calm, repeatable, “I trust my marks” way),
explains why false readings happen, and shows how to verify what your tool is telling you before you drill.
Expect practical steps, real-world examples, and a few friendly reminders that wires and pipes do not care
about your weekend project timeline.
What a Stud Finder Is Actually “Finding”
Most stud finders don’t magically see wood through drywall. Instead, they detect clueseither metal fasteners
(nails/screws) or changes in density behind the wall.
Common stud finder types (and why you might like each)
- Magnetic stud finders: Simple magnets that “stick” when they find nails or screws in a stud.
They’re slower, but they’re refreshingly honestno batteries, no drama. - Electronic stud finders (single-sensor): These sense density changes and usually need calibration
against the wall. They’re common and affordable, but technique matters. - Multi-sensor / wide-display stud finders: These read more than one point at a time and often show
a wider “map” of the stud area. They can feel easier to interpret, especially for beginners. - Wall scanners / RF or radar-style scanners: Higher-end tools that can identify objects more
specifically (studs, pipes, wiring) depending on the model. Great when walls are complicated.
Before You Start: A 60-Second Setup That Prevents 60 Minutes of Frustration
1) Check the basics
- Fresh batteries: Weak batteries = weird readings, random beeps, and you questioning reality.
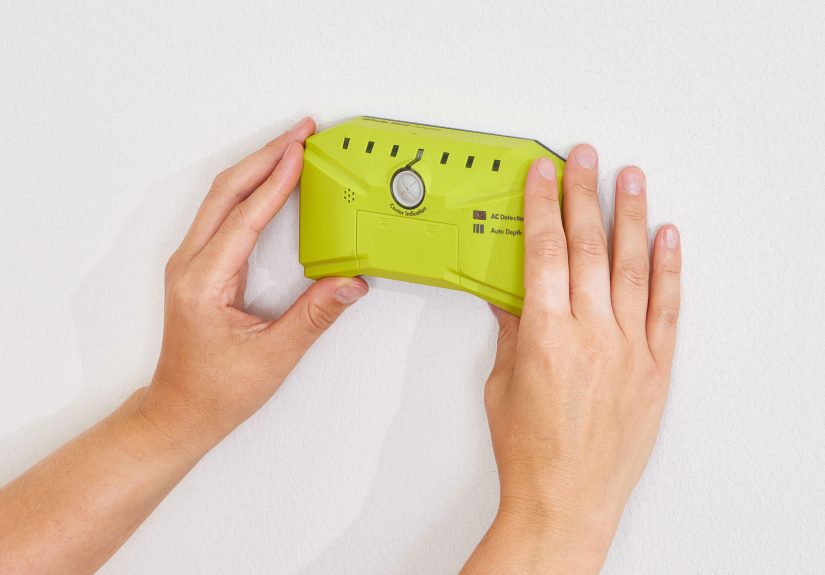
- Pick the right mode: “Stud” for typical drywall, “Deep Scan” for thicker walls, “Metal” for pipes/metal studs, and “AC” if your unit has live-wire detection.
- Clear the area: Remove pictures, shelves, or anything that prevents the tool from sitting flat.
2) Use painter’s tape (optional, but awesome)
Put a strip of painter’s tape on the wall where you’ll be scanning. You can mark on the tape, not the paint,
and it’s easier to see pencil linesespecially on textured walls.
Step-by-Step: How to Use a Stud Finder on Drywall
Step 1: Decide your mounting height
Studs run vertically, but you should scan at the same height where you’ll place screws. If you’re mounting a TV,
scan at bracket height. If you’re hanging shelves, scan along the shelf’s support line.
Step 2: Calibrate correctly
Most electronic stud finders must calibrate on a “blank” spot of wall (not over a stud). Place the tool flat,
press and hold the button (or power it on), and wait until it signals it’s readyusually with a light or beep.
- Keep it flat: Tilting changes the reading.
- Don’t calibrate over a stud: If you do, the tool can treat “stud” as normal wall and everything else as suspicious.
Step 3: Scan slowly in one direction
Slide the stud finder horizontally across the wallslowly. “Slowly” here means you could narrate your motion
in a calm voice and still keep up. When it signals a stud edge (or begins showing increased density), stop.
Step 4: Mark the first edge
Make a small pencil line on the tape where the tool indicates the stud edge. Some tools show an edge; others
show center. Follow your model’s indicator.
Step 5: Keep moving to find the other edge
Continue past the stud until the signal drops off. Mark the second edge. The stud’s center is roughly halfway
between those two marks.
Step 6: “Trust but verify” by scanning back
Lift the tool off the wall, place it back a few inches away, calibrate again (if your model requires it),
and scan the opposite direction. You should find the same edges in roughly the same place. If the marks drift
every time, slow down and re-check calibration.
Step 7: Map the stud at two heights
Here’s a pro move that turns “probably” into “pretty sure”: scan 6–12 inches higher or lower and repeat.
If your marks line up vertically, you’ve likely found a stud. If they wander, you might be detecting a drywall seam,
a patch, a pipe, or a textured area.
How to Find the Center of the Stud (So Your Screw Actually Hits It)
A typical wood stud is about 1.5 inches wide. If you marked both edges, the center is the midpoint. If your tool
only identifies “center,” still verify by scanning from both sides and checking that the center reading repeats.
Quick center-finding trick
- Mark the left edge.
- Mark the right edge.
- Measure halfway between marks and place a bold center mark.
- Scan vertically to confirm the center stays consistent.
Stud Spacing: Use the House’s “Rhythm” to Double-Check Your Result
In many U.S. homes, studs are spaced at regular intervalsoften 16 inches on center, sometimes 24 inches.
That means once you find one stud center, the next one may be about 16 or 24 inches away.
Don’t treat spacing like a law of physics (older homes and remodeled walls can be quirky), but do use it as a
logic check. If your marks suggest studs every 6 inches, your stud finder is probably reacting to something else.
Using a Stud Finder for Real Projects
Mounting a TV (the “please don’t fall” project)
- Find two studs: Most TV mounts require anchoring into at least two studs.
- Measure spacing: After finding the first center, measure 16 inches (or 24) to locate the next stud and confirm with scanning.
- Avoid outlet zones: If there’s an outlet below, wires can run vertically or horizontally near it. Use wire detection if available and proceed carefully.
- Pre-drill: A pilot hole helps your lag bolt go in straight and reduces splitting.
Hanging heavy shelves
Shelves fail when they’re asked to do “stud-level work” with “drywall-anchor pay.” If the shelf will hold books,
dishes, or anything that makes you say “it’s not that heavy,” hit studs where you can.
- Find stud centers along the shelf line.
- Use a level to keep brackets aligned.
- If one bracket can’t land on a stud, use a high-quality anchor rated for the load and wall type.
Installing grab bars or handrails
These are safety-critical installations. Whenever possible, fasten into studs (or use approved blocking).
Map the stud carefully at multiple heights and verify before drilling.
Finding ceiling joists
Many stud finders also work on ceilings to locate joists for hanging plants, bikes, or garage storage systems.
The technique is the sameflat contact, slow scanning, mark edges, confirm from both directions.
Wire and Pipe Safety: Your Stud Finder Is Helpful, Not Psychic
Some models include AC wire detection, but detection depth and accuracy vary by tool and wall conditions.
Treat any wire warning seriously, and assume there may be wires or pipes even if your tool is silent.
Smart safety habits
- Scan the whole area: Don’t scan one line and drill. Scan around your planned hole in a small grid pattern.
- Pay attention to outlets and switches: Wires commonly run near them.
- When in doubt, choose a different spot: Moving a bracket 2 inches is easier than dealing with an “unexpected electrical surprise.”
- If you must drill near electrical: Shut off the correct breaker and confirm power is off using an appropriate tester.
Troubleshooting: Why Your Stud Finder Is Lying to You (And How to Fix It)
Problem: “It says there’s a stud everywhere.”
- Cause: You’re moving too fast, the wall is heavily textured, or calibration is off.
- Fix: Recalibrate on a clear spot, slow down, and keep the tool flat. Try scanning at a different height.
Problem: “It finds a stud… then loses it.”
- Cause: Uneven pressure, tilt, or a stud finder that’s extra sensitive to density changes.
- Fix: Use steady pressure, scan from both directions, and mark edges only when readings repeat.
Problem: “False positives on plaster or lath-and-plaster walls.”
Older walls can have inconsistent density (plaster buildup, lath strips, repairs), which confuses density-based
stud finders. In these cases, a magnetic stud finder (looking for nails) or a tool with a dedicated metal scan
can be more reliable.
Problem: “It’s detecting metalare those studs or pipes?”
Metal scan may pick up metal studs, pipes, nail plates, conduit, or even corner bead. Use multiple scans:
map the object vertically and horizontally. A stud typically creates a long, straight vertical pattern.
Pipes may read differently, and electrical conduit can run vertically or horizontally depending on the installation.
Special Wall Situations (Because Homes Love Plot Twists)
Tile walls (bathrooms and backsplashes)
Tile adds thickness and can change how sensors read. Use a deeper scan mode if your tool has one, and go slowly.
If you’re drilling through tile, your bit choice and technique matterso confirm your stud location first,
then plan the safest drilling method for tile.
Multiple drywall layers or paneling
Deep scan mode helps, but it can also increase false positives. That’s why mapping at multiple heights is key.
If your tool struggles, a magnetic stud finder can help you locate the fasteners holding drywall to studs.
Metal studs
Many stud finders can detect metal studs, but anchoring into them is different than wood. If you’re mounting
something heavy, confirm the wall framing type and use fasteners appropriate for metal studs (or consider
installing backing).
The “Before You Drill” Checklist
- Found both edges? Greatmark the center.
- Scanned from both directions? Your marks should repeat.
- Mapped at two heights? Studs behave vertically.
- Used spacing as a reasonableness check? Look for the next stud at ~16 or 24 inches.
- Checked for wires/pipes? Scan around the hole, not just across it.
- Still unsure? Choose a different location or get a second verification method (magnet, small pilot test, or professional help).
Conclusion: Make the Wall Work With You
Using a stud finder well is mostly about consistency: calibrate correctly, scan slowly, mark edges, confirm from
both directions, and verify with a second pass at a different height. Do that, and you’ll spend less time patching
holes and more time enjoying the thing you hung up in the first place.
Real-World Experiences and Lessons From Using a Stud Finder (500+ Words)
The first time many DIYers use a stud finder, it feels like a tiny plastic lie detector… except the wall is the one
being interrogated and it refuses to answer in complete sentences. Over time, patterns emergeboth in the wall and
in how people accidentally sabotage their own readings.
The “TV Mount Confidence Curve”
A common story: someone finds what they believe are two studs, drills pilot holes, and realizes the bit slid forward
with suspicious ease. The lesson isn’t “stud finders don’t work.” The lesson is “verify the center.” When people go
back and do the edge-to-edge methodmark left edge, mark right edge, then find the midpointthe next pilot hole hits
solid wood exactly where it should. It’s a small change in process that produces a big change in confidence.
The Shelf That Taught Everyone to Scan Twice
Another classic: floating shelves installed in a hurry. The stud finder beeped, marks were made, brackets went up…
and the shelf slowly developed a sad downward tilt like it lost faith in gravity’s fairness. After removing the bracket,
the owner scans againthis time from the opposite directionand the “stud” shifts an inch and a half. What happened?
Most likely a calibration or speed issue. Slower scanning plus re-calibration on a blank section of wall usually brings
the reading back into alignment. The best habit that comes out of this is simple: scan left-to-right, then right-to-left.
If the marks don’t agree, don’t drill.
Textured Walls and the Mystery of “Stud Everywhere”
People with orange-peel texture or heavy plaster often report that their stud finder insists the entire wall is a stud,
whichif truewould make the wall the strongest object known to science. In real life, texture and uneven density can
confuse density-based sensors. The workaround most DIYers end up loving is painter’s tape plus a second method:
place tape, scan slowly, then confirm by mapping the line at different heights. If the “stud” jumps around as you move up
and down, it’s probably not a stud. Some folks switch to a magnetic stud finder for these walls because nails and screws
don’t care how dramatic the plaster is.
The Outlet Warning That Saved a Weekend
Many first-time users assume wire detection is either perfect or useless. In practice, it’s best treated as a cautious
friend who says, “Hey… maybe don’t drill there.” DIYers often learn this when mounting something near an outlet.
The stud finder shows a stud, but it also flashes a live-wire warning. The best outcome is when the person pauses,
scans a wider area, and realizes the “best” mounting spot overlaps a likely cable path. Shifting the bracket a couple inches
can avoid a risky drill point without changing the look of the final installation. The bigger lesson: scan the neighborhood,
not just the address.
The Renovation House Surprise: Studs Don’t Always Follow the Rules
In newer construction, the 16-inch rhythm often shows up reliably. In older or remodeled homes, you might find doubled studs
near windows, extra framing near corners, or odd spacing where a wall was repaired. DIYers who succeed in these houses tend to
do two things: they measure from a confirmed stud center and they stay flexible when the next stud isn’t exactly where the tape
measure “promised.” A stud finder becomes less of a “one-and-done” gadget and more of a mapping toolmark, confirm, connect the dots,
and then commit to drilling.
Put all those experiences together and you get a practical rule: the best stud finder technique is the one that produces the same
answer twice. When you can repeat the reading from both directions and at multiple heights, you’re not guessingyou’re installing like
someone who plans to keep the wall intact.