Table of Contents >> Show >> Hide
- Step 1: Gather and Prep Your Old Photos
- Step 2: Choose How You’ll Digitize Your Photos
- Step 3: Dial In the Right Scan Settings
- Step 4: Save and Transfer Photos to Your Computer
- Step 5: Organize Your Digital Photo Library
- Step 6: Back Up Your Photos So You Don’t Lose Them
- Common Mistakes to Avoid When Saving Old Photos
- Real-Life Experiences: What Digitizing Old Photos Teaches You
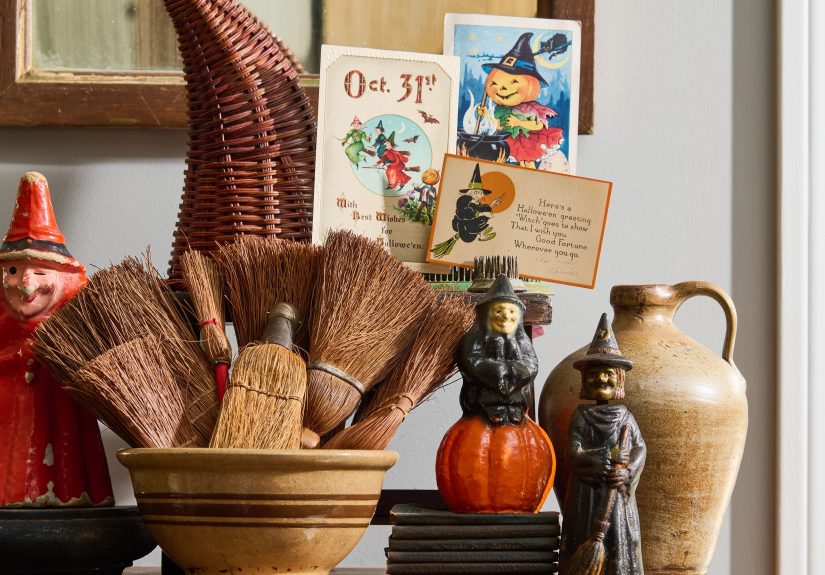
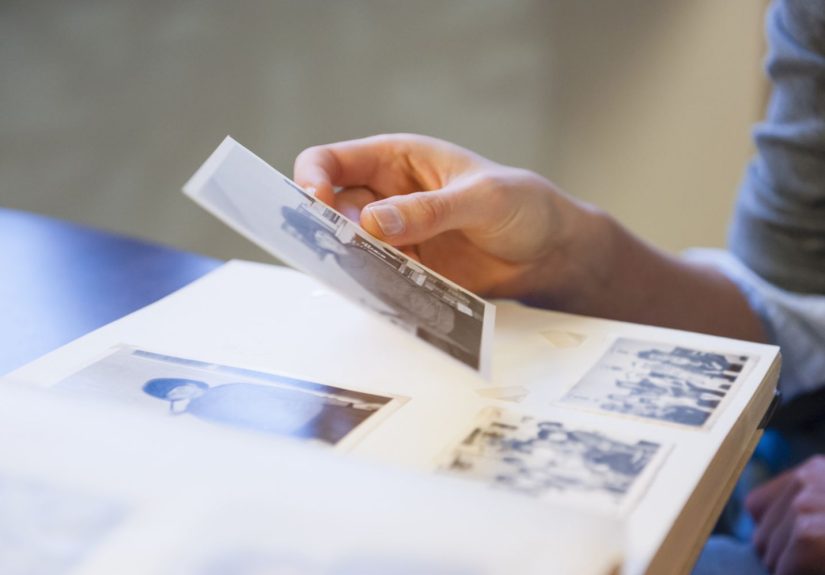
If you still have a shoebox (or six) of old family photos hiding in a closet, congratulations: you basically own a tiny, dusty museum. The only problem? Paper doesn’t age gracefully. Prints fade, albums crumble, and one spilled coffee can take out an entire decade of memories.
The good news is that saving old photos to your computer is easier than ever. Whether you have a flatbed scanner, an all-in-one printer, or just a smartphone, you can turn fragile prints into long-lasting digital files you can back up, share, and enjoy.
In this guide, we’ll walk through step-by-step how to digitize old photos, move them onto your computer, organize them, and keep them safely backed up for the long haul.
Step 1: Gather and Prep Your Old Photos
Before you start hitting the “Scan” button like it owes you money, take a few minutes to prep. It will save you hours later.
Sort your photos into small batches
- Group by era or event. Think “childhood,” “college,” “wedding,” “kids’ baby years,” etc. This makes digital organizing way easier later.
- Prioritize the most important photos first. Start with irreplaceable shots: grandparents, weddings, baby photos, and anything that makes your heart melt on sight.
- Set aside damaged photos. Torn, faded, or water-stained prints can still be scanned, but you may want to handle them carefully or even get help from a professional service.
Clean gently to protect your scanner and photos
Dust and crumbs make terrible cameos in scans. Many photo-scanning services and archivists recommend cleaning both the glass and the photos before scanning to improve quality.
- Wipe the scanner glass with a soft, lint-free cloth (microfiber is ideal).
- Use a clean, dry, soft cloth or a blower brush to gently sweep dust off photos.
- Avoid liquids, sprays, or household cleaners directly on your printsmoisture is not their friend.
Be careful with old albums and sticky pages
If your photos are stuck in “magnetic” albums with sticky pages, don’t force them loose. You may be able to scan them right in the album if the page lies flat. If they’re very stuck, consider consulting a photo preservation specialist before trying to pry them out.
Step 2: Choose How You’ll Digitize Your Photos
There’s no one “right” way to digitize old photos. The best method depends on how many photos you have, how picky you are about quality, and what equipment you already own.
Option 1: Use a flatbed scanner (best quality at home)
A flatbed scanner is the classic choice for digitizing prints. Many archival and records-management guides recommend scanning photos at 300–600 DPI (dots per inch) for high-quality results, with 600 DPI or higher if you might enlarge or crop later. Higher DPI means more detail, but also larger files.
When you use a flatbed scanner:
- Resolution: Set at least 300 DPI for basic viewing and printing. Choose 600 DPI (or more) for important photos or if you may reprint them larger later.
- Color mode: Use color even for black-and-white photos. It captures subtle tones better.
- File format:
- JPEG is fine for everyday use and smaller file sizes.
- TIFF is better for long-term archival quality (larger files, but lossless).
- Use preview and crop. Most scanning software lets you preview and crop so you’re not scanning a huge area of blank glass around the photo.
If you’re scanning slides or negatives, check your scanner manual: you may need a model with a transparency adapter and higher recommended resolution on the long side of the film.
Option 2: Use an all-in-one printer/scanner
Many home printers come with a built-in scanner. They may not be as sharp as a dedicated flatbed scanner, but they can still produce good results if you:
- Open the scanner software on your computer (not just the “copy” button on the printer).
- Manually set resolution to 300–600 DPI.
- Choose “photo” or “image” mode instead of “document.”
Option 3: Use your smartphone with a photo-scanning app
No scanner? No problem. Today’s smartphones have solid cameras, and dedicated apps are designed to reduce glare and correct perspective. Google’s PhotoScan, for example, helps you scan printed photos with automatic edge detection, perspective correction, and glare reduction. The Google Photos help pages recommend keeping the phone level, using a contrasting background, and following the on-screen prompts for best results.
General smartphone-scanning tips:
- Work in bright, indirect light to minimize harsh shadows.
- Place photos on a flat, non-shiny, contrasting surface.
- Turn on the app’s built-in “anti-glare” or multi-frame mode if available.
- Keep the phone level and steadypretend you’re balancing a book on top of it.
Option 4: Use a professional photo digitizing service
If you have thousands of photos or fragile albums, you may want to outsource. Many U.S. digitizing companies will send you a shipping kit, scan your prints at 300–600 DPI or higher, and return both your originals and digital copies on USB, DVD, or in a cloud folder.
This option costs more, but it saves time and can be worth it for big projects, very old photos, or film formats you can’t scan at home.
Step 3: Dial In the Right Scan Settings
Even if you’re not “techy,” a few simple settings can make a huge difference in how good your scanned photos look and how easy they are to store.
Resolution (DPI)
- 300 DPI: Good for standard viewing and small reprints.
- 600 DPI: Great all-around choice for family archives and enlargements.
- Higher than 600 DPI: Helpful for very small originals (like wallet-size photos or slides) or if you want maximum detail. Just remember that file sizes grow quickly.
Color and file type
- Color depth: Most home users can stick with 24-bit color. Higher bit depth is more for professional editing.
- JPEG: Smaller files; ideal for everyday use, sharing, and cloud storage.
- TIFF: Lossless, higher quality; ideal for “master” archival copies if you have enough storage.
Basic corrections (don’t overdo it)
Many scanning tools offer options like dust removal, color correction, or restoring faded photos. These can be helpful, but use them lightly:
- Turn on dust/scratch removal if available (it can save you touch-up time later).
- Use auto color correction for faded photos, but compare to the original; you don’t want everyone looking slightly green.
- Save a clean “master” scan, then create adjusted copies if you want to try more aggressive editing later.
Step 4: Save and Transfer Photos to Your Computer
Once you’ve scanned or snapped your photos, it’s time to get them onto your computer where you can actually find and protect them.
If you used a scanner connected to your computer
- Choose a main folder like
PicturesOld_PhotosorPhotosFamily_Archive. - Create subfolders such as
1950s,1990s, orVacation_2003as you go. - Save scans directly into the correct folder instead of dumping everything into “Scans” and promising to fix it later (we both know how that ends).
If you used your smartphone
- Transfer via USB cable. Connect your phone to your computer, unlock it, and copy the scanned photos into your chosen folders.
- Use cloud sync. If you scanned into Google Photos, iCloud Photos, OneDrive, or similar, download the images from the web interface onto your computer and place them in your main photo archive folder.
- Use AirDrop (Mac/iPhone). AirDrop the photos to your Mac and move them into your photo archive folder.
Use simple, consistent file names
You don’t have to rename every file perfectly, but a little structure is gold:
- Use a simple pattern:
YYYY-Event-Description-###.jpg, e.g.,1994-Christmas-Eric-and-dog-001.jpg. - If you don’t know the exact year, group by decade (e.g.,
1970s-childhood-001.jpg). - Avoid random names like
Scan12345.jpg. Your future self will thank you.
Step 5: Organize Your Digital Photo Library
Digitizing is only half the job. If you want to actually find a specific photo later (“that one of Grandma holding the giant turkey”), organization matters.
Create a single “photo hub”
Many photo-organization experts now recommend creating one main “home” for all your photos, instead of having some on the desktop, some on an old laptop, some in random USB drives, and some on your phone.
- Pick a main location, such as
C:UsersYourNamePicturesPhoto_Archive(Windows) or the Pictures folder on a Mac. - Move all newly scanned photosand eventually, your phone and camera photosinto this hub.
- Avoid keeping separate, unconnected piles of files scattered across devices.
Use folders by year and event
A simple folder system works surprisingly well:
Photo_Archive1950s1960s1980s1990s1994-Christmas1997-Summer-Vacation
2000s
You can get fancier with tags and facial recognition later using photo-management software, but clear folders are a great foundation.
Clear out duplicates and near-duplicates
It’s easy to end up with three almost identical scans. As you go, delete:
- Blurry, crooked, or badly cropped versions.
- Extra copies of the same photo unless you’re keeping a “backup” version (which is better handled by proper backup, not random duplicates).
Step 6: Back Up Your Photos So You Don’t Lose Them
Once your old photos live on your computer, the final (and critical) step is protecting them from hard drive failures, accidents, and “I thought you had a backup?” moments.
Follow the 3-2-1 backup rule
Many photo-preservation and backup experts recommend a simple strategy:
- 3 copies of your photos
- 2 different types of storage (for example, your computer and an external drive)
- 1 copy offsite (such as a cloud service)
Practical ways to back up
- External hard drive or SSD: Plug it into your computer and copy your entire photo archive to a backup folder. Repeat this regularly.
- Cloud storage: Use services like Google Photos, iCloud, OneDrive, Dropbox, Amazon Photos, or similar to keep an additional copy in the cloud.
- Automatic backup software: Tools that can automatically back up your photo folder to cloud storage or another drive help ensure you don’t forget.
Once your backup is set up, test it occasionally by restoring a couple of photos from the backup locationjust to be sure everything works.
Common Mistakes to Avoid When Saving Old Photos
- Scanning at too low a resolution. 150 DPI might look okay on screen now, but it won’t hold up well for printing or cropping later.
- Overusing auto-corrections. Auto color and sharpening can help, but they can also make skin tones look strange. Keep a clean original scan.
- Skipping backups. If all your digitized photos only live on one laptop, you’ve just moved your riskfrom a shoebox to a hard drive.
- Waiting until you’re “done” to organize. Light organizing as you go (basic folders and names) beats a massive clean-up job at the end.
Real-Life Experiences: What Digitizing Old Photos Teaches You
On paper (pun intended), saving old photos to your computer is a technical project: DPI settings, file formats, backup strategies. In real life, it’s a very human experience. Once you sit down with a pile of prints and start scanning, you’re not just checking off a to-do listyou’re walking back through decades.
Most people report that the hardest part of the process isn’t actually the tech, it’s the decision-making. You’ll find four nearly identical shots of the same birthday cake and catch yourself wondering, “Do I keep all four?” Here’s a simple rule of thumb: if an image doesn’t tell a story, it’s okay to let it go. Pick the version where everyone’s eyes are open, the expressions feel most like “them,” and move on.
Another common experience: once your photos are digitized and easy to share, they stop being “background clutter” and start being part of your life again. Instead of boxes in the basement, you get:
- A rotating digital photo frame in the living room that quietly cycles through family history.
- Shared online albums for reunions, where cousins can add their own photos and help tag people.
- Last-minute giftslike a printed photo book for a milestone birthdaythat would’ve been impossible if everything were still buried in albums.
The process also has a funny way of sparking conversations. As you scan, you’ll find photos you don’t recognize: a mysterious great-uncle, a house you’ve never seen, a vacation before your time. Asking older relatives about those images can unlock stories you’d never hear otherwise. If you can, scan with someoneyour mom, your sibling, your teenager who has never seen a camera that doesn’t live in a phone. The commentary is half the fun.
You’ll probably make a few “rookie mistakes” along the way, too. Maybe you’ll scan an entire afternoon at 150 DPI before realizing you wanted 600 DPI. Maybe you’ll forget to name a folder and end up with “New Folder (3)” full of important scans. That’s normal. The good news is that once you’ve done a batch or two, you’ll develop your own rhythm: sort, clean, scan, save, rename, back up, repeat.
One of the most surprising lessons people learn is just how vulnerable their memories were before this project. Seeing a neat, backed-up folder full of decades of family photos on your computer is oddly calming. Instead of wondering if that leaky water heater is going to destroy your albums, you know that your images exist in multiple placesin your home, in the cloud, maybe even on a second drive at a relative’s house.
Saving old photos to your computer isn’t about becoming a scanning expert. It’s about giving your family’s stories a better chance of surviving moves, accidents, and the slow fade of paper. A simple setupa basic scanner or smartphone app, a clear folder system, and a solid backup planis enough to turn dusty prints into a living, searchable, shareable family archive.
So pull out that shoebox, wipe off the scanner glass, and start with just one small stack. In a few weeks, you may find that your “someday” project has quietly turned into one of the most meaningful things you’ve done for your future self and your family.