Table of Contents >> Show >> Hide
- Quick checklist: What aloe vera needs to thrive
- Step 1: Pick the right pot (this is not the time for a “cute but cursed” container)
- Step 2: Use the right soil (aka “drainage, drainage, drainage”)
- Step 3: Plant a store-bought aloe vera in a pot
- Step 4: Plant aloe vera outdoors (only if your climate cooperates)
- Step 5: Plant aloe pups (the easiest way to multiply aloe)
- After planting: Aloe vera care that keeps your plant alive and smug
- Troubleshooting: What your aloe is trying to tell you
- Safety note: Aloe vera and pets
- Conclusion + Real-World Experiences (the “I learned so you don’t have to” section)
Aloe vera is the “low-maintenance roommate” of the plant world: it pays rent in soothing gel, asks for bright light,
and prefers you don’t hover. If you’ve ever loved a plant to death with “just one more watering,” aloe is here to
teach you a gentle life lesson: neglect, but responsibly.
This guide covers exactly how to plant aloe vera successfullywhether you’re potting up a store-bought plant,
moving one outdoors, or separating aloe pups (baby offsets). Along the way, you’ll get the practical details
that matter most: pot choice, drainage, soil mix, planting depth, first watering, and what to do if your aloe
looks offended by your efforts.
Quick checklist: What aloe vera needs to thrive
- Bright light (often a south- or west-facing window indoors; outdoor sun with gradual acclimation)
- Fast-draining soil (cactus/succulent mix; extra grit is your friend)
- A pot with drainage holes (terracotta/clay is a classic for a reason)
- Infrequent watering (only after the mix dries wellespecially in winter)
- Warm temps (protect from frost; indoors is easiest in cool climates)
Step 1: Pick the right pot (this is not the time for a “cute but cursed” container)
Choose a pot with drainage holes
If your pot can’t drain, your aloe is basically sitting in wet socks. That’s how root rot starts. Use a container
with at least one good-size drainage holemultiple holes are even better.
Terracotta vs. plastic: which is better?
Terracotta/clay breathes and helps the mix dry fastergreat for beginners or anyone who waters “with feelings.”
Plastic holds moisture longerfine if you’re in a very dry home and you’re disciplined about watering.
Pick the right size
Go only 1–2 inches wider than the root ball. An oversized pot holds extra wet soil that roots can’t use quickly,
which increases rot risk. Aloe likes a snug apartment, not an echoing mansion.
Step 2: Use the right soil (aka “drainage, drainage, drainage”)
Best option: cactus/succulent potting mix
A commercial cactus/succulent mix is usually the simplest and most reliable. Aloe vera naturally tolerates
leaner, sandy conditions, so a rich, moisture-holding houseplant mix can be too heavy.
Upgrade your mix for extra drainage
If your “succulent mix” still feels peat-heavy or stays damp for many days, amend it. A good beginner formula is:
- 2 parts cactus/succulent mix
- 1 part perlite, pumice, or coarse sand (choose one)
The goal is a gritty, fast-draining medium that dries evenlyso roots get oxygen instead of sitting in soggy compost.
Step 3: Plant a store-bought aloe vera in a pot
What you’ll need
- Pot with drainage
- Cactus/succulent mix (plus perlite/pumice if needed)
- Small trowel or spoon
- Gloves (optional, but helpful if your aloe has attitude)
1) Unpot and inspect the roots
Slide the aloe out of its nursery pot. If roots are circling tightly, gently loosen the outer layer.
Trim only what’s clearly dead or mushy. Healthy roots are usually firm and pale.
2) Set planting depth (don’t bury the “neck”)
Put a little mix in the bottom of the pot and position the aloe so it sits at the same depth it was growing before.
Keep the crown/neck (where leaves meet the base) slightly above the soil line. Burying leaves invites rot.
3) Backfill and stabilize
Add mix around the root ball, gently firming it just enough to hold the plant upright. Don’t pack it down like you’re
building a sandcastleroots want air pockets. If the plant wobbles, you can top-dress with gravel or use a temporary
support until roots settle.
4) Wait before the first watering
Here’s the counterintuitive part: after planting, wait 3–7 days before watering. This gives any tiny root
breaks time to callus, reducing the chance of rot. (Yes, your aloe will survive a week. It’s literally built for this.)
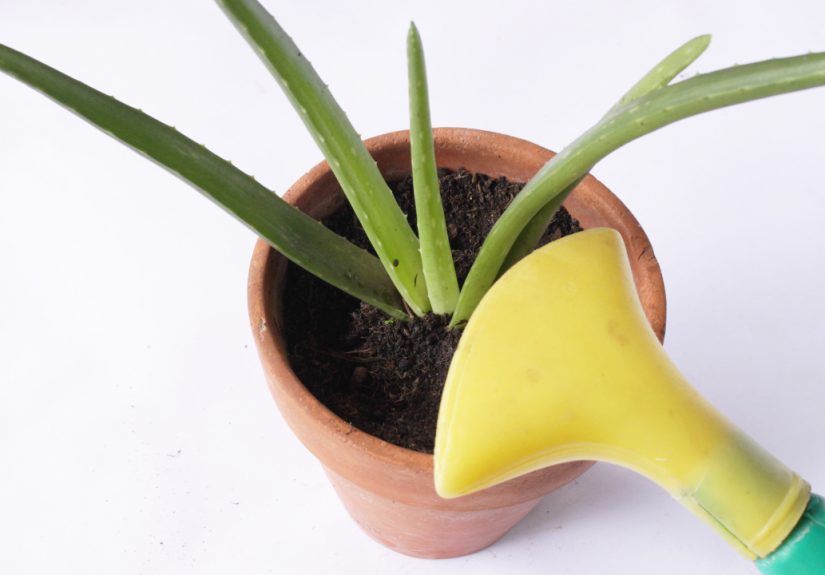
5) First watering (when you finally water)
Water thoroughly until it drains out the bottom, then discard any water in the saucer. After that, you’ll water only
when the mix dries well below the surface.
Step 4: Plant aloe vera outdoors (only if your climate cooperates)
Know the temperature limits
Aloe vera is frost-sensitive. Outdoors year-round works best in warm regions where freezes are rare. If your area gets
frost, keep aloe in a pot so you can move it indoors, or treat it as a seasonal patio plant.
Choose the right spot
- Light: Full sun to partial shade. In very intense sun, provide some afternoon protection.
- Drainage: Must be fast. Avoid low spots, clay-heavy beds, or sprinkler zones.
- Airflow: Helpful for drying out the rosette and preventing rot.
Fix poor drainage (raised mound method)
If your soil drains slowly, build a mounded bed or use a raised planter. Mix in coarse sand, gravel, or pumice
so water moves through quickly. Aloe roots hate being waterlogged more than they hate your playlist.
Planting steps in the ground
- Dig a hole slightly wider than the root ball (not deeper).
- Set the plant at the same depth it was growing.
- Backfill with a gritty, well-draining soil blend.
- Water lightly to settle the soil, then let it dry out before watering again.
Step 5: Plant aloe pups (the easiest way to multiply aloe)
What are pups?
Aloe vera often produces offsetssmall baby plants around the base. These pups are the most reliable method of propagation.
Think of them as aloe’s built-in “copy/paste” feature.
When to separate pups
The best time is during active growth (often spring through early fall). Choose pups that are a few inches tall and,
ideally, have some roots of their own.
How to separate and pot pups
- Gently remove the parent plant from its pot.
- Brush away soil to locate where the pup connects to the mother plant.
- Separate carefully by hand, or use a clean, sharp knife if needed.
- Let the cut area dry and callus for several days to a week before planting.
- Pot the pup in a small draining pot with cactus/succulent mix.
- Wait a few days before watering; then water lightly and let dry between waterings.
Can you grow aloe from a leaf cutting?
Many succulents root from leaf cuttings, but aloe vera is far less predictable that way and often rots. If you want
high success, use pups (offsets) instead.
After planting: Aloe vera care that keeps your plant alive and smug
Light requirements (indoors)
Aloe likes bright light. A sunny window is usually ideal. If you’re moving your plant from low light to stronger sun,
acclimate gradually over 1–2 weeks to reduce sun stress (think “plant sunscreen,” but in slow motion).
How often to water aloe vera
The rule that beats any calendar: water only when the potting mix is dry. For many indoor setups, that might mean:
- Spring/Summer: every 2–3 weeks (sometimes more in hot, bright conditions)
- Fall/Winter: every 3–6 weeks, or even less if growth slows
Example: A 6-inch terracotta pot in a bright window might dry in 10–14 days in summer. The same plant in a plastic pot
with lower light might need water only every 3–4 weeks. When in doubt, wait a few more daysaloe forgives thirst more
easily than it forgives soggy roots.
Temperature and humidity
Normal indoor home temperatures are fine. Aloe generally prefers drier air and does not need misting.
If you summer your aloe outdoors, bring it in before chilly nights and definitely before frost.
Fertilizer (less is more)
Aloe doesn’t need much feeding. If you fertilize, do it sparingly during the growing season (spring/summer), using a
balanced fertilizer diluted to half-strength. Skip fertilizer in winter.
When to repot
Repot every 2–3 years, or sooner if the plant becomes top-heavy, roots circle the pot, or pups crowd the container.
Move up just one pot size.
Troubleshooting: What your aloe is trying to tell you
Mushy, translucent, or collapsing leaves
Usually overwatering or poor drainage. Stop watering, check roots, and repot into fresh, gritty mix in a draining pot.
Remove any rotten roots and let the plant dry for a few days before watering again.
Wrinkled, thin, or curling leaves
Often underwatering. Give a deep watering, let it drain fully, and then return to “water only when dry.”
If soil has become hydrophobic (water runs straight through), soak the pot briefly from the bottom to rehydrate the mix.
Long, stretched growth (leggy aloe)
Not enough light. Move to a brighter spot. Rotate the pot every week or two so it grows evenly instead of leaning like
it’s trying to eavesdrop on your neighbor.
Brown tips or reddish/browned leaves
This can happen from sun stress, underwatering, or mineral buildup from hard water. If you recently moved it into stronger sun,
back off slightly and acclimate more gradually. Consider occasional deep flushes of the potting mix if salts build up.
Common pests
Indoors, watch for mealybugs and scale. Isolate the plant, wipe pests with cotton swabs dipped in rubbing alcohol, and
improve airflow. Consistently soggy soil also invites fungus gnatsanother reason drainage matters.
Safety note: Aloe vera and pets
Aloe vera is popular for its gel, but the plant itself can be toxic to cats and dogs if chewed. If you have pets
that like to sample your houseplants like a salad bar, place aloe out of reach or choose a pet-safe alternative.
Conclusion + Real-World Experiences (the “I learned so you don’t have to” section)
Planting aloe vera is mostly about getting three things right: drainage, light, and patience with watering.
Use a draining pot, a gritty succulent mix, plant at the correct depth, and don’t water immediately after potting.
Then let the soil dry between wateringsespecially in winter. Do those basics, and aloe becomes one of the easiest,
most rewarding succulents to grow indoors or in warm outdoor climates.
500-ish words of aloe experiences (with honest mistakes and minor redemption)
The first time I planted aloe vera, I treated it like a typical houseplant: fresh potting soil, a decorative pot (no drainage),
and a watering schedule that could qualify as overachieving. Within a couple of weeks, my aloe started to look… soft.
Not “luxury spa towel” softmore like “this leaf has given up on structure” soft. That’s when aloe taught me its core philosophy:
you can love it, but you cannot smother it.
The biggest game-changer was switching to a real succulent setup: terracotta pot, cactus mix, and extra perlite.
Suddenly the plant stopped acting like a drama queen. The leaves firmed up, new growth appeared, and I realized something
important: aloe is less about frequent care and more about the right environment. It’s like setting up a good desk chair
once it’s correct, you stop thinking about it every day.
Another lesson came from light. I once tucked an aloe on a shelf because it “looked cute there.” In plant terms,
that was basically putting it in a dim hallway and asking it to thrive. It stretched, leaned, and got pale.
When I moved it to brighter light and rotated it weekly, it slowly regained its shape. Now I use a simple test:
if I can comfortably read a book there during the day without turning on a lamp, it’s usually bright enough for most houseplants
but aloe often wants even more.
My favorite aloe moment, though, is pup season. The first time I noticed pups, I panicked“Is my plant multiplying because it’s stressed?”
(Spoiler: sometimes pups happen because the plant is mature and doing fine.) I waited until the pups were a few inches tall, then separated them,
let the cuts callus for several days, and potted them into small containers. The patience part felt weirdlike ignoring a text on purposebut it worked.
A couple weeks later, they were stable, upright, and basically independent teenagers.
If you take only one experience-based tip from me, it’s this: don’t water aloe because you feel like you should.
Water because the soil is dry and the plant is actually asking for it. Aloe rewards calm, consistent restraint.
And yessometimes the best plant care looks like walking past your aloe, making eye contact, and keeping your watering can in check.