Table of Contents >> Show >> Hide
- Quick Planning: Decide Your Clock’s “Big Clock Energy”
- The Secret Sauce: Choosing the Right Clock Movement (So It Actually Works)
- Materials List (With Smart Substitutions)
- Step-by-Step: Build Your Giant Wall Clock
- Step 1: Make a full-size template (yes, even if you “eyeball well”)
- Step 2: Cut the circle (three easy paths)
- Step 3: Find and drill the exact center
- Step 4: Sand, fill, and prep like you mean it
- Step 5: Finish the clock face (paint, stain, or both)
- Step 6: Lay out numbers and tick marks (the “make it look expensive” step)
- Step 7: Install the clock movement
- Step 8: Add optional upgrades
- How to Hang a Giant Wall Clock Securely (No Drama, No Wall Damage Surprises)
- Troubleshooting: When Your Giant Clock Acts Like a Diva
- Cost and Time: What to Expect
- Design Examples You Can Copy (Without Copying)
- of Real-World “DIY Clock” Experiences (So Yours Goes Smoother)
- Conclusion
A giant wall clock is one of those home décor “cheat codes”: it fills an empty wall, looks expensive, and makes guests assume you know what “scale” means in interior design.
The best part? You can build a big, beautiful statement clock without spending big, beautiful statement-clock money.
This guide walks you through planning, cutting (or skipping cutting), finishing, installing a high-torque clock movement, and hanging your oversized clock safely.
Expect practical tips, a few “learn-from-my-mistakes-but-not-actually-mine” warnings, and options for multiple stylesfrom farmhouse to modern minimal.
Quick Planning: Decide Your Clock’s “Big Clock Energy”
1) Pick a size that fits your wall
- 24–30 inches: Big enough to stand out, easy to build, easier to hang.
- 36–42 inches: True statement-piece territory (hello, living room feature wall).
- 48 inches (and up): “Is that a clock or a portal?” level. Plan for stronger hanging hardware.
2) Choose a style before you buy anything
- Modern minimal: Clean paint, simple tick marks, no numbers.
- Farmhouse / vintage: Distressed paint, Roman numerals, weathered wood tones.
- Industrial: Dark stain, metal accents, bold hands.
- Coastal / airy: Light wood, whitewash, thin hands, soft contrast.
3) Check where it will hang
Drywall, plaster, brick, tile, and textured walls all change your hanging plan. A giant clock can be lightweight, but it still has a big footprint,
and you don’t want gravity to “remodel” your home at 2:00 a.m.
The Secret Sauce: Choosing the Right Clock Movement (So It Actually Works)
For a giant DIY wall clock, the clock movement matters more than the paint color. Big hands need more power, and thicker clock faces need the correct shaft length.
Translation: the wrong kit can turn your masterpiece into a decorative circle that is “right twice a day.”
What to look for in a movement
- High-torque quartz movement: Needed for longer/larger hands (especially if the minute hand is long).
- Correct shaft length: The threaded shaft must be long enough to pass through your clock face plus washer/nut.
- Hand size compatibility: Hands should fit the movement’s arbor style and be proportional to the clock diameter.
- Silent sweep option (optional): Great for bedrooms and offices if ticking drives you bananas.
Simple sizing rule (that saves headaches)
Measure your clock face thickness (including any decorative overlays). Choose a shaft length that gives you enough thread to tighten the nut comfortablysnug, not struggling.
For hand length, a common visual goal is the minute hand reaching about 1/2 to 2/3 of the clock’s radius (so it “reads” well across the room).
Materials List (With Smart Substitutions)
Clock face options
- Plywood (recommended): Strong, stable, takes screws well.
- MDF: Smooth finish, easy to paint, but heavier and hates moisture.
- Hardboard/Masonite: Lighter, affordable, great for painted clocks.
- Upcycle option: Old tabletop, round tray, or large wooden cable spool top.
Core supplies
- High-torque clock movement kit (movement + hands + mounting hardware)
- Paint and/or stain + clear topcoat (polycrylic or polyurethane)
- Wood filler (for voids/imperfections) and sandpaper (80/120/220 grit)
- Numbers: vinyl decals, stencils, wood numbers, or paint pen
- Hanging hardware: French cleat, D-rings, keyhole hangers, or heavy-duty anchor setup
- Optional: rubber bumpers/felt pads for the back corners
Tools (use what you have)
- Measuring tape, ruler, pencil
- Drill + bits (for the center hole and mounting hardware)
- Jigsaw OR router with a circle-cutting jig (router gives cleaner circles)
- Sander (or sanding block), clamps (helpful), level
- Safety gear: eye protection, dust mask/respirator, hearing protection
Minor safety note: If you’re under 18, do this with a parent/guardian or a trusted adultespecially for cutting, drilling, and wall mounting.
Power tools and ladders are not the vibe for solo experimentation.
Step-by-Step: Build Your Giant Wall Clock
Step 1: Make a full-size template (yes, even if you “eyeball well”)
Mark your intended diameter on the floor using painter’s tape, string, or cardboard.
Stand back and check it from across the room. If it looks too small on the floor, it will look even smaller on the wall.
Step 2: Cut the circle (three easy paths)
- Best finish: Use a router with a circle jig for a clean, round edge. Make shallow passes rather than trying to cut full depth at once.
- Simple method: Trace a circle (string + pencil) and cut with a jigsaw. Sand the edge smooth afterward.
- No-cut shortcut: Buy a pre-cut round wood panel (craft stores, woodworking suppliers) and skip straight to finishing.
Step 3: Find and drill the exact center
The center hole is the “heart” of your clock. If it’s off, your hands may wobble, scrape, or look crooked.
To find the center, draw two straight lines across the circle (like big X marks) using a straightedge; where they cross is your center.
Drill the center hole according to your movement kit’s requirements. Start with a smaller pilot hole if you’re nervous, then widen it cleanly.
Step 4: Sand, fill, and prep like you mean it
- Fill plywood voids or dents with wood filler; let it dry completely.
- Sand the face and edge (80 → 120 → 220 grit).
- Wipe off dust with a tack cloth or a slightly damp microfiber cloth.
- If painting, consider primer for a smoother, more even finish.
Step 5: Finish the clock face (paint, stain, or both)
For farmhouse style, many DIYers do a base coat (white/cream), then lightly sand edges and high spots for a worn look.
For modern style, go for crisp paint lines and a clean matte or satin topcoat.
If staining, apply stain evenly, wipe off excess, and seal with a clear coat for durability (especially in humid climates).
Step 6: Lay out numbers and tick marks (the “make it look expensive” step)
Start by marking 12, 3, 6, and 9. Use a level and measuring tape to ensure they’re perfectly aligned.
Then fill in the remaining numbers or tick marks.
Easy layout trick: Make a paper ring template.
- Cut a large paper circle the same size as your clock face (kraft paper works well).
- Fold it in half, then half again, then again to create evenly spaced marks.
- Transfer those marks to the wood for consistent spacing.
Want a super crisp look? Use vinyl numbers or stencils. Want character? Hand-paint Roman numerals and embrace the “artisan” vibe.
Step 7: Install the clock movement
- Insert the movement shaft through the center hole from the back.
- Add the washer and nut on the front and tighten until snug (don’t overtighten and crush MDF).
- Attach the hour hand first by pressing it straight on.
- Attach the minute hand next and secure it as your kit requires.
- If you have a second hand, install it last.
Spin the hands gently (by moving the minute hand forward) through a full 12-hour cycle.
If anything rubs, bend the hands slightly so they don’t touch each other or the clock face.
Step 8: Add optional upgrades
- Raised numbers: Wood numbers add depth and shadow (very “designer”).
- Rim detail: A thin wood trim ring or faux metal band gives a finished frame look.
- Center cap: A small decorative knob can hide the hand hardware for a polished center.
How to Hang a Giant Wall Clock Securely (No Drama, No Wall Damage Surprises)
The safest approach depends on weight and wall type. If your clock is light (for example, hardboard with a small movement),
you have more options. If it’s heavier (thick plywood + trim), treat it like hanging a mirror: use studs or rated anchors.
Best hanging methods
- French cleat (excellent for large clocks): Distributes weight and keeps the clock tight to the wall.
Great when you want stability and easy leveling. - D-rings + wall hook/anchors: Common, reliable, but measure carefully so it sits level.
- Keyhole hangers: Clean look, but installation must be precise.
Renters: adhesive strips can workwithin limits
If you use adhesive hanging strips, follow manufacturer instructions closely: clean the wall, apply correct pressure, and respect weight ratings.
Also, avoid hanging heavy items in risky places (like above a bed). When in doubt, choose a stud-based solution.
Final mounting checklist
- Use a level (your eyes will lie to you after 10 minutes of ladder time).
- Add rubber bumpers or felt pads on the back corners to prevent wall scuffs and wobble.
- Make sure the movement is accessible for battery changes.
Troubleshooting: When Your Giant Clock Acts Like a Diva
The hands get stuck or stop
- Hands may be rubbing each othergently bend to create clearance.
- The nut may be too tightsnug is good; “gorilla tight” is bad.
- You may need a higher-torque movement if the hands are very long.
The clock looks crooked
- Recheck number placement (start with 12/3/6/9 alignment).
- Confirm the hanger is level and centered on the wall.
- Use a French cleat or two-point hanging to reduce rotation.
It’s too quiet or too loud
- If ticking bugs you, switch to a silent sweep movement.
- If it’s silent and you miss the ticking… congratulations, you’re mysterious.
Cost and Time: What to Expect
- Budget build: $25–$60 (hardboard/MDF, basic paint, simple numbers, standard high-torque kit).
- Mid-range: $60–$120 (plywood, nicer hands, layered numbers, clear coat, sturdier hardware).
- Fancy finishes: $120+ (trim/rim, specialty stains, metal accents, premium movement).
Most builds take a weekend if you’re cutting the circle yourself (because drying time is the true boss fight).
If you start with a pre-cut round, you can finish faster.
Design Examples You Can Copy (Without Copying)
Modern Two-Tone Minimal
Paint the top half of the clock face one color and the bottom half another. Add thin tick marks at 12/3/6/9.
Choose sleek hands in a contrasting finish for readability.
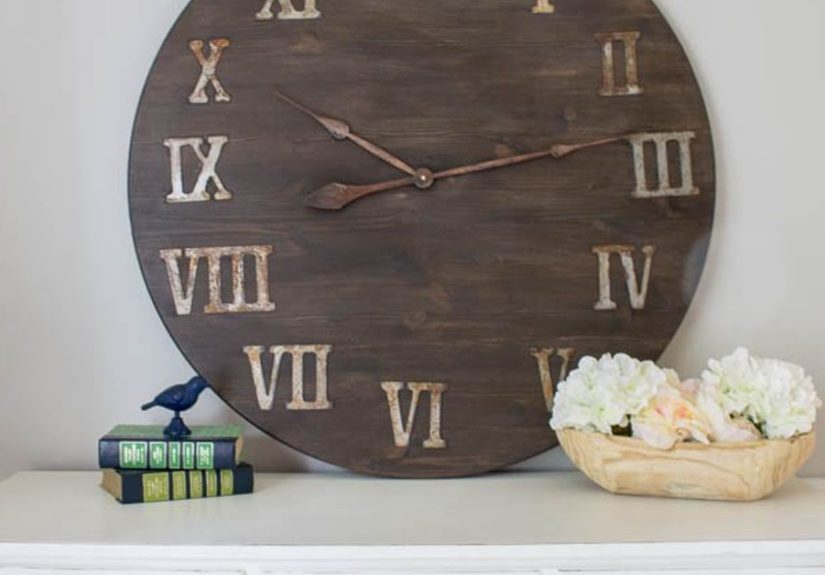
Oversized Farmhouse Roman Numeral Clock
Use a warm wood stain, add distressed whitewash, then stencil Roman numerals in black.
A thicker rim detail makes it look like a high-end store piece.
Gallery Wall Anchor Clock
Keep the face simpleno big bold numbersso your clock complements surrounding frames.
Add subtle marks and let the size do the talking.
of Real-World “DIY Clock” Experiences (So Yours Goes Smoother)
People who build giant DIY wall clocks tend to agree on one universal truth: the clock face is the easy part; the “why is this not working at 11:58?” part is where the learning happens.
One of the most common experiences is realizingafter the paint is perfectthat the center hole is slightly off. A tiny center error doesn’t always show up until the hands are installed, and then
you notice the minute hand “wobbles” as it swings. The fix is usually simple (re-drill cleanly, use a bushing, or slightly enlarge the hole), but the lesson is permanent:
measure twice, drill once, and don’t rush the center.
Another classic moment is the “hand clearance” discovery. Big hands look sturdy, but many large-clock kits intentionally use lightweight hands so a battery-powered movement can lift them smoothly.
DIYers often think the hands feel flimsy right out of the packagethen they learn that heavier hands can stall the movement. If the clock keeps stopping at roughly the same time every cycle,
it’s often because a hand is rubbing (against the face, another hand, or the center hardware). Slightly bending the handstiny adjustments, not a pretzel twistusually solves it.
People are often surprised at how small an adjustment can make the clock run perfectly.
Layout experiences are their own mini-adventure. The first-time builder’s instinct is to place numbers by eye, then step back and wonder why “3” looks like it’s drifting into another zip code.
The DIYers who end up happiest usually start with 12, 3, 6, and 9, then fill in the rest using evenly spaced marks (paper ring templates, folding tricks, or careful measuring).
A projector-style tracing approach is also popular for oversized farmhouse clocks because it makes big numerals consistentespecially if you’re doing Roman numerals, which are unforgiving when
one “V” is chunkier than the others.
Hanging is where practical reality taps you on the shoulder. Many people love the idea of damage-free hanging, but giant clocks have big surface area, and textured walls reduce adhesive performance.
DIYers often report better long-term stability using a French cleat or a stud-based mount, especially for clocks 36 inches and up. The “aha” moment is realizing that even if the clock isn’t super heavy,
the size makes it more likely to shift or rotate slightly over timetwo-point hanging or a cleat helps prevent that slow, annoying drift.
Finally, there’s the maintenance experience: battery changes and time setting. A giant clock looks amazing until you mount it too tight to the wall and can’t reach the battery compartment.
Builders who plan ahead leave just enough access space (and add small bumpers on the back corners) so it sits cleanly but remains serviceable.
The most satisfying “experience” people share, though, is the first time someone asks, “Where did you buy that?”and you get to casually say, “Oh, I made it.”
That moment is basically the DIY version of a trophy.
Conclusion
A giant DIY wall clock is a project that rewards careful planning and simple craftsmanship: choose the right high-torque movement, take your time with layout,
and hang it securely for the long run. Whether you go modern, farmhouse, or industrial, your finished clock will look custombecause it is.