Table of Contents >> Show >> Hide
- Before You Start: Safety + “Should I DIY This?”
- Gear Checklist (No, a T-shirt Over Your Nose Doesn’t Count)
- The Main Event: 18 Specialist-Approved Tips to Kill (and Remove) Black Mold
- 1) Fix the moisture source firstalways
- 2) Dry wet areas fast (aim for 24–48 hours)
- 3) Keep indoor humidity under control
- 4) Protect yourself like you mean it
- 5) Isolate the work zone (keep spores from touring your house)
- 6) Don’t dry-brush or dry-sweep mold
- 7) Remove porous materials that are moldy (yes, even the “mostly fine” ones)
- 8) Start with the simplest cleaner: soap + water
- 9) Scrub smarter: use the right tool for the surface
- 10) Use a HEPA vacuum the right way (after drying)
- 11) Consider an EPA-registered antimicrobial (when appropriate)
- 12) Borax can help on some surfaces
- 13) Hydrogen peroxide (3%) is a solid option for tile and grout
- 14) White vinegar can be useful for surface mold
- 15) Baking soda is great for deodorizing and gentle scrubbing
- 16) Use bleach strategicallynot automatically
- 17) Don’t paint over moldclean and dry first
- 18) Prevent the comeback tour with ventilation + maintenance
- Common Black Mold Cleanup Mistakes (Learn From Other People’s Regrets)
- When to Worry About Health Symptoms
- Extra: Real-World Experiences and Lessons (What Homeowners Wish They Knew)
- Conclusion
Black mold has one job: show up uninvited, throw a damp little house party, and then act like it pays rent.
If you’ve spotted dark patches creeping along drywall, grout lines, window sills, or basement corners, you’re not aloneand you’re not doomed.
The good news: most “black mold” problems can be handled safely when they’re small. The even better news: you don’t need to wage chemical warfare.
You need a plan: remove the mold, clean the surface, andmost importantlystop the moisture.
Quick reality check before we grab the spray bottles: “black mold” is a casual nickname, not a diagnosis.
Lots of mold species can look black or dark green. The approach is still similartreat it seriously, avoid breathing spores, and fix the water issue.
And if the affected area is large or the damage is from flooding or sewage, it’s time to call in pros (no hero points for DIY misery).
Before You Start: Safety + “Should I DIY This?”
DIY is usually okay when…
- The moldy area is small (roughly under 10 square feet).
- The mold is on hard, cleanable surfaces (tile, sealed counters, glass, metal, some plastics).
- You can identify and fix the moisture source (leak, humidity, condensation).
Call a professional when…
- Mold covers more than about 10 square feet or is spread across multiple areas.
- You suspect mold inside walls, ceilings, insulation, crawlspaces, or HVAC systems.
- The water damage came from flooding or sewage.
- Someone in the home has asthma, severe allergies, chronic lung disease, or a weakened immune system.
Safety gear is not optional. Mold cleanup stirs up spores and fragmentsexactly the stuff you don’t want in your lungs or eyes.
Think of it like sanding: you might not see the dust, but your respiratory system will definitely notice.
Gear Checklist (No, a T-shirt Over Your Nose Doesn’t Count)
- N95 respirator (or better), properly fitted
- Gloves (nitrile or rubber)
- Goggles (sealed or non-vented is best)
- Long sleeves/pants (or disposable coveralls for bigger jobs)
- Trash bags (thick contractor bags help), plastic sheeting, painter’s tape
- Bucket, scrub brush, microfiber cloths, paper towels
- Dish detergent, and your chosen cleaning solution (more on that below)
- Fan + dehumidifier (for drying)
- Optional but helpful: HEPA air purifier and/or HEPA vacuum
The Main Event: 18 Specialist-Approved Tips to Kill (and Remove) Black Mold
1) Fix the moisture source firstalways
If you skip this, you’re basically mopping the floor while the bathtub is overflowing.
Repair leaks, improve ventilation, stop condensation, and address drainage issues. Mold is a symptom; moisture is the cause.
2) Dry wet areas fast (aim for 24–48 hours)
Mold loves a slow-drying home. After leaks or spills, use fans and dehumidifiers and open windows (weather permitting).
The faster you dry materials, the less chance mold has to dig in.
3) Keep indoor humidity under control
Many specialists recommend keeping indoor humidity below about 50%. Basements and bathrooms are usual suspects.
A dehumidifier can be a game-changerjust remember to empty and clean it regularly.
4) Protect yourself like you mean it
Wear gloves, goggles, and an N95 respirator. If you’re sensitive to mold, upgrade protection and minimize exposure time.
If you start coughing, wheezing, or feeling “off,” pause and reassessyour body is filing a complaint.
5) Isolate the work zone (keep spores from touring your house)
Close doors. Hang plastic sheeting if needed. Keep kids, pets, and spectators out.
For anything beyond a tiny patch, consider adding a fan blowing out a window to exhaust air outdoors.
6) Don’t dry-brush or dry-sweep mold
Dry scrubbing can launch spores into the air like confetti at the worst party.
Lightly dampen the area first, then scrub. Work gently and deliberately.
7) Remove porous materials that are moldy (yes, even the “mostly fine” ones)
Drywall, insulation, ceiling tiles, carpet padding, paper-faced materials, and many fabrics can be impossible to fully clean once mold penetrates.
If they’re moldy and porous, bag them and remove themespecially if they were soaked or flood-damaged.
8) Start with the simplest cleaner: soap + water
For many hard surfaces, scrubbing with water and dish detergent removes the mold physicallywhich is the real win.
Killing mold is less important than removing it. After scrubbing, rinse (if appropriate) and dry thoroughly.
9) Scrub smarter: use the right tool for the surface
Use a stiff nylon brush for tile/grout, a non-scratch pad for delicate surfaces, and microfiber for smooth areas.
The goal is to lift the growth without shredding the surface (or launching debris into the air).
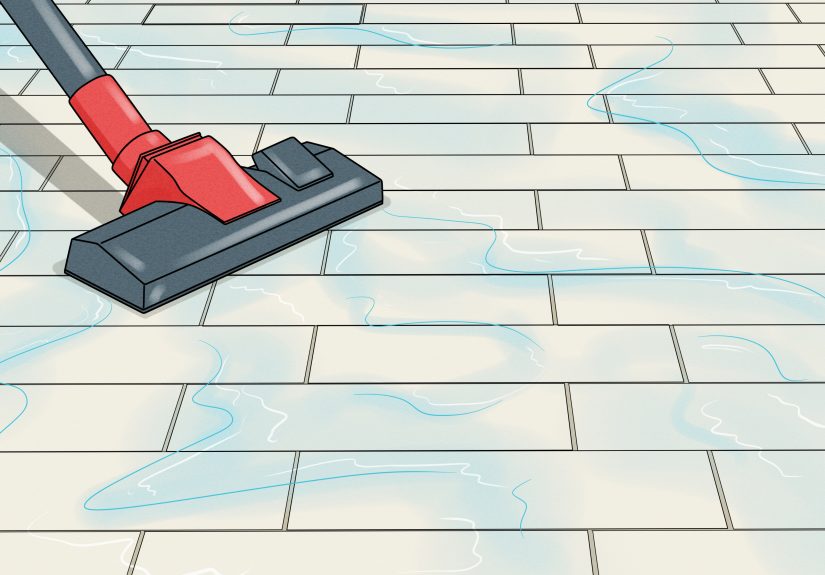
10) Use a HEPA vacuum the right way (after drying)
HEPA vacuums can capture very small particles. If you have one, vacuum adjacent areas (floors, ledges) after cleanup.
Change filters carefully while wearing protection, and dispose of debris in sealed bags.
11) Consider an EPA-registered antimicrobial (when appropriate)
Routine “biocide everything” isn’t always recommended, but certain situations may call for a labeled antimicrobial product.
If you use one, follow the label instructions exactly, ventilate the space, and never mix products.
12) Borax can help on some surfaces
A borax-and-water solution is a popular option for non-porous and some semi-porous surfaces.
Scrub it in, and focus on thorough drying. (Translation: borax isn’t magic; moisture control still matters.)
13) Hydrogen peroxide (3%) is a solid option for tile and grout
Hydrogen peroxide can be useful on bathroom surfaces. Spray, let it sit briefly, then scrub and wipe clean.
Test a small area firstespecially on colored grout, wood, or painted surfacesto avoid discoloration.
14) White vinegar can be useful for surface mold
Plain white vinegar is often used on non-porous surfaces. Apply, let it sit, scrub, then wipe.
Never mix vinegar with bleach or other cleaners. Pick one product and stay loyal for the whole job.
15) Baking soda is great for deodorizing and gentle scrubbing
Baking soda is mild, cheap, and good for musty smells. Make a paste for stubborn spots or use a light sprinkle as a gentle abrasive.
It’s not a replacement for fixing leaks, but it can help restore “normal house smell.”
16) Use bleach strategicallynot automatically
Bleach can disinfect non-porous surfaces, but it’s not recommended as a routine go-to for every mold job.
If you choose to use it, ventilate well, wear protection, and use the right dilution (commonly no more than 1 cup household bleach per gallon of water).
Never mix bleach with ammonia or other cleaners.
17) Don’t paint over moldclean and dry first
Painting over mold is like putting a sticker over the “check engine” light.
Clean the surface, dry it fully, and confirm the moisture issue is solved. Only then consider stain-blocking primers or mold-resistant paints.
18) Prevent the comeback tour with ventilation + maintenance
Use exhaust fans in bathrooms and kitchens, vent dryers outdoors, fix plumbing drips fast, and watch window condensation.
In basements, combine dehumidification with good airflow and smart storage (mold loves cardboard boxes like cats love knocking things off shelves).
Common Black Mold Cleanup Mistakes (Learn From Other People’s Regrets)
- Cleaning without fixing moisture (mold returnssurprise!)
- Using bleach on porous materials and thinking it solved the problem
- Mixing cleaning products (dangerous fumes are not a “deep clean”)
- Dry-scrubbing and spreading spores through the room
- Running HVAC during cleanup and distributing particles
- Ignoring hidden mold (musty smell but “no visible mold” is a clue, not a victory)
When to Worry About Health Symptoms
Mold exposure can trigger allergy symptoms (stuffy nose, itchy eyes, coughing), worsen asthma, and irritate skin, eyes, nose, throat, and lungs.
If symptoms improve when you leave the home and flare when you return, that’s worth taking seriously.
If you have asthma, chronic lung disease, or immune suppression, consider consulting a clinician and avoid DIY cleanup.
Extra: Real-World Experiences and Lessons (What Homeowners Wish They Knew)
Homeowners who’ve dealt with “black mold” often describe the same emotional arc: denial (“That’s just a shadow”), bargaining (“If I scrub hard enough, it’ll disappear forever”), and finally acceptance (“Okay, I’m buying a dehumidifier and learning what ‘humidity’ means”).
The most common surprise is that the mold spot is rarely the main problemmoisture is. One family might clean a bathroom ceiling three times before noticing the exhaust fan vents into the attic instead of outdoors. Another might keep wiping a window frame every week, not realizing the indoor humidity is creeping above 60% because the basement is damp and the HVAC isn’t dehumidifying well.
Another lesson: the “stronger chemical” approach can backfire. People often reach for bleach first because it feels decisive. But the pros tend to start with basic physical removalscrub with detergent, rinse, and drybecause removing mold matters more than dramatically “killing” it on the surface. Homeowners also learn the hard way that bleach fumes plus a small bathroom equals instant regret. The smarter move is ventilation, protective gear, and choosing one method you can use safely and consistently. And yes, many people discover that their “mask” wasn’t really doing anything because it wasn’t fittedan N95 that gaps around the nose is basically a decorative accessory.
Real cleanups also reveal how much mold loves porous materials. Someone may try to salvage a section of damp carpet padding or a water-stained drywall panel, only to get that musty odor again a week later. That’s when the big mindset shift happens: some materials aren’t worth saving. Pros often say, “If it’s porous and moldy, remove it,” because mold can infiltrate deep enough that surface cleaning doesn’t reach it. Homeowners who follow this advicepainful as it is to toss somethingusually report fewer repeat problems. They also get better at “mold-proofing” habits: storing items in plastic bins instead of cardboard, keeping furniture a few inches off basement walls, and not shoving towels into a dark corner “to deal with later.”
Many people also find that mold cleanup is a systems problem, not a single Saturday project. The win isn’t just a clean tile lineit’s better airflow, steadier humidity, and quicker responses to leaks. A homeowner might add a timer switch to the bathroom fan so it runs 20 minutes after showers, or install a quieter fan so the family actually uses it. In basements, the experience often ends with a reliable dehumidifier set to a realistic target, plus a small hygrometer so humidity isn’t a guessing game. That tiny screen displaying “47%” becomes weirdly satisfyinglike a Fitbit for your house.
Finally, people who’ve been through it tend to become excellent at deciding when to DIY and when to outsource. They learn that if the mold covers a large area, keeps coming back, or seems to be inside walls or HVAC, professionals aren’t a luxurythey’re a shortcut to doing it correctly and safely. The best “experience-based” advice is simple: treat mold like a water problem first, a cleaning problem second, and an ongoing maintenance habit third. That’s how you stop the mold from turning your home into its personal spa retreat.
Conclusion
If you remember nothing else, remember this: you don’t beat black mold with brute forceyou beat it with moisture control and thorough removal.
Small areas on hard surfaces can often be handled safely with the right PPE, smart cleaning, and aggressive drying.
Bigger problems, hidden growth, or flood-related contamination deserve professional remediation.
Either way, once you cut off the moisture, mold loses its favorite thing: an all-you-can-eat buffet of damp building materials.