Table of Contents >> Show >> Hide
- What You Need Before You Start
- Step 1: Remove Trash, Clutter, and Floor Mats
- Step 2: Vacuum Like You Mean It
- Step 3: Dust the Vents, Cracks, and Little Gremlin Zones
- Step 4: Clean the Dashboard, Console, and Door Panels
- Step 5: Deep Clean Cloth Seats and Carpet
- Step 6: Clean Leather and Vinyl the Smart Way
- Step 7: Do Not Forget the Headliner
- Step 8: Clean the Interior Glass for a Streak-Free Finish
- Step 9: Eliminate Odors Instead of Just Covering Them
- Step 10: Add Protection and Build a Maintenance Routine
- Common Mistakes That Make Interiors Look Worse
- Why a Clean Interior Matters More Than You Think
- Real-Life Experience: What Cleaning a Car Interior Actually Teaches You
- Conclusion
Your car’s interior has a magical ability to collect everything: crumbs, dust, receipts, mystery fuzz, rogue French fries, and at least one pen that does not work when you need it most. The good news is that you do not need a detailing studio, a booming soundtrack, or the patience of a saint to make your cabin look fantastic. You just need a smart process, the right tools, and a little consistency.
If you have ever sprayed random cleaner on your dashboard, wiped one seat, and then called it a “deep clean,” welcome. Many people clean their car in the exact wrong order, which is why dirt moves around instead of leaving the vehicle. A pro-level clean is not about working harder. It is about working in the right sequence, using safe products, and paying attention to the spots most drivers ignore.
In this guide, you will learn how to clean your car’s interior like a pro, from the floor mats and seats to the vents, screens, glass, and those suspicious cup holders that deserve their own legal counsel. Whether you drive a family SUV, a commuter sedan, a pickup, or a compact car that somehow holds the contents of an entire apartment, these car interior cleaning tips will help you get a cleaner, fresher, longer-lasting result.
What You Need Before You Start
Before you begin, gather your supplies so you are not doing the “where did I put that microfiber towel?” dance every three minutes. A professional-looking result usually comes from simple tools used correctly.
- Vacuum with hose and crevice attachments
- Several clean microfiber towels
- Soft detailing brush or clean paintbrush
- Interior cleaner safe for plastic, vinyl, and trim
- Upholstery cleaner for cloth seats and carpet
- Leather cleaner and conditioner, if your car has leather
- Ammonia-free glass cleaner
- Small bucket of warm water
- Cotton swabs or foam swabs for tight spaces
- Optional: compressed air, carpet brush, odor eliminator, and protectant
The biggest rule is simple: use the right cleaner on the right surface. Your dashboard, touchscreen, cloth seats, leather, and tinted windows are not all begging for the same spray bottle. If a product label sounds vague or aggressive, back away slowly. And yes, always test any new cleaner on a small hidden area first. That tiny step can save you from a giant “why is my seat two shades lighter?” moment.
Step 1: Remove Trash, Clutter, and Floor Mats
Professional detailers do not clean around clutter. They remove it. Start by taking everything out of the car: bottles, wrappers, charging cables, coins, gym bags, old receipts, and that napkin stash you have been emotionally attached to since last road trip season.
Pull out the floor mats too. Cleaning mats outside the car keeps dirt from falling right back onto freshly cleaned carpet. Shake them out first, then set them aside for a more thorough cleaning later. This first step seems basic, but it changes everything. Once the cabin is empty, you can finally see the dirt instead of negotiating with it.
Step 2: Vacuum Like You Mean It
If you want to know how to detail a car interior properly, start with vacuuming. Not “a quick pass.” Not “good enough.” A real vacuum job. Loose dirt is the enemy because it turns into mud when mixed with liquid cleaners and creates scratches when rubbed across trim and plastic.
Work from top to bottom. Start with the seats, then move to the cracks and seams, then the carpet, under the seats, and finally the cargo area or trunk. Use the crevice tool around seat rails, between cushions, and along the console. Use a soft brush attachment for vents, dashboards, and delicate trim.
If pet hair is staging a hostile takeover, use a rubber brush, lint roller, or lightly dampened rubber glove before vacuuming. For stubborn carpet debris, brush the fibers gently to loosen dirt before making another vacuum pass. This is one of those “annoying but worth it” steps. The carpet may not write you a thank-you letter, but it will look dramatically better.
Step 3: Dust the Vents, Cracks, and Little Gremlin Zones
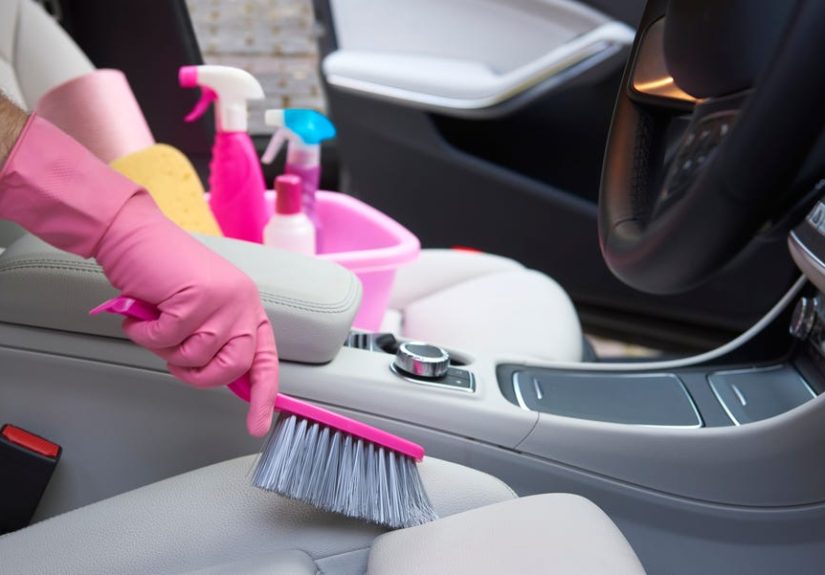
Now it is time to tackle the places that make a car look dirty even after the big surfaces are clean. Air vents, button edges, cup holder seams, shifter trim, door handle pockets, and dashboard creases collect fine dust faster than you can say, “I cleaned this last weekend.”
Use a soft detailing brush to loosen debris, then vacuum it away. A microfiber towel wrapped around a slim plastic card can help reach tight trim edges. Cotton swabs are handy around knobs and stitched seams, but use a light touch. You are cleaning a car, not performing surgery.
This stage matters because the difference between a basic clean and a pro-looking interior often comes down to detail work. Anyone can wipe the center console. Pros clean the edges around it.
Step 4: Clean the Dashboard, Console, and Door Panels
Once loose dust is removed, wipe down the hard surfaces. Spray interior cleaner onto a microfiber towel rather than directly onto electronics, switches, or sensitive trim. That gives you more control and prevents overspray from settling where it should not.
Wipe the dashboard, center console, steering wheel, turn signal stalks, door panels, grab handles, and armrests. These areas collect body oils, sunscreen residue, fingerprints, and everyday grime. A second dry microfiber towel helps buff away residue and leaves a more even finish.
Do not chase maximum shine. A greasy dashboard may look “clean” for five minutes, but it also attracts dust and can create glare on the windshield. The better goal is a clean, natural, low-sheen finish that looks fresh without screaming, “I was attacked by a gallon of silicone dressing.”
What About Touchscreens and Gauge Clusters?
Be gentle. Screens and instrument panels can scratch easily. Use a clean, soft microfiber cloth, and avoid soaking the surface. If your owner’s manual has cleaning instructions, follow those first. For many vehicles, less is more. A lightly damp microfiber towel is often enough for fingerprints and light smudges.
Step 5: Deep Clean Cloth Seats and Carpet
Cloth upholstery is comfortable, forgiving, and incredibly talented at absorbing spills. Coffee, soda, rainwater, fast-food grease, and mystery stains all love a fabric seat. To clean car seats made of cloth, vacuum thoroughly first, then treat stains before doing a general cleaning.
Blot fresh spills instead of rubbing them. For older stains, use an upholstery cleaner according to the label directions. Spray lightly, work the product in with a soft brush, and blot with a clean towel. Do not oversaturate the fabric. Too much liquid can soak into padding and turn your interior into a damp science project.
For carpet, use the same approach: pre-treat stains, agitate gently with a brush, then blot or extract. Pay extra attention to high-traffic areas under the pedals and around the driver’s heel rest. Those spots collect grit, oil, and enough daily abuse to qualify for overtime pay.
How to Handle Common Interior Stains
- Coffee: Blot first, then use upholstery cleaner and repeat as needed.
- Mud: Let it dry, vacuum it up, then treat what remains.
- Grease: Use a fabric-safe cleaner designed to break down oily residue.
- Salt marks: Brush away loose residue first, then clean lightly with the proper fabric product.
Whatever the stain, patience beats aggression. Scrubbing like you are erasing a bad tattoo usually just frays fabric and spreads the mess.
Step 6: Clean Leather and Vinyl the Smart Way
Leather seats need a different approach than cloth. Vacuum seams first so dirt does not act like sandpaper when you wipe the surface. Then use a dedicated leather cleaner and a soft cloth or brush. Work in small sections and wipe away residue as you go.
Once the surface is clean and dry, apply a leather conditioner if recommended for your interior. This can help maintain flexibility and reduce the dry, tired look that develops over time. Leather should feel clean and soft, not slick enough to launch you into the back seat during a right turn.
Vinyl and synthetic surfaces are easier to maintain, but they still benefit from gentle cleaners and non-greasy protectants. On both leather and vinyl, avoid harsh household products unless your manufacturer specifically says they are safe. Your seats should not have to survive a chemistry experiment.
Step 7: Do Not Forget the Headliner
The headliner is the fabric surface on the ceiling of the car, and it is far more delicate than most people think. If it is dusty, use a soft brush attachment or microfiber towel. If it has a spot, treat it carefully with a small amount of appropriate cleaner on a towel, not directly drenched onto the material.
The secret here is restraint. Too much moisture can damage the adhesive behind the headliner and cause sagging. If you have ever seen a droopy headliner hanging down like a tired hammock, that is your warning sign from the detailing universe.
Step 8: Clean the Interior Glass for a Streak-Free Finish
Nothing ruins a freshly cleaned interior faster than a greasy windshield glowing in late-afternoon sun. Interior glass picks up smoke residue, off-gassing film, fingerprints, and mystery haze. Use an ammonia-free glass cleaner and two microfiber towels: one for cleaning, one for buffing dry.
Spray the towel instead of the glass when possible, especially near dashboards and electronics. Wipe in overlapping motions and finish with a dry towel to remove streaks. Do the side windows, rear glass, and mirrors too. If your windows are tinted, an ammonia-free product is especially important.
This step is not glamorous, but it is one of the most satisfying. The first time the sunlight hits a truly clean windshield, you will wonder why you spent so much of your life driving through a light fog made of fingerprints.
Step 9: Eliminate Odors Instead of Just Covering Them
A hanging air freshener is not a cleaning plan. It is a scented peace treaty with the problem. If your car smells musty, sour, smoky, or just vaguely like old french fries and regret, the solution is to remove the source first.
Start with trash, food debris, dirty mats, damp fabric, and overlooked storage pockets. Clean the upholstery and carpet thoroughly, then let everything dry completely. Lingering moisture can keep odors alive. Replace cabin air filters when needed, especially if the car smells stale when the fan kicks on.
After cleaning, use an odor eliminator if necessary. Baking soda can help with removable mats and certain fabric areas, but the main point is this: deodorizing works best after actual cleaning. Otherwise, you are just creating “mountain breeze with notes of old drive-thru.”
Step 10: Add Protection and Build a Maintenance Routine
Once the interior is clean, you can make your next cleaning easier by protecting key surfaces. A quality UV protectant for dashboards and trim can help reduce fading and cracking. Fabric protectors can help cloth resist future spills. Leather conditioners can help keep seats supple.
Then create a realistic maintenance routine:
- Remove trash every few days
- Vacuum every one to two weeks
- Wipe high-touch surfaces weekly
- Deep clean seats, mats, and carpet monthly or as needed
- Clean interior glass at least twice a month
That schedule is far easier than waiting until your car looks like it hosted a three-day music festival.
Common Mistakes That Make Interiors Look Worse
- Cleaning before vacuuming
- Using too much product
- Using one towel for every surface
- Ignoring the headliner and vents
- Using the wrong cleaner on leather, screens, or tinted glass
- Leaving seats or carpet too wet
- Trying to hide odors instead of removing the cause
If you avoid those mistakes, your car interior cleaning results will improve immediately. Most “professional” results do not come from expensive tools. They come from avoiding bad habits.
Why a Clean Interior Matters More Than You Think
Learning how to clean your car’s interior like a pro is not just about looks. A cleaner cabin is more pleasant to drive in, easier to maintain, and often more appealing if you ever decide to sell or trade the vehicle. Clear glass improves visibility. Cleaner surfaces reduce grime buildup. Regular care also helps trim, upholstery, and leather last longer.
And there is a mental benefit too. Sliding into a clean car feels different. Your commute feels calmer. Your passengers stop brushing crumbs off their pants. You stop pretending the mess is “part of the rugged lifestyle.” It is a small upgrade with a surprisingly big payoff.
Real-Life Experience: What Cleaning a Car Interior Actually Teaches You
The first time I tried to clean a car interior “like a pro,” I made the classic rookie mistake: I attacked the dashboard first because it was the most visible. Ten minutes later, I realized dust from the vents had settled back onto the freshly wiped surface, crumbs were still hiding under the seats, and the cup holders looked like they had survived a syrup tornado. That was the day I learned that good car cleaning is less about enthusiasm and more about order.
Once I switched to a top-to-bottom routine, everything got easier. I started by removing trash and floor mats, then vacuumed thoroughly before touching any liquid product. That alone changed the outcome. The carpet looked better, the seats felt cleaner, and the dashboard no longer ended up with gritty streaks. It was the difference between “someone wiped this car down” and “someone actually detailed this car.”
I also learned that the dirtiest parts of a car are rarely the most obvious. The steering wheel, seat belt buckle, door pull, shifter area, and window switches collect an incredible amount of grime. These are the spots your hands touch constantly, yet they often get skipped during quick cleanups. Once I started paying attention to those high-contact areas, the whole cabin looked more polished, even before I finished the bigger surfaces.
Another lesson came from trying to clean cloth seats too aggressively. I once used far too much upholstery cleaner on a small stain, thinking more product meant faster results. It did not. It just made the seat overly damp and extended drying time. Since then, I have learned to work lightly, blot patiently, and repeat if needed. Car interiors reward restraint. They do not respond well to panic-cleaning.
Leather taught me something different. It responds best when treated gently and regularly. Waiting until leather looks dry, shiny, and tired is like watering a plant after it has already started writing its will. Small, consistent maintenance works much better. The same is true for glass. A clean windshield is easy to take for granted until you drive into bright sun and realize how much haze was actually there.
The biggest experience-based takeaway is this: maintaining a clean car is much easier than rescuing a dirty one. A five-minute reset after errands, a quick weekly vacuum, and wiping up spills right away can save hours later. Once I started treating car interior care like basic upkeep instead of a once-in-a-blue-moon event, the process stopped feeling overwhelming.
And maybe that is the real professional trick. Not secret products. Not fancy tools. Just a repeatable system, a little patience, and the willingness to face what is lurking under the passenger seat. Spoiler: it is probably a receipt, two fries, and a level of dust that deserves its own ZIP code.
Conclusion
If you want your vehicle to feel fresher, look better, and hold up over time, learning how to clean your car’s interior like a pro is one of the best habits you can build. The formula is simple: declutter, vacuum first, clean by surface type, treat stains carefully, use glass cleaner correctly, and keep up with small maintenance sessions before the mess gets out of control.
You do not need a luxury garage or a detailer’s business card to get professional-looking results. You just need the right process and the discipline to follow it. Once you do, your car stops feeling like a rolling storage bin and starts feeling like a place you actually enjoy being. That is a pretty solid return on a bucket of towels and one determined afternoon.