Table of Contents >> Show >> Hide
- First, What Does “Change a Toilet” Actually Mean?
- Tools and Materials Checklist
- Safety and Prep: Don’t Skip These “Boring” Steps
- Step-by-Step: Removing the Old Toilet
- Inspect the Flange and Floor (The “Please Don’t Be Rotten” Moment)
- Installing the New Toilet (AKA “The Part Where You Feel Powerful”)
- Step 1: Dry-fit the bowl (optional but smart)
- Step 2: Install new closet bolts
- Step 3: Place the wax ring (or wax-free seal)
- Step 4: Set the toilet bowl
- Step 5: Tighten the closet bolt nuts (slowly!)
- Step 6: Shim if needed
- Step 7: Install the tank (two-piece toilets)
- Step 8: Connect a new supply line
- Step 9: Turn water on and test
- Step 10: Caulk (optional, but often recommended)
- Common Mistakes (So You Don’t Repeat the Internet’s Greatest Hits)
- Smart Upgrades While You’re Replacing the Toilet
- When to Call a Pro (No Shame, Just Wisdom)
- Quick FAQ
- Conclusion: Your Bathroom, Your Rules (But Also Your Bolts)
- of Real-World Toilet-Changing Experience (The Stuff People Learn the Hard Way)
Toilets are the unsung heroes of modern life. They never ask for a raise, they work nights and weekends, and the second they stop doing their job, everyone in the house suddenly becomes a plumbing expert.
The good news: changing a toilet (removing the old one and installing a new one) is a very doable DIY project for most homeowners. The “hard” part is mostly awkward lifting, a little cleanup, and resisting the urge to overtighten anything made of porcelain (because porcelain holds grudges).
This guide walks you through the whole processtools, steps, common mistakes, and how to avoid turning a simple toilet replacement into a weekend-long “bathroom floor archaeology” dig.
First, What Does “Change a Toilet” Actually Mean?
In DIY-land, “changing a toilet” usually means replacing the entire toiletbowl and tank (or a one-piece unit). Sometimes people say “change” when they only need to reset the toilet with a new wax ring because it’s leaking at the base. The steps overlap heavily, so you’re covered either way.
Signs it’s time to replace the whole toilet
- Cracks in the bowl or tank (even hairlines can become “surprise indoor fountain”).
- It rocks no matter what you do, and the floor/flange situation is… questionable.
- Chronic clogs, weak flushes, or “I flushed and prayed” becomes your daily ritual.
- You want an upgrade: comfort height, elongated bowl, quieter flush, or better water efficiency.
Tools and Materials Checklist
You don’t need a plumber’s vanjust the right basics. Gather everything first so you’re not sprinting to the hardware store mid-project with wet socks and regret.
Tools
- Adjustable wrench (and/or a deep socket wrench for the floor bolts)
- Flathead screwdriver (for bolt caps and gentle persuasion)
- Putty knife or paint scraper (for old wax cleanup)
- Utility knife (for old caulk)
- Sponge + small bucket (for removing leftover water)
- Old towels or rags (you’ll thank yourself)
- Level (small is fine)
- Hacksaw or mini saw (only if old bolts are corroded and refuse diplomacy)
Materials
- New wax ring (or a wax-free rubber seal)
- New closet bolts (highly recommended)
- New toilet supply line (braided stainless is a common go-to)
- Toilet shims (plastic shims made for toiletsbecause cardboard belongs in shipping boxes, not bathrooms)
- Optional: silicone caulk for the base
- Optional: flange repair ring/extender kit if the flange is damaged or too low
Safety and Prep: Don’t Skip These “Boring” Steps
1) Make space and protect the floor
Remove rugs, trash cans, and anything that will get in your way. Lay down a towel or a piece of cardboard to set the old toilet on. (Your floor will appreciate not meeting the gritty underside of a 10-year-old toilet.)
2) Turn off the water
Find the shutoff valve behind the toilet and turn it clockwise until it stops. If the valve won’t fully close, you may need to shut off the house water at the mainbecause some valves are more “suggestions” than “controls.”
3) Flush and drain
Flush once, then hold the handle down to push as much water out of the tank as possible. Use a sponge to remove the remaining water from the tank and bowl into a bucket. Less water = fewer surprises.
Step-by-Step: Removing the Old Toilet
Step 1: Disconnect the supply line
Place a small bucket under the connection. Unscrew the supply line where it connects to the bottom of the tank. Some connections loosen by hand; others need a wrench. Expect a little water to dribble outthis is normal, annoying, and why you brought towels.
Step 2: Remove the bolt caps and nuts
At the base of the toilet, pop off the plastic caps covering the closet bolts. Loosen the nuts underneath. If the bolts spin, corrode, or generally act like they’re starring in a soap opera, cut them off carefully.
Step 3: Separate the toilet from the wax seal
If there’s caulk around the base, slice it with a utility knife. Then gently rock the toilet side-to-side to break the wax seal. Once it’s loose, lift straight up.
Pro reality check: Toilets are heavier than they look and more awkward than a couch in a stairwell. If you can recruit a helper, do it. If you can’t, remove the tank first (on two-piece models) to lighten the lift.
Step 4: Plug the drain opening
Immediately stuff a rag into the drain opening (the flange hole). This blocks sewer gases and prevents small parts from taking a one-way vacation into your plumbing.
Step 5: Scrape off the old wax
Use a putty knife to remove the old wax from the flange and from the underside of the toilet (if you’re resetting the same toilet). This part is messy. Consider gloves. Consider also not having snacks nearby.
Inspect the Flange and Floor (The “Please Don’t Be Rotten” Moment)
With the toilet removed, you can finally see what’s been happening underneath. Inspect the flange (the ring that anchors the toilet to the drain) and the surrounding floor.
Look for these issues
- Cracked, broken, or corroded flange: may need a repair ring or flange replacement.
- Soft or damaged subfloor: often caused by long-term leaksfix before installing a new toilet.
- Flange height problems: the flange ideally sits on top of the finished floor; a slightly low flange can sometimes be handled with an extra-thick wax ring or a flange extender.
One important tip: don’t stack wax rings like pancake layers to fix a height problem. Use the right thickness ring or install a proper extender/repair solution so the seal stays consistent.
Installing the New Toilet (AKA “The Part Where You Feel Powerful”)
Step 1: Dry-fit the bowl (optional but smart)
Before committing to the wax ring, place the new bowl over the flange (no wax yet) to check alignment and confirm it sits flat. If it rocks, you’ll likely need shims after installationbut it’s good to know what you’re dealing with.
Step 2: Install new closet bolts
Slide the new closet bolts into the flange slots so they stand upright and parallel to the wall behind the toilet. Good bolts now save you from weird wobble drama later.
Step 3: Place the wax ring (or wax-free seal)
Wax rings are single-use: once compressed, they’re done. Place the wax ring centered on the flange (or on the toilet outlet, depending on your kit’s instructions). The goal is a clean, even seal between toilet and flangekeeping water in and sewer gases out.
Wax vs. wax-free: Wax is the old-school standard and works extremely well when the flange height is correct and the toilet is set straight. Wax-free rubber seals can be cleaner and may be more forgiving in some situationsespecially when flange height is imperfect. Use what fits your installation needs and follow the seal’s instructions closely.
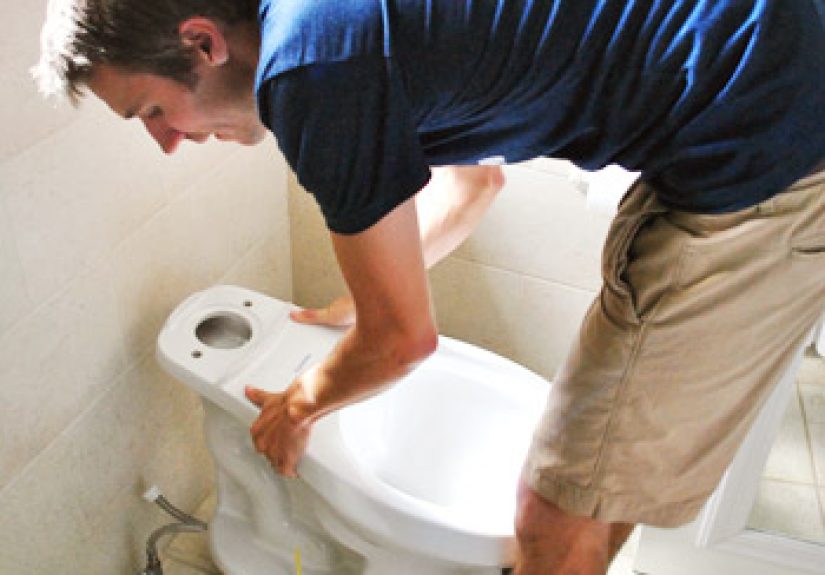
Step 4: Set the toilet bowl
This is the money moment. Lift the bowl, align the bolt holes over the closet bolts, and lower it straight down. Avoid sliding it aroundmoving after you set it can compromise the seal.
Once it’s down, press firmly to compress the seal. Some installers use a gentle rocking motion to help seat the bowl, but the big rule remains: don’t keep shifting the toilet around like you’re trying to find the “perfect angle” for a selfie.
Step 5: Tighten the closet bolt nuts (slowly!)
Add washers and nuts. Tighten each side gradually, alternating left-right so the toilet seats evenly. Do not overtightenporcelain can crack, and a cracked toilet is a “start over” problem.
Step 6: Shim if needed
If the toilet rocks, insert plastic shims where needed until it’s stable. Trim shim ends with a utility knife. Stability matters because rocking can stress the seal and cause leaks over time.
Step 7: Install the tank (two-piece toilets)
Follow the manufacturer’s instructions. Typically, you’ll place a tank-to-bowl gasket, set the tank, and tighten the tank bolts evenly so the tank sits level. Same rule applies: snug is good; gorilla-tight is not.
Step 8: Connect a new supply line
Attach the new supply line to the shutoff valve and to the tank’s fill valve. Hand-tighten first, then give a small additional turn with a wrench if needed. Avoid cranking it down like you’re tightening lug nuts on a truck.
Step 9: Turn water on and test
Open the shutoff valve slowly. Let the tank fill. Then flush several times while checking for leaks:
- At the supply line connections
- At the tank bolts and gasket (two-piece models)
- Around the base of the toilet
Step 10: Caulk (optional, but often recommended)
Many pros caulk around the base to help keep mop water and splashes from sneaking under the toilet and damaging the floor. Some building codes and local practices require it; others treat it as optional. A common compromise is to caulk most of the perimeter but leave a small gap at the backso if the toilet ever leaks, water can escape and alert you instead of hiding under the base like a sneaky villain.
Common Mistakes (So You Don’t Repeat the Internet’s Greatest Hits)
Reusing the old wax ring
If you lift the toilet after setting it on wax, the wax ring is no longer trustworthy. Use a new one. Wax rings are cheaper than subfloor repairsby a lot.
Overtightening bolts
Tightening too much can crack the base or tank. Tighten gradually, alternate sides, and stop when secure.
Ignoring a damaged flange
A broken flange isn’t a “future me” problemit’s a “leaky toilet next week” problem. If the flange is cracked, corroded, or loose, repair it properly before you install the new toilet.
Installing on an uneven floor without shims
A rocking toilet can break seals and loosen bolts. Shim it now while you’re already down there doing the hard work.
Smart Upgrades While You’re Replacing the Toilet
If you’re going through the effort, it’s a great time to pick features that make daily life better (and sometimes reduce water use).
Water-efficient toilets
Many modern toilets use significantly less water than older models, and high-efficiency options can be rated at 1.28 gallons per flush (gpf) or less. That can add up over time, especially in a busy household.
Comfort height and elongated bowls
Comfort height can be easier on knees and backs. Elongated bowls often feel roomier (and let’s be honest: no one complains about “a little more space” in the bathroom).
Bidet seat compatibility
Even if you’re not installing a bidet seat today, choosing a toilet that makes it easy later can be a win.
When to Call a Pro (No Shame, Just Wisdom)
DIY is greatuntil it’s not. Consider a plumber if you run into:
- A severely damaged or sunken flange that needs structural repair
- Rotten subflooring or signs of mold/water damage beyond a small area
- No working shutoff valve (or a valve that won’t fully close)
- Unusual plumbing setups (older cast iron, lead bends, relocation plans)
- You’re installing a wall-hung or in-wall tank system (awesome, but not “beginner mode”)
Quick FAQ
How long does it take to change a toilet?
A straightforward replacement can take a couple of hours. If you find flange damage or floor issues, add timebecause home projects love plot twists.
Can one person do it?
Yes, but it’s easier with help. One-piece toilets are especially heavy and awkward. If you’re solo, consider a two-piece toilet so you can move bowl and tank separately.
What’s the #1 cause of leaks after installation?
A compromised sealoften from a mis-seated wax ring, a toilet that rocks, or moving the toilet after it’s set.
Conclusion: Your Bathroom, Your Rules (But Also Your Bolts)
Changing a toilet is one of those projects that sounds intimidating until you do itthen you wonder why you waited so long. Take your time, keep things level, don’t overtighten anything, and treat the wax ring like the one-shot seal it is.
Do it right, and you’ll get the best kind of home improvement reward: a toilet that works perfectly… and you never have to think about it again. Beautiful.
of Real-World Toilet-Changing Experience (The Stuff People Learn the Hard Way)
DIYers who replace a toilet for the first time almost always report the same surprise: it’s not complicated, it’s just oddly physical. The steps are straightforward, but the job has a “gym day” vibelift, squat, don’t twist, set it down gently, repeat. Many people go in expecting wrench work and come out realizing the real challenge was carrying a porcelain object shaped like it was designed by someone who hates elbows.
The second most common “oh wow” moment is what’s hiding under the toilet. Once the old bowl comes up, you’re staring at a flange, old wax, maybe discoloration, and occasionally evidence that the previous installer believed in “creative interpretation” of instructions. DIYers frequently discover one of three scenarios: (1) everything looks fine and you feel like you won the lottery, (2) the flange is a little low and you have to choose the right seal strategy, or (3) the subfloor is soft and your simple project becomes a responsible adult project. This is why experienced homeowners keep a flexible schedule and an emotional support towel.
People also learn quickly that a toilet can be “tight” and still not be “stable.” A tiny rockbarely noticeablecan eventually break the seal, especially on uneven tile or older floors. DIYers who take five extra minutes to shim properly usually report the most satisfaction later, because the toilet feels solid and stays that way. The ones who skip shims often end up revisiting the job, and nobody wants a sequel to “Wax Ring: The Reckoning.”
Another common lesson: the shutoff valve is either your best friend or your passive-aggressive roommate. Many homeowners don’t discover a valve is failing until they try to turn it off. That’s why some people choose to replace the supply line and address the valve while they’re already in plumbing mode. It’s not glamourous, but it’s the kind of boring preventive move that saves you from an emergency later.
Finally, there’s the confidence boost. A lot of DIYers finish the job with a ridiculous amount of pridebecause a working toilet is deeply practical. You didn’t build a gazebo or install a chandelier. You upgraded the most-used seat in the house. And the first time someone flushes and everything stays dry, stable, and stink-free, you get a quiet little victory that feels way bigger than it should. That’s homeownership magic: small improvements, massive peace of mind.