Table of Contents >> Show >> Hide
- What Exactly Is a Wire-Mesh Planter Table?
- Plan Your Build: Pick a Size That Fits Your Life
- Materials and Tools
- Example Cut List (42" x 22" Coffee Table, 18" Tall)
- Step-by-Step Build Instructions
- Step 1: Build a Rock-Solid Base (a.k.a. “No Wobble Zone”)
- Step 2: Build the Tabletop Frame
- Step 3: Cut and Prep the Hardware Cloth
- Step 4: Attach the Wire Mesh (Three Reliable Methods)
- Step 5: Add the “Planter Tray” Options (Pick Your Adventure)
- Step 6: Install the Top on the Base
- Step 7: Add a Lower Shelf (Optional but So Useful)
- Step 8: Sand, Seal, and Weather-Proof
- Design Upgrades That Actually Matter
- Outdoor Durability: Don’t Let Fasteners Ruin the Party
- Budget and Time: What to Expect
- Troubleshooting: Common Issues and Easy Fixes
- of Real-World Experience (So You Don’t Learn the Hard Way)
- Wrap-Up
- SEO Tags
If your outdoor space feels like it’s missing something, it’s probably a table. Or a planter. Or a place
to set your iced coffee that you swear you’ll sip slowly this time. Good news: you can build one piece that does
all threean outdoor planter table with wire mesh.
The secret sauce is hardware cloth (a sturdy galvanized wire mesh). It creates a breathable,
drain-friendly “basket” inside your tabletopperfect for holding pots, rocks, moss, or even a mini herb display.
You get the vibe of a designer patio table, but with DIY bragging rights and fewer “Why does this cost $600?”
moments.
What Exactly Is a Wire-Mesh Planter Table?
Think of it as a normal outdoor tableexcept the center is a recessed tray made of wire mesh. Depending on how you
finish it, the mesh tray can:
- Hold potted plants on a bed of river rock for a clean, modern look.
- Become a true planter with a fabric liner and soil (hello, succulents).
- Act as a “mess zone” for potting or repotting so dirt doesn’t take over the whole table.
- Double as décor storage (pinecones? seashells? tiny rubber ducks? you do you).
The wire mesh is the MVP: it lets water drain, improves airflow, and reduces that soggy-bottom situation that
makes outdoor projects age faster than a banana in July.
Plan Your Build: Pick a Size That Fits Your Life
Before you cut anything, decide what role this table will play. Here are two proven “comfort zones”:
Option A: Patio Coffee Table (Most Popular)
- Top size: 36″–42″ long x 20″–24″ deep
- Height: 16″–18″ (typical coffee-table height)
- Best for: seating areas, conversation sets, outdoor lounges
Option B: Standing Planter / Potting Table (Garden Workhorse)
- Top size: 42″–48″ long x ~24″ deep
- Height: 32″–36″ (more back-friendly for planting work)
- Best for: potting, greenhouse corners, patios that function as a mini garden studio
This tutorial uses a flexible “middle ground” design you can scale up or down. I’ll show example measurements,
then explain where you can adjust without accidentally inventing a wobbly modern art sculpture.
Materials and Tools
Lumber (Outdoor-Friendly Choices)
- Cedar (easy to work, naturally rot-resistant, great outdoors)
- Redwood (also rot-resistant, gorgeous, sometimes pricier)
- Pressure-treated wood (budget-friendly and durable, but choose compatible fasteners)
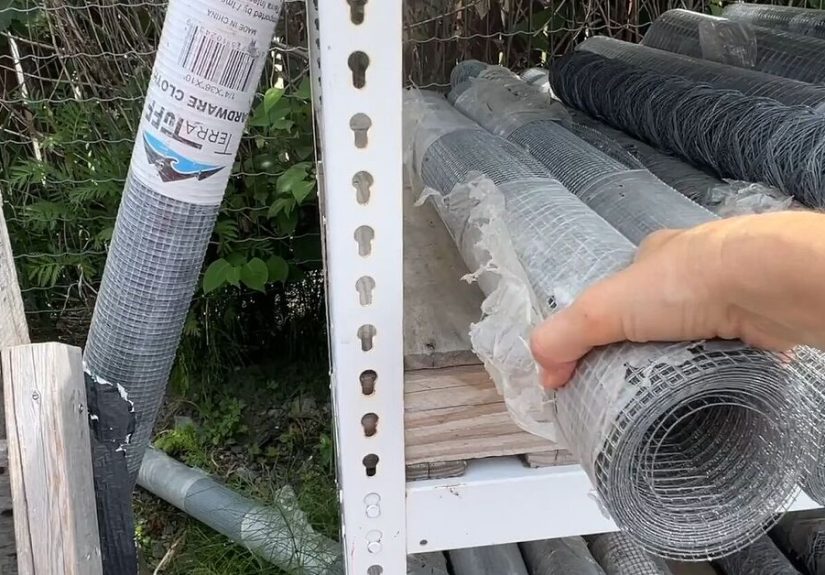
Wire Mesh
- Galvanized hardware cloth, 1/4″ or 1/2″ mesh
- 1/4″ holds smaller materials (pebbles, soil with liner) better; 1/2″ is easier to clean and great for airflow.
Fasteners and Hardware
- Exterior wood screws (stainless steel or hot-dip galvanized recommended outdoors)
- Outdoor wood glue (optional but helpful for rigidity)
- Staples for fastening mesh (or screws + fender washers)
- Corner braces (optional, for extra stability)
- Rubber feet or adjustable leveling feet (highly recommended)
Finishes (Pick One)
- Exterior stain + sealer
- Deck sealer
- Exterior paint (if you want color and don’t mind occasional touch-ups)
- Leave cedar/redwood unfinished for a natural weathered look (low effort, high charm)
Tools
- Miter saw or circular saw
- Drill/driver + bits
- Measuring tape, square, pencil
- Staple gun (or screwdriver + washers)
- Tin snips or heavy-duty wire cutters (for mesh)
- Sander or sanding block
- Clamps (optional, but they make you feel like a woodworking wizard)
Safety note: hardware cloth can be sharp. Wear gloves and eye protection when cutting and shaping
it. Nobody wants a patio table that comes with a surprise bandage collection.
Example Cut List (42″ x 22″ Coffee Table, 18″ Tall)
This is a solid starter size. Want it longer or deeper? Keep the same build logic and adjust the lengths.
Frame and Legs (using 2x2s or ripped 2x4s)
- Legs (4): 17″ (gives ~18″ finished height with top)
- Long aprons (2): 39″ (fits a 42″ top with 1.5″ overhang each end)
- Short aprons (2): 19″
- Lower shelf supports (2–4): 39″ (optional, depending on shelf style)
Tabletop “Picture Frame” (using 1x3s or 1x4s)
- Top frame long sides (2): 42″
- Top frame short sides (2): 22″
- Inner ledgers/cleats (4): sized to fit inside the top frame
Wire Mesh Panel
- Mesh piece (1): cut about 1″–2″ larger than the opening it will cover (for fastening)
Pro tip: if you want a larger center “planter zone,” make a wider top frame and a bigger opening. Just keep enough
solid wood around the perimeter so the table stays strong.
Step-by-Step Build Instructions
Step 1: Build a Rock-Solid Base (a.k.a. “No Wobble Zone”)
Cut your legs and aprons. Dry-fit them on a flat surface. Then assemble two rectangles: one for the upper base
(just under the top) and one optional lower frame (for a shelf).
- Attach aprons to legs using exterior screws (predrill to avoid splitting). You can do butt joints,
pocket holes, or half-lap jointschoose the method that matches your tools and patience level. - Check for square by measuring diagonals corner-to-corner. If both diagonal measurements match,
you’re square. If they don’t, gently adjust before the screws “lock in” your mistake. - Add a lower shelf frame (optional) about 4″–6″ from the ground. This helps stability and gives
you storage for pots, watering cans, or that mysterious trowel that teleports away every spring.
Step 2: Build the Tabletop Frame
Your top is a “picture frame” that will hold the mesh tray. Assemble the outer frame first, then add inner cleats
to support the mesh.
- Assemble the outer rectangle (top frame long + short sides).
- Install inner cleats/ledgers around the inside perimeter, set down about 3/4″ to 1″ from the top
edge. This creates a ledge so your mesh can sit recessed, not flush. - Decide your “planter opening” size. You can leave a large center opening (more dramatic) or make
it smaller (more tabletop surface for drinks and snacks).
Step 3: Cut and Prep the Hardware Cloth
Measure the inside dimensions where the mesh will sit. Cut the hardware cloth slightly oversized so you can fasten
it securely. Use tin snips or heavy wire cutters, and take your timethis is where rushed cuts become pointy
regrets.
After cutting, fold or crimp any sharp edges down with pliers. If you want an extra polished finish, you can
“cap” the mesh edges with thin wood trim strips later.
Step 4: Attach the Wire Mesh (Three Reliable Methods)
Choose the method that matches your tools and how “forever” you want this to be.
- Staples + wood sandwich (very sturdy): staple the mesh to the frame, then screw a thin wood strip
over it so the mesh is trapped between layers of wood. - Screws + fender washers (super secure): place washers over the mesh and drive screws through the
washers into the wood every few inches. - Staples only (fastest): staple every 2″–3″, then add a second pass around the perimeter for
insurance.
Whichever method you choose, keep the mesh taut. A sagging mesh tray turns your chic planter table
into a sad hammock for pebbles.
Step 5: Add the “Planter Tray” Options (Pick Your Adventure)
Option 1: Rock + Pots (Cleanest, Easiest)
Lay a thin layer of river rock or pea gravel inside the mesh tray. Nestle potted plants into the rock. The rock
hides pot bottoms, helps drainage, and gives you that high-end patio look with very little maintenance.
Option 2: True Planter (Liner + Soil)
If you want soil directly in the table, line the mesh with landscape fabric or coconut coir liner. Add a thin rock
layer at the bottom for drainage, then potting mix. Choose plants that match your sun exposure and watering habits
(succulents for “I forget,” herbs for “I cook,” and annuals for “I like color explosions”).
Option 3: Glass-Top Planter Table (Fancy Without Being Fragile)
Place rubber bumpers on the wood perimeter and set a cut-to-size piece of tempered glass on top. Now you have a
functional tabletop with a visible planter display underneath. It’s basically patio jewelry.
Step 6: Install the Top on the Base
Center the tabletop on your base with an even overhang (or align it flush if you prefer a clean boxy look). Predrill,
then screw up from the aprons into the tabletop frame. Add corner braces inside if you want maximum rigidity.
Step 7: Add a Lower Shelf (Optional but So Useful)
A slatted shelf keeps items off the ground and improves airflow. Use deck boards or 1×6 slats spaced slightly
apart. If you want more drainage and a lighter look, you can use wire mesh here too.
Step 8: Sand, Seal, and Weather-Proof
Lightly sand all surfaces and ease sharp corners. Then choose your finish:
- Stain + sealer: protects while letting the wood grain show.
- Paint: maximum color, slightly more maintenance.
- Leave it natural: cedar and redwood can weather beautifully over time.
Don’t skip sealing exposed end grain if you’re in a wet climate. End grain drinks water like it’s at a summer
cookout.
Design Upgrades That Actually Matter
1) Add a Wire Mesh Tool Panel (If You’re a Garden Person)
Mount a vertical piece of hardware cloth on the side or back and hang tools with S-hooks. It’s efficient, tidy,
and makes your setup look like a “garden station” instead of “random table near plants.”
2) Build in a Removable Bin
Want the mesh tray to catch soil mess? Add a removable plastic bin or shallow metal tray beneath the mesh area.
When you’re done potting, slide it out, dump it, and pretend you’re the kind of person who cleans as they go.
3) Use Cross-Bracing for Maximum Stability
If your table will live on uneven pavers, add diagonal braces or a solid back stretcher. It’s the difference
between “sturdy” and “why is my drink moving by itself?”
Outdoor Durability: Don’t Let Fasteners Ruin the Party
Outdoors is a harsh gig for metal. If you use pressure-treated wood, choose fasteners that play nicely with it.
In general, hot-dip galvanized or stainless steel fasteners are the safe choices for long life.
Also avoid mixing incompatible metals (galvanic corrosion is real, and it does not care about your aesthetic).
For coastal or humid environments, stainless steel is often the “buy once, cry once” move. And if you’re using
galvanized mesh, keep your fasteners corrosion-resistant too.
Budget and Time: What to Expect
A typical DIY wire-mesh planter table can be built in a weekend with basic tools:
- Build time: 4–8 hours (plus finish drying time)
- Skill level: beginner-to-intermediate
- Cost: varies by lumber choice (cedar/redwood cost more than pine or treated wood)
The big cost drivers are wood species, hardware quality, and whether you add glass. The big savings come from
building it yourself instead of buying a “handcrafted artisan patio experience” that ships in eight pieces and
emotionally damages your wallet.
Troubleshooting: Common Issues and Easy Fixes
Problem: The mesh sags in the middle
Fix: add a center support strip under the mesh (a wood stretcher) or tighten the mesh and secure it more frequently
around the edges.
Problem: The table rocks on the patio
Fix: add adjustable feet or set the table on furniture pads. If the base is out of square, loosen and re-square
before tightening everything.
Problem: Soil or gravel falls through too easily
Fix: use smaller mesh (1/4″), add a liner, or keep soil in nursery pots and use rock as the “display layer.”
Problem: Rust spots on the mesh
Fix: confirm your mesh is galvanized, avoid pooling water, and consider a clear outdoor metal protectant if you’re
in a high-moisture environment.
of Real-World Experience (So You Don’t Learn the Hard Way)
The first time you work with hardware cloth, it feels harmless. It’s just wire mesh, right? Then you pick it up
like it’s a bedsheet and it reminds youimmediatelythat metal has opinions. The biggest lesson: handle
it like it’s sharp, because it is. Wear gloves when you cut it, and don’t do that brave little “I’ll just
hold it steady with my bare hand” move unless you want your project to include an unscheduled trip to your
first-aid kit.
Cutting the mesh is another “respect the material” moment. Tin snips work well, but they can leave tiny needle
ends. After every cut, I like to run a gloved hand along the edge (gently) and then crimp those sharp bits down
with pliers. If you skip this, the mesh will eventually snag on sleeves, towels, or whatever else you brush past
itusually when you’re carrying something heavy and cannot react gracefully.
Getting the mesh tight is what separates a professional-looking planter table from something that looks
like it’s wearing a saggy sweater. The easiest trick is to staple one side first, then pull the mesh snug as you
fasten the opposite side. Work from the center outward so tension stays even. If you only staple at the corners,
you’ll end up with a droop in the middle that collects rock, water, and regret.
The “rock layer” approach is hands-down the most forgiving setup for a wire-mesh planter table. River rock hides
pot bottoms and makes the whole thing look intentional, like you hired a patio stylist. It also lets you swap
plants easilyseasonal color in spring, herbs in summer, mums in fallwithout rebuilding anything. If you want a
true planter with soil, a liner is your friend. Landscape fabric works, but it can clog over time; coconut coir
liner drains well and looks natural, but may need replacing after a couple seasons depending on weather.
Weatherproofing is where a lot of DIY tables quietly fail. Not because the wood is bad, but because water gets
into end grain and joints. A simple habit that helps: after the first season, do a quick inspection. Tighten any
screws that loosened from wood movement, recoat high-wear surfaces, and check that the table feet aren’t sitting
in puddles. Elevating the legs slightlyrubber feet, furniture pads, even little composite shimskeeps moisture
from wicking up and extends the table’s life dramatically.
Finally, don’t underestimate the joy factor. There’s something oddly satisfying about having a table that’s part
furniture, part garden feature. It becomes the place people gathereven if they pretend they’re gathering for the
conversation and not because your plants look amazing under string lights.
Wrap-Up
A wire-mesh outdoor planter table is one of those rare DIY builds that’s both practical and genuinely stylish. You
get drainage, airflow, and a built-in display zonewithout giving up the functionality of a real table. Build it
simple, upgrade it over time, and enjoy the fact that your patio now looks like it has a plan.