Table of Contents >> Show >> Hide
- The Sure-Fire Formula (Cubic Yards)
- Step-by-Step: Measure, Convert, Calculate
- What If the Shape Isn’t a Rectangle?
- Convert Cubic Yards to Tons (and Why It’s Never Exact)
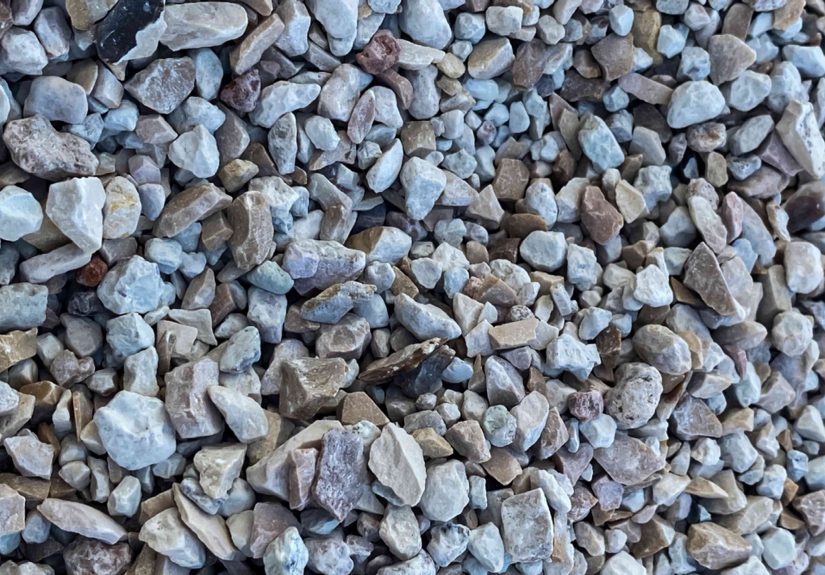
- Pick the Right Crushed Stone for the Job (So Your Formula Stays True)
- Depth Guidelines: How Thick Should Crushed Stone Be?
- Compaction, Settlement, and the “Order Extra” Rule
- Quick Reference Cheat Sheet
- Common Mistakes That Trigger a Second Delivery
- Conclusion
- Experiences That Make the Math Stick (Real-World Lessons)
Crushed stone is one of those “small detail” materials that can quietly run your whole weekend.
Order too little and you’ll spend Saturday afternoon text-battling a delivery dispatcher.
Order too much and you’ll own a brand-new decorative boulder pile for the next 18 months.
The good news: figuring out how much crushed stone you need is not mysterious. It’s just volume.
The slightly annoying news: stone is sold in cubic yards or tons, your project is measured in feet and inches,
and compaction loves to steal a little material like a raccoon raiding a cooler.
Below is a simple, reliable formula (plus the real-world “don’t make me reorder” add-ons) you can use for patios,
driveways, paver bases, walkways, drainage trenches, and just about anything that involves dumping rock into a space.
The Sure-Fire Formula (Cubic Yards)
For a basic rectangular area, crushed stone volume in cubic yards is:
(Length in feet × Width in feet × Depth in feet) ÷ 27 = Cubic Yards
Why 27? Because one cubic yard is 3 feet × 3 feet × 3 feet = 27 cubic feet.
If your depth is in inches (it usually is), convert it to feet by dividing by 12.
Step-by-Step: Measure, Convert, Calculate
Step 1: Measure the footprint (length × width)
Measure the area you’re filling in feet. If the shape is weird, don’t panicbreak it into smaller rectangles,
calculate each one, then add them together.
Step 2: Choose the finished depth (inches) and convert to feet
Typical depths are expressed in inches: 2″, 3″, 4″, 6″, etc. Convert to feet:
- 2″ = 2 ÷ 12 = 0.167 ft
- 3″ = 3 ÷ 12 = 0.25 ft
- 4″ = 4 ÷ 12 = 0.333 ft
- 6″ = 6 ÷ 12 = 0.5 ft
Step 3: Calculate cubic feet, then convert to cubic yards
Multiply length × width × depth (in feet) to get cubic feet. Then divide by 27 for cubic yards.
Example A: A small patio base
You’re building a 12 ft × 16 ft patio base with 4″ of compactable base stone.
- Depth in feet = 4 ÷ 12 = 0.333 ft
- Cubic feet = 12 × 16 × 0.333 ≈ 63.94 cu ft
- Cubic yards = 63.94 ÷ 27 ≈ 2.37 cu yd
That’s the “math” number. In real life, you’ll usually round up and add compaction/waste (we’ll get to that),
so you might order closer to 2.5–3.0 cubic yards depending on your base material and site conditions.
Example B: A gravel walkway top layer
Walkway is 3 ft wide and 25 ft long, with a 3″ decorative gravel layer:
- Depth in feet = 3 ÷ 12 = 0.25 ft
- Cubic feet = 3 × 25 × 0.25 = 18.75 cu ft
- Cubic yards = 18.75 ÷ 27 ≈ 0.69 cu yd
Example C: A driveway base (because driveways are hungry)
Driveway is 40 ft × 12 ft with a 6″ base layer:
- Depth in feet = 6 ÷ 12 = 0.5 ft
- Cubic feet = 40 × 12 × 0.5 = 240 cu ft
- Cubic yards = 240 ÷ 27 ≈ 8.89 cu yd
What If the Shape Isn’t a Rectangle?
Circles (fire pits, tree rings, round patios)
Use area of a circle: Area = π × r², then multiply by depth (in feet),
then divide by 27.
Example: A 10 ft diameter circle (radius = 5 ft) at 4″ depth:
- Area ≈ 3.14 × 5 × 5 = 78.5 sq ft
- Volume in cubic feet = 78.5 × 0.333 ≈ 26.1 cu ft
- Cubic yards = 26.1 ÷ 27 ≈ 0.97 cu yd
Slopes and multiple layers
If your project has a slope or varying depth, estimate an average depth
(e.g., (2″ + 4″) ÷ 2 = 3″) and use that for the calculation.
If you’re building a base plus a top layer, calculate each layer separately and add them.
Convert Cubic Yards to Tons (and Why It’s Never Exact)
Many suppliers sell crushed stone by the ton. To convert cubic yards to tons, you need the material’s density
(weight per cubic yard). Unfortunately, density varies by stone type, size, moisture, and how many fines are mixed in.
A practical rule: most gravel and crushed stone products land somewhere around
1.2 to 1.5 tons per cubic yard. Some products run heavier.
Simple conversion
Tons ≈ Cubic Yards × Tons per Cubic Yard
Typical “ballpark” weights
- General gravel: often around 2,400–2,900 lb per cubic yard (≈ 1.2–1.45 tons)
- Crushed stone (average): commonly listed around 2,700 lb per cubic yard (≈ 1.35 tons)
- #57 stone: frequently estimated around ~1.4 tons per cubic yard
- Crusher run / well-graded base: often around ~2,410 lb per cubic yard (≈ 1.21 tons)
Translation: if your math says 2.37 cubic yards, and your supplier says the material runs 1.35 tons per yard,
then 2.37 × 1.35 ≈ 3.20 tons. If they sell by the ton, you’d likely round up to 3.5 tonsbecause no one likes
the phrase “short by half a ton.”
Pick the Right Crushed Stone for the Job (So Your Formula Stays True)
Not all rock behaves the same. The “how much do I need?” math is volume, but the “will it stay put?” part
depends on which stone you choose.
Common options you’ll see at U.S. suppliers
- Crusher run / road base / 3/4" minus:
A mix of sizes including fines that compact well. Great for paver bases and driveway base layers. - #57 stone (about 3/4"):
Popular for drainage, concrete mix, and general landscaping. It’s often described as “self-compacting”
in the sense that it settles and locks, but it won’t compact the same way as a fines-rich base material. - Stone dust / screenings:
Very fine. Used for leveling, under some paver systems, or as a setting layer when appropriate. - Pea gravel:
Rounded and pretty, but it doesn’t “lock” like crushed stone. Great for decorative top layers,
not ideal as a structural base.
If you’re building a base (pavers, patio, driveway), a compactable, well-graded material is usually the move.
If you’re doing drainage, you may want a cleaner, more open-graded stone.
Ask your supplier what they recommend for your use and soil conditions.
Depth Guidelines: How Thick Should Crushed Stone Be?
Depth is where projects go from “cute weekend upgrade” to “why is my wheelbarrow crying?”
General guidelines used in hardscaping:
- Walkways / light pedestrian areas: about 4–6 inches of base material
- Driveways (vehicle loads): often 8–12 inches of base material
- Paver projects: base thickness varies with soil, climate, and load; many guides land in similar ranges
Local conditions matter. Clay soils, frost-prone areas, and consistently wet sites often need deeper excavation and base.
If you want one “never-regret-it” move: prioritize drainage and compaction over saving a half-yard of stone.
Compaction, Settlement, and the “Order Extra” Rule
Here’s the part calculators don’t scream loudly enough: base materials change volume when compacted.
If you place loose stone at 6″ thick and compact it properly, you may end up with less than 6″ finished thickness.
That’s not failurethat’s physics doing its job.
A practical ordering approach
- Decorative top layers (minimal compaction): add 5–10% extra
- Compacted base materials (driveways/pavers): consider adding 10–15% to cover compaction and grading tweaks
Also: install base material in lifts (thin layers) and compact each layer, rather than dumping the whole depth at once.
You’ll get a firmer base and fewer future dipsaka fewer future “why is this paver sinking like it’s sad?” moments.
Bonus pro tip: lightly dampening certain base materials can reduce dust and help compaction.
(You want “slightly damp,” not “accidentally invented a mud bog.”)
Quick Reference Cheat Sheet
How much area does 1 cubic yard cover?
Since 1 cubic yard = 27 cubic feet, coverage depends on depth:
- At 2" depth (0.167 ft): ~162 sq ft
- At 3" depth (0.25 ft): ~108 sq ft
- At 4" depth (0.333 ft): ~81 sq ft
- At 6" depth (0.5 ft): ~54 sq ft
Mini-checklist before you order
- Confirm the project area (and break odd shapes into rectangles/circles).
- Confirm the depth after compaction if you’re building a base.
- Ask the supplier for the product’s typical tons-per-yard (or lbs-per-yard).
- Add your “extra” factor (5–15%) based on compaction and site messiness.
- Round up to the supplier’s ordering increments (tons, half-tons, full yards, etc.).
Common Mistakes That Trigger a Second Delivery
1) Forgetting the depth conversion
Inches must become feet in the formula. If you plug “4” instead of “0.333,” you won’t just be wrongyou’ll be
“starting a quarry” wrong.
2) Measuring the visible area, not the actual base footprint
Many base installations extend beyond the finished surface for stability.
If your base extends 6″ past the edges, your volume goes up. Measure what you’ll actually fill.
3) Using the wrong density
“One yard equals one ton” is a myth that refuses to die. Stone densities vary.
Get the supplier’s number for your exact product.
4) Ignoring compaction and grading
If you’re building a base, compaction is the point. Plan for it. Order like you plan for it.
Conclusion
The sure-fire way to calculate crushed stone is straightforward: measure length, width, and depth, convert depth
to feet, multiply for cubic feet, and divide by 27 for cubic yards. Then convert to tons using the density your
supplier provides (or a realistic range), and add an extra cushion for compaction and real-life leveling.
Do that, and you’ll spend your weekend installing stonenot negotiating emergency delivery fees.
Your wheelbarrow will still hate you, but at least it won’t be for a second trip.
Experiences That Make the Math Stick (Real-World Lessons)
If you’ve never ordered crushed stone before, the numbers can feel oddly abstractlike you’re shopping for rock
using a calculator and good intentions. The easiest way to make the formula “click” is to connect it to what
actually happens once the stone hits the ground.
1) The “It Looked Deep Enough” driveway base
A common driveway story goes like this: someone spreads a 6″ layer of base stone, steps back, nods proudly,
then compacts it and suddenly it’s… not 6″ anymore. That’s because well-graded base material tightens up when
compactedexactly what you want for strength. The lesson: decide the finished thickness you need and
order enough to still have that thickness after compaction. If your plan says 6″ finished, you’ll often
need more than a strict “loose volume” calculation to get there.
2) The patio that taught everyone about edges
Another classic: a 12×16 patio base is measured at 192 square feet, the math is done perfectly, and the stone
arrives… slightly short. Why? The base footprint is frequently larger than the patio itself. Many installers extend
the base beyond the pavers so the edges don’t slump over time. That extra perimeter adds real square footage,
especially on larger patios. The lesson: measure the excavation/base area, not just the “pretty final surface.”
3) The drainage trench that ate a whole extra yard
Trenches are sneaky because they feel narrowuntil you multiply length by depth. A 30-foot trench that’s 12 inches
wide doesn’t sound like much, but at 18 inches deep you’re already at 30 × 1 × 1.5 = 45 cubic feet (1.67 yards)
before you account for bedding, wrapping fabric, and the fact that trench walls are rarely laser-straight.
The lesson: long, deep projects amplify small measurement errors. Add extra, and consider measuring trench width
at the top and bottom and using an average.
4) The “wrong stone for the job” redo
People love pea gravel because it looks nice and is easy to spread. But when it’s used where a compacted base is
needed, it can shift and rutespecially under wheels. The formula didn’t fail; the material choice did.
The lesson: your quantity calculation is only as good as your product selection. For structural bases, use a
compactable crushed stone or road base; for decorative top layers, choose what looks best and plan for raking
and topping off over time.
5) The “I should’ve ordered one more half-ton” moment
The most universal experience is finishing 95% of the project and realizing you’re shortby an amount too small to
justify another delivery, but too big to ignore. This is why pros round up. The extra material rarely goes to waste:
it becomes a low spot fix, a future edging project, a stepping-stone bed, or a patch for the area where the mailbox
truck keeps chewing up the shoulder. The lesson: treat your extra percentage as “future-proofing,” not “waste.”
Stone stores well, and having a little left over is almost always better than being short.