Table of Contents >> Show >> Hide
- Why Doilies Work So Well (Even If You’ve Never Owned One)
- Pick Your Doily Makeover Style
- Supplies Checklist
- Step-by-Step: Doily Stencil Tabletop Makeover
- Step 1: Check the Table’s “Health” (And Fix the Drama)
- Step 2: Clean Like You Mean It
- Step 3: Scuff Sand (You’re Not Carving a Canoe)
- Step 4: Prime Strategically
- Step 5: Paint the Base Color
- Step 6: Place and Secure the Doily
- Step 7: Stencil the Pattern (Light Hands Win)
- Step 8: Reveal the Pattern
- Step 9: Seal and Protect the Top
- Step 10: Finish the Base and Add the “It Looks Expensive” Details
- Option B: Lace Doily + Decoupage for Texture
- Common Mistakes (And How to Fix Them Without Crying)
- Design Ideas: 6 Doily Table Looks You Can Steal
- Safety Notes (Because Your Lungs Also Live Here)
- Conclusion: You Didn’t Just Paint a TableYou Gave It a Backstory
- Real-World Experiences: What I’ve Learned From Doing Doily Table Makeovers
Every home has at least one piece of furniture that’s quietly auditioning for a “before” photo: the wobbly side table,
the scratched-up thrift-store find, the hand-me-down that’s been through more moves than your favorite houseplant.
The good news? You don’t need a workshop, a woodshop degree, or a fairy godmother with a sanding obsession to give it a glow-up.
You just need paint, patience, andplot twistdoilies.
A doily table makeover is exactly what it sounds like: transforming a table using lace or paper doilies to create a delicate,
vintage-inspired pattern that looks custom (and suspiciously expensive). The result can lean farmhouse, French cottage, modern boho,
or “I swear I bought this from a boutique that sells $14 candles.” Let’s make your table the main character.
Why Doilies Work So Well (Even If You’ve Never Owned One)
Doilies are basically ready-made pattern templates. Their repeating geometryscallops, florals, medallionscreates instant visual interest
without needing freehand art skills. They also deliver that “layered” design look: a plain tabletop becomes a focal point, while the base can stay simple.
- Budget-friendly: Paper doilies are inexpensive, and lace doilies can be thrifted.
- Beginner-friendly: The pattern does most of the workyour job is mostly prep and light paint application.
- Customizable: You choose the vibe: high contrast, tone-on-tone, distressed, metallic accents, or bold color.
Pick Your Doily Makeover Style
Before you open a paint can, decide what kind of finish you want. This choice affects which doily you buy and how you attach it.
1) Classic Doily Stencil (Crisp Pattern, Clean Lines)
You place a doily on the tabletop, apply paint over it with a pouncer/sponge/roller, then lift it to reveal a patterned design underneath.
This is the easiest “wow” with minimal mess.
2) Reverse Stencil (Pattern in the Base Color)
Paint the table your “pattern color” first, then place the doily and paint the surrounding area your main color. When you lift the doily,
the pattern shows through as the original colordramatic and very “designer.”
3) Lace + Sealer for a Soft Raised Texture
Use a real lace doily (or lace yardage), adhere it with a decoupage medium, and seal it down. You can leave it exposed for texture
or paint over it for an embossed look. It’s subtle, touchable, and extremely satisfying.
4) “Faux Inlay” Look (High Contrast + Repeat Pattern)
Think bold contrastlike deep navy with creamy whiteso the pattern reads from across the room. This style is especially striking on small accent tables.
Supplies Checklist
Here’s what you’ll typically need. You can swap brands and tools based on what you already have.
Core Supplies
- Side table (wood, veneer, or laminate all work with the right prep)
- Paper doilies (great for crisp stencils) or lace doilies (great for texture)
- Cleaner/degreaser and lint-free rags
- Sandpaper or sanding sponge (suggestion: medium to fine grit range)
- Primer (bonding or stain-blocking, especially for glossy finishes or wood knots)
- Paint (furniture paint, chalk-style paint, or durable interior enamel)
- Painter’s tape (optional for borders)
- Stencil tool: foam pouncer, makeup sponge, or small foam roller
- Topcoat: water-based polyurethane, clear furniture topcoat, or wax (depends on finish and use)
Nice-to-Haves
- Spray adhesive (repositionable) or light-tack stencil adhesive to prevent shifting
- Brayer/roller for smoothing if you decoupage lace/fabric
- Wood filler for dents and scratches
- Glaze or antiquing wax for a vintage finish
- New knobs/feet or felt pads for the bottom
Step-by-Step: Doily Stencil Tabletop Makeover
This is the go-to method for a crisp, clean doily pattern. It’s reliable, photogenic, and doesn’t require advanced techniquejust light coats and patience.
Step 1: Check the Table’s “Health” (And Fix the Drama)
Flip the table over and tighten any loose screws. If it wobbles, fix that nowpaint won’t distract anyone from a table that shakes like it just drank espresso.
Fill deep scratches with wood filler, let it dry fully, then smooth it out.
Step 2: Clean Like You Mean It
Furniture collects invisible gunk: oils, polish residue, handprints, mystery kitchen film. Clean thoroughly and let it dry.
Skipping this step is how paint fails later (usually right after you start bragging about your DIY skills).
Step 3: Scuff Sand (You’re Not Carving a Canoe)
Your goal isn’t to sand to bare woodit’s to dull shine and create “tooth” for primer and paint. Lightly sand all surfaces you’ll paint,
especially the tabletop edge where hands and friction happen.
Step 4: Prime Strategically
Primer is your insurance policy. Use it if your table is glossy, dark-stained, has knots, or you suspect old finish or residue.
Apply a thin, even coat and let it dry fully. If it dries a little rough, a very light sanding after it cures can help your finish look smoother.
Step 5: Paint the Base Color
This is the color that will show beneath your doily pattern. Apply thin coats. Let each coat dry well before the next.
If you want a smooth finish, a light “de-nibbing” sand between coats can reduce texture (wipe dust away before repainting).
Step 6: Place and Secure the Doily
Center your doily on the tabletop or position it off-center for a modern look. You can:
- Use light-tack spray adhesive: Helps prevent paint bleed and keeps the doily from sliding.
- Use painter’s tape loops: Works in a pinch, but watch for shifting.
- Use a very light coat of decoupage medium under the doily: Only if you plan to remove it carefully; test first.
Pro tip: If you’re using a paper doily, keep a few extras. Paper doilies are heroes, but they can tear if you get too enthusiastic.
Step 7: Stencil the Pattern (Light Hands Win)
Load a foam pouncer or sponge with a small amount of paint. Then offload most of it onto a paper towelthis is the secret to crisp stenciling.
Use gentle tapping (not swiping) from the edges toward the center. Heavy paint = bleed. Light layers = clean pattern.
Want extra dimension? Use two tones: a slightly darker shade for outer edges of the doily, then a lighter shade closer to center.
It creates depth without looking like you tried too hard (the best kind of DIY flex).
Step 8: Reveal the Pattern
Lift the doily slowly while the stencil paint is still slightly wet. If you wait until it fully dries, it can bridge and tear.
If you do get a tiny bleed, don’t panictouch up with a small artist brush once everything is dry.
Step 9: Seal and Protect the Top
Tabletops take a beating: cups, keys, mail piles, the occasional “I’ll just set this here for a second” that lasts three weeks.
A protective topcoat improves durability and makes cleaning easier. Choose based on the finish you want:
- Water-based polyurethane/topcoat: Clear, durable, and less likely to warm/yellow light colors.
- Furniture wax: Soft, velvety look, great for decorative pieces (but not ideal for heavy-use tables).
- Clear chalk-style topcoat: Good compatibility with chalky finishes; follow dry/recoat instructions closely.
Apply thin coats and let them dry thoroughly. Remember: “dry to the touch” is not the same as “cured.”
Treat the tabletop gently for the first days (or longer if your product label recommends it).
Step 10: Finish the Base and Add the “It Looks Expensive” Details
Paint the legs/base in a coordinating colorclassic white, soft black, warm greige, or a muted green. Replace hardware if your table has a drawer.
Add felt pads to protect floors. Finally, style it with a small lamp, a stack of books, and one decorative object you pretend you don’t love (but absolutely do).
Option B: Lace Doily + Decoupage for Texture
If you want a slightly raised, romantic texture, use a real lace doily instead of paper. This technique looks especially good
on drawer fronts or the tabletop center.
- Cut and test-fit your lace: Trim carefully and plan placement.
- Apply decoupage medium: Brush a thin, even layer where the lace will sit.
- Lay lace and smooth it: Use fingers or a brayer to press it down gently, pushing out bubbles.
- Seal over the lace: Brush another thin layer on top to lock it in place.
- Let it dry fully: Then paint over for an embossed lookor leave it visible under a clear seal for subtle texture.
The key is thin layers. Too much medium can wrinkle fabric and turn your “vintage heirloom” dream into “why is my table wearing wet socks.”
Common Mistakes (And How to Fix Them Without Crying)
Paint Bleeds Under the Doily
- Use less paint on your sponge/pouncer.
- Tap straight downdon’t drag paint sideways.
- Use a light-tack adhesive to keep the edges flat.
- Touch up after drying with a small brush in the base color.
The Doily Tears When Removing
- Remove while stencil paint is still slightly wet.
- If it tears, lift in smaller sections with tweezers and patience.
- Keep spare doilies (future-you will thank present-you).
Paint Peels Later
- This is almost always prep: grease, glossy finish, or skipping primer.
- Sand back loose paint, clean, prime, repaint in thin coats, and seal properly.
The Topcoat Feels Sticky
- Humidity and thick coats can slow drying.
- Use thin coats, allow longer drying time, and improve airflow.
- Always follow your product’s label for recoat and cure guidance.
Design Ideas: 6 Doily Table Looks You Can Steal
1) Cottage Classic
White base + soft gray doily pattern + lightly distressed edges. Looks at home with florals and vintage frames.
2) Moody Modern
Charcoal base + black doily pattern in matte + a satin clear coat. Add a brass lamp for instant sophistication.
3) Coastal Calm
Pale blue base + white doily pattern + clean lines (no distressing). Great for beachy, airy rooms.
4) Boho Warmth
Terracotta base + cream pattern + a little glaze in the details. Pair with woven baskets and plants you talk to.
5) French-Inspired Vintage
Muted sage base + tone-on-tone pattern + antiquing wax in crevices for an aged finish.
6) High-Contrast “Faux Inlay”
Deep navy base + crisp white pattern repeated in a grid or medallion layout. Looks high-end on a small accent table.
Safety Notes (Because Your Lungs Also Live Here)
- Work in a well-ventilated area, especially with primers and topcoats.
- Wear a mask when sanding and consider gloves for chemical cleaners.
- Protect floors with a drop cloth and keep pets away from drying surfaces (curious paws are undefeated).
Conclusion: You Didn’t Just Paint a TableYou Gave It a Backstory
A doily table makeover is one of those rare DIY projects that hits the sweet spot: affordable, achievable, and genuinely impressive.
Whether you go crisp stencil, raised lace texture, or high-contrast drama, your table becomes a functional art pieceone that looks like
it came from a curated shop, not the corner of your garage.
And the best part? Once you learn the doily trick, you’ll start side-eyeing other surfaces in your home like,
“You… would look amazing with a lace medallion.” Welcome to the club.
Real-World Experiences: What I’ve Learned From Doing Doily Table Makeovers
The first time I tried a doily table makeover, I went in with maximum confidence and minimum humilityclassic DIY energy.
I had a thrifted end table, a stack of paper doilies, and exactly zero respect for the phrase “thin coats.”
I slapped the base color on, waited what I considered “long enough” (translation: I got bored), and jumped straight to the stencil.
The pattern looked incredible… for about five minutes. Then I lifted the doily and saw faint smudges where wet paint had crept under the edges.
Not a total disaster, but definitely not the crisp lace moment I imagined.
Here’s what fixed it: I stopped treating paint like frosting. The next attempt, I used a foam pouncer with almost-dry paint,
tapping lightly like I was trying not to wake a sleeping cat. Night and day difference. The doily pattern came out sharp,
and the tiny imperfections were easy to touch up later with a small brush. It also taught me something important:
the “wow” of this project doesn’t come from fancy suppliesit comes from restraint.
My second makeover was on a small table that was suspiciously shiny, like it had been polished by someone with a vendetta against paint adhesion.
I cleaned it, but I skipped primer because I told myself, “This paint says it sticks to everything.” Spoiler: my table disagreed.
A few days later, I could scratch the finish with a fingernail. That’s when I learned the difference between paint that looks dry
and paint that’s actually bonded to the surface. I had to sand it back, clean again, prime properly, and repaint in thin coats.
It was annoyingbut it was also the moment I became a prep believer. Now, if a surface is glossy or questionable,
I prime without arguing with myself first.
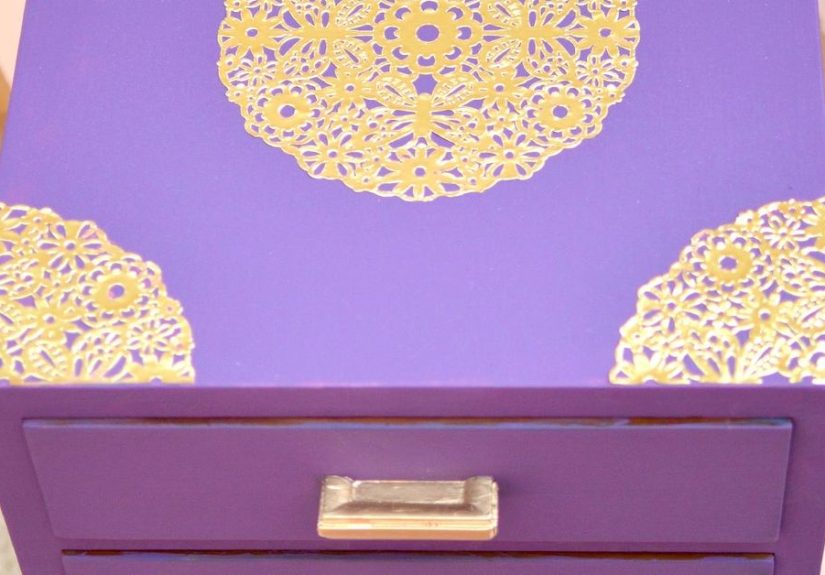
The most satisfying doily project I’ve done used lace instead of paper. I adhered a real lace doily to the center of the tabletop
with a decoupage medium, sealed it on top, and then painted over it in the same color as the basetone-on-tone.
The pattern wasn’t screaming for attention, but when light hit it, you could see and feel the texture. It looked expensive
in a way that made visitors run their hand over it and say, “Wait… how did you do this?”
(Which is the highest compliment a DIY can receive.)
If you’re wondering about durability: the tables that held up best were the ones I sealed carefully and then left alone to cure.
Not “I waited an hour and declared it done,” but “I let it sit while I pretended I wasn’t impatient.”
When I rushed, I got tacky topcoats, fingerprint impressions, or a slightly cloudy finish from applying sealant too thick.
When I slowed down, the results looked smoother, felt harder, and handled daily life bettercups, keys, the occasional snack plate,
and whatever else ends up on a side table.
My biggest takeaway is that doily makeovers are forgiving. Even if you mess up, most problems are fixable with light sanding,
touch-up paint, and a better plan on the next coat. And once you finish one table, you start seeing potential everywhere:
drawer fronts, trays, plant stands, nightstands, even a little stool that’s been hiding in your closet since 2017.
Doilies aren’t just for “old-school decor.” They’re basically a shortcut to making ordinary furniture look intentionaland that’s
the kind of shortcut I support.