Table of Contents >> Show >> Hide
- Why Old Frames Are Perfect for a Chunky Frame Makeover
- What You Need for a DIY Chunky Photo Frame
- How to Make a Chunky Photo Frame Step by Step
- Design Ideas for a Chunky Photo Frame That Looks High-End
- Mistakes to Avoid
- Real-World DIY Experiences: What This Project Feels Like in Practice
- Conclusion
- SEO Tags
There are two kinds of old picture frames in this world: the ones currently hanging on a wall looking respectable, and the ones hiding in closets like they owe you money. This article is for the second group. If you’ve got a stack of dusty, slightly dated, maybe-a-little-ugly frames collecting lint in the garage, attic, or under the guest bed, congratulationsyou’re already halfway to a stylish DIY chunky photo frame.
Chunky frames have become popular for a simple reason: they make art, family photos, printable wall art, and vintage finds look more expensive than they really are. A thicker profile adds visual weight, makes small prints feel more intentional, and helps a thrift-store frame stop looking like, well, a thrift-store frame. The best part is that you do not need to buy a pricey custom frame. You can build that bold, high-end look by upgrading an old frame with basic trim, glue, filler, primer, and paint or stain.
In this guide, you’ll learn how to turn old, neglected frames into beautiful chunky statement pieces. We’ll cover the best materials, the smartest prep steps, a beginner-friendly build process, design ideas, common mistakes, and real-world experience tips that make the whole project easier. In other words, this is your official permission slip to rescue those old dusty frames and make them fabulous again.
Why Old Frames Are Perfect for a Chunky Frame Makeover
An old frame is actually the ideal starting point for this project because the hard part is already done: the basic shape exists. You already have the opening, the backing, and often the glass. Instead of building a full frame from scratch, you are upgrading what you’ve got by adding thickness and detail around the outside edge.
This is also a great low-cost upcycling project. Vintage or secondhand frames often have solid bones, even if the finish is chipped or the style feels outdated. A little sanding, cleaning, and refinishing can make them look intentional instead of tired. Better yet, a mismatched group of old frames can become a cohesive collection when they are finished in the same color or stain.
A chunky photo frame also has a practical design advantage. It visually “grounds” the art inside it. Small family photos look more substantial. Printable art looks more custom. A flea-market botanical print suddenly gives “curated gallery wall” instead of “I found this while buying old teacups and a lamp that definitely has ghosts.”
If you like decorating on a budget, this DIY hits the sweet spot between affordable and impressive. It’s one of those projects people assume required expensive materials, when in reality it mostly required patience, decent measuring, and the emotional maturity to admit when a miter cut needs a second try.
What You Need for a DIY Chunky Photo Frame
Core Materials
- Old wood frame or sturdy composite frame
- Wood trim, lattice strips, screen molding, or small decorative molding
- Wood glue
- Wood filler
- Paintable caulk for tiny gaps if needed
- Primer
- Paint, stain, or chalk-style finish
- Sandpaper in medium and fine grits
- Photo, print, artwork, or mat board
Helpful Tools
- Measuring tape or ruler
- Miter saw, miter box, or fine hand saw
- Clamps or painter’s tape for holding trim while glue dries
- Putty knife
- Tack cloth, vacuum brush attachment, or damp lint-free cloth
- Paintbrush or spray paint
- Level and hanging hardware
If your old frame is metal, plastic, or covered in a glossy finish, you may need a bonding primer or surface-specific primer. If it is raw or unfinished wood, primer or stain prep becomes even more important. Either way, surface prep is what separates a frame that looks custom from one that starts peeling before you’ve even bragged about it to your friends.
How to Make a Chunky Photo Frame Step by Step
1. Pick the Right Old Frame
Start with a frame that is structurally sound. Small scratches, faded finish, and outdated color are no problem. But if the frame is warped, cracked through the corners, or missing major pieces, it may create more work than it’s worth.
Wood frames are usually the easiest to transform because they sand well, take filler nicely, and bond well with added trim. Composite frames can work too, especially if you prime them properly. Make sure the back still holds the art securely and the glass fits correctly before you start adding bulk to the outside.
2. Clean It Like You Mean It
Before sanding or painting, remove the glass, backing, hanging hardware, and artwork. Set those aside. Then clean the frame thoroughly. Dust, wax, oil, and mystery grime will ruin paint adhesion faster than a rushed DIY video with cheerful background music.
Wipe the frame down well, especially around carved details and corners. If the frame is glossy or greasy, a deglosser or careful cleaning step helps even more. Let everything dry fully before moving on.
3. Lightly Sand the Surface
You do not need to sand the frame into another century. The goal is to scuff the existing finish so primer and paint can grab on. Light sanding is especially important for glossy surfaces. If you are staining raw wood trim you plan to add, sand that too so the finish goes on more evenly.
After sanding, remove all dust carefully. This step matters more than many beginners expect. Leftover sanding dust gets trapped in paint and stain, which leads to a rough, messy finish. Vacuum it, wipe it, and then wipe it again. Dust is sneaky.
4. Plan Your Chunky Profile
Now for the fun part: deciding how chunky you want your frame to be. There are two easy ways to create this look:
- Add trim around the outer edge of the old frame. This is the most common method. You glue mitered wood strips around the frame to create a thicker, more architectural border.
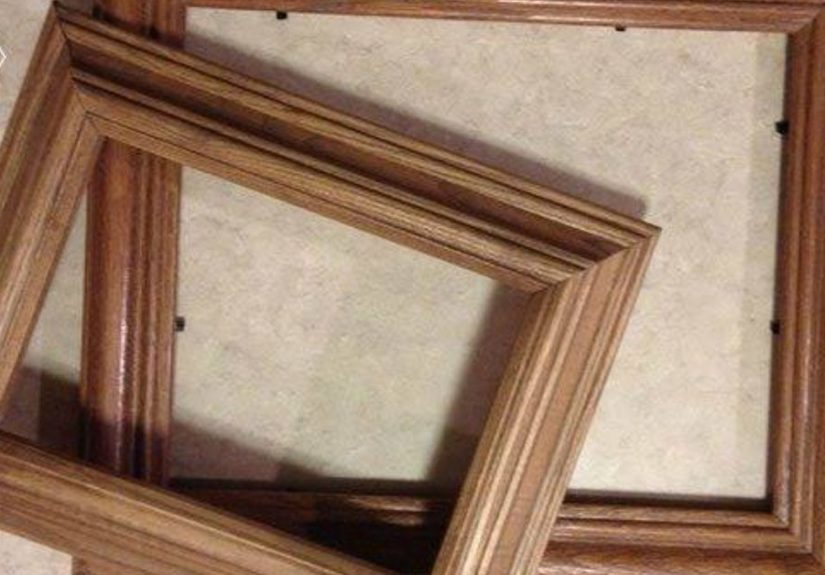
- Layer one frame over another. If you have two compatible frames, stacking them can create instant depth. This works especially well for rustic or eclectic decor.
For a clean, modern chunky frame, choose flat wood strips or simple square-edged molding. For a more traditional or cottage-style look, choose decorative trim with a little curve or profile. Dry-fit all pieces before gluing. If the proportions look off, now is the time to fix themnot after everything is attached forever out of spite.
5. Measure, Cut, and Dry-Fit the Trim
Measure each side carefully. If you’re using mitered corners, cut each end at 45 degrees so the pieces meet neatly. A miter saw is easiest, but a miter box works fine for smaller projects. Test each piece against the frame before attaching it.
Dry-fitting is non-negotiable. Even tiny measurement errors become very visible once the trim is painted. A small gap can often be fixed with filler, but a badly cut corner will keep looking suspicious, like a picture frame wearing a fake mustache.
6. Glue the Trim in Place
Apply wood glue to the back of each trim piece and press it into position on the frame. Use clamps, painter’s tape, or gentle weights to keep the trim from sliding while it dries. If your frame is large, you can reinforce the build with brad nails, but glue alone is often enough for smaller photo frames.
Wipe away squeeze-out immediately. Dried glue can interfere with stain and make paint look uneven. Let the frame dry fully according to the glue instructions before you do anything else.
7. Fill Gaps and Imperfections
Once the trim is secure, inspect every seam and corner. Small gaps are normal, especially on first attempts. Use wood filler on joints, dents, or chips. For tiny hairline gaps, a small bead of paintable caulk can help smooth the transition.
After the filler dries, sand it smooth. This is one of those fussy little steps that makes a giant difference. The finished frame should feel like one solid piece, not like several unrelated boards that accidentally formed a committee.
8. Prime Before Painting
If your frame has mixed materials, glossy paint, laminate-like surfaces, or dark old finishes, primer is your best friend. It helps the paint stick better and creates a more even color. If you skip primer on a tricky surface, the finish may chip, peel, or show uneven coverage.
If you’re going for a stained wood look instead of paint, this is where you prep the new trim and old frame so they take stain consistently. In some cases, matching different woods perfectly is hard, so painting may be the easiest path to a truly unified chunky frame.
9. Paint or Stain the Frame
You’ve got options here, and they’re all good:
- Matte black: bold, classic, and expensive-looking
- Warm white: fresh and versatile for farmhouse, coastal, or traditional decor
- Soft taupe or greige: subtle and designer-friendly
- Wood stain: natural, warm, and timeless
- Chalk-style finish: great for vintage or distressed looks
Use thin, even coats. Multiple light coats almost always beat one heavy coat. If brushing, paint with the grain when possible. If spraying, work in a ventilated area and keep the coats controlled so details don’t get gummy. Let the frame dry properly between coats, because impatience is how fingerprints become “texture.”
10. Reassemble and Hang Safely
Once the finish cures, reinsert the glass, mat, artwork, and backing. If the frame gained significant weight from extra trim, check the existing hanging hardware. A heavier DIY chunky photo frame may need stronger D-rings, new wire, or better wall anchors.
For gallery walls, using frames finished in the same color creates a cohesive look even when the art is mixed. If your print is small, consider adding a wider mat so the finished piece feels more upscale and balanced.
Design Ideas for a Chunky Photo Frame That Looks High-End
The beauty of this DIY is that it can go in several style directions. A few smart choices change the entire personality of the piece.
Modern Minimalist
Use flat trim, crisp corners, and matte black or soft white paint. Pair with abstract art, black-and-white family photos, or simple line drawings.
Vintage Cottage
Choose slightly ornate thrifted frames, add curved trim if possible, and use warm white, cream, sage, or a lightly distressed finish.
Rustic Wood Look
Skip the bright paint and use stain to emphasize texture. This works beautifully with botanical prints, landscapes, and old family photos.
Gallery Wall Upgrade
Make several mismatched old frames look intentional by giving them all the same chunky treatment and finish. Suddenly, the wall looks collected, not chaotic.
Mistakes to Avoid
Skipping surface prep: Paint does not love dirt, grease, or glossy mystery residue.
Using too much glue: Squeeze-out is annoying and can mess with stain and paint.
Rushing the dry time: A half-cured finish is a magnet for smudges, dents, and regret.
Ignoring the frame’s final weight: More trim equals more weight, and the wall deserves a plan.
Trusting every first miter cut: Dry-fit first. Pride second.
Forgetting proportion: Not every tiny frame needs giant trim. Aim for balance, not cartoon eyebrows.
Real-World DIY Experiences: What This Project Feels Like in Practice
One of the most surprising things about making a DIY chunky photo frame is how quickly an old frame changes from “junk drawer decor” to “wait… this actually looks expensive.” The transformation usually happens in stages. First, the frame looks worse because you’ve stripped it down, sanded it, and covered it in filler. At that point, it often resembles a craft project that has lost the will to live. Then the primer goes on, the lines start to unify, and suddenly you can see the finish line. By the time the final coat dries, it becomes deeply satisfying in a way only home DIY people truly understand.
Another common experience is learning that old frames have a lot of personality, and not all of that personality is helpful. Some are slightly uneven. Some corners are not perfectly square. Some have hidden staples, weird backing tabs, or ancient hardware that seems to have been installed during a previous civilization. You start the project thinking, “I’ll just freshen this up,” and then spend 20 minutes negotiating with one stubborn metal tab like it’s a hostage situation. Oddly enough, this is part of the charm.
Many DIYers also discover that the design choices matter just as much as the construction. A frame can be technically well made but still look off if the trim is too bulky, too tiny, too ornate, or the wrong color for the art. It often helps to step back several times during the process and actually look at the piece from across the room. What feels dramatic up close can look just right from six feet away. What seems like a soft beige on the workbench may read “sad oatmeal” on the wall. That’s just honest decorating.
There’s also a very real emotional payoff in using something you already own. Turning old dusty frames into finished decor feels resourceful. It saves money, reduces waste, and gives sentimental items a second life. Maybe the frame came from a relative’s house. Maybe you bought it years ago at a thrift store because it had “potential” and then let it marinate in the closet for three years. Either way, finishing it feels like finally cashing in on your own good intentions.
And then there is the confidence factor. Once you make one chunky frame, you start looking at every old frame like a future project. Suddenly, thrift stores become opportunity zones. Garage sales become dangerous. Your storage closet becomes less of a shame cave and more of a design inventory system. The first frame teaches you the process. The second one goes faster. By the third, you’re casually saying things like, “This one just needs a little filler and a cleaner profile,” which is how you know the DIY bug has fully taken hold.
The best experience, though, is hanging the finished piece and seeing how different it feels from the original. A chunky frame has presence. It makes the photo or art feel chosen. It gives the room a polished layer without requiring a major renovation or a scary budget. And every time someone compliments it, you get the deeply enjoyable chance to say, “Thanks, it used to be a dusty old frame.” That sentence alone is worth at least one afternoon of sanding.
Conclusion
A DIY chunky photo frame is one of the smartest ways to upgrade your decor without spending custom-frame money. With the right old frame, some simple trim, proper prep, and a finish that suits your style, you can create wall art that looks polished, personal, and far more expensive than it really was. Whether you love vintage decor, modern gallery walls, rustic finishes, or budget-friendly upcycling, this project checks all the right boxes.
So yes, those old dusty frames deserve another chance. Clean them up, bulk them out, give them a new finish, and let them come back into the room like the stylish little overachievers they were always meant to be.