Table of Contents >> Show >> Hide
- Why Choose a Concrete Patio?
- Planning Your Concrete Patio (AKA: Measure Twice, Pour Once)
- Design Options That Don’t Look Like a Sidewalk
- The Anatomy of a Patio Slab (The Nerdy Part That Prevents Heartbreak)
- Installation Overview: What “Pouring a Patio” Actually Involves
- Weather, Climate, and Concrete’s Mood Swings
- Concrete Patio Cost: What You’ll Pay (and Why)
- Maintenance: Keeping Your Patio Looking Good (Without Babysitting It)
- Common Concrete Patio Problems (and What to Do About Them)
- DIY vs. Hiring a Pro: A Practical Decision Guide
- Conclusion
- Experience Notes: Real-World Lessons People Learn the Hard Way (So You Don’t Have To)
A concrete patio is the ultimate “looks simple, secretly complicated” backyard upgrade. Done right, it’s a durable outdoor living room
that survives barbecues, birthday parties, and the occasional chair-dragging Olympics. Done wrong… well, you’ll learn new words like
spalling, scaling, and why-is-there-a-puddle-shaped-like-Florida.
This guide walks you through planning, design, installation basics, costs, curing, and long-term maintenanceplus the real-world “wish I knew that”
lessons people only share after they’ve mopped the same rainwater lake for the fifth time. Whether you’re hiring a pro or going full DIY hero,
you’ll leave with a smarter plan and fewer regrets.
Why Choose a Concrete Patio?
Concrete is popular for patios because it’s strong, adaptable, and can be finished in more styles than a streaming service has true-crime documentaries.
A basic broom-finish slab is budget-friendly and low maintenance. Decorative concretelike stamped concrete, stained concrete, or exposed aggregatecan
mimic stone, brick, or even wood without the weeds that love to move into real joints like they pay rent.
Pros
- Durability: Handles foot traffic, outdoor furniture, grills, and normal life.
- Design flexibility: Color, texture, borders, curves, patterns, and inlays are all possible.
- Lower upkeep than many surfaces: No shifting pavers, fewer joints to de-weed.
- Clean look: Crisp edges, seamless transitions, and easy patio furniture placement.
Cons
- It can crack: Concrete is strong in compression, less so in tension. Cracks are normal; the goal is controlling where they happen.
- Repairs can be visible: Patches don’t always blend, especially with decorative finishes.
- Surface can be slippery: Some sealers and smooth finishes become slip-and-slide adjacent when wet.
Planning Your Concrete Patio (AKA: Measure Twice, Pour Once)
Before you think about concrete, think about use. Is this a dining zone? A fire-pit hangout? A hot tub pad? The function affects size,
thickness, reinforcement, and finish.
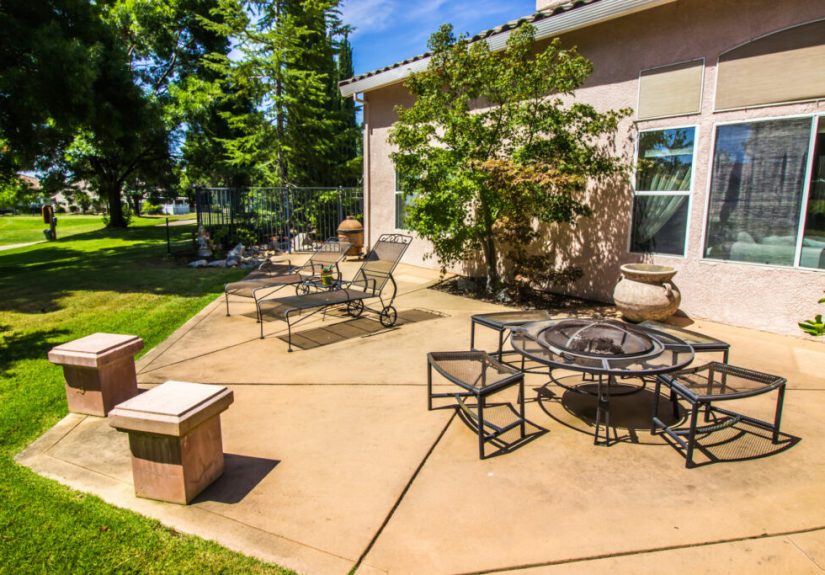
Size and layout that actually works
A common patio size is around 12′ x 16′ (192 sq ft). That fits a table, chairs, and breathing room without forcing guests to shuffle sideways like
they’re passing each other in an airplane aisle. If you’re adding a grill station, outdoor kitchen, or bulky furniture, sketch it firstyour future
self will thank you.
Drainage: your patio’s love language
Water should move away from your house. A practical rule is a slope of about 1/4 inch per foot. For a patio extending 12 feet,
that’s about a 3-inch drop from the house side to the yard side. It’s subtle under your feetbut very obvious to puddles deciding where to live.
Permits, codes, and “surprise, there’s a utility line”
Permit rules vary by city and county. Some places care about patio size, grading changes, drainage impact, or whether the slab is tied to the home.
Even when a permit isn’t required, it’s smart to call local utility locating services before digging. The goal is a pationot an accidental
neighborhood blackout.
Design Options That Don’t Look Like a Sidewalk
The “gray rectangle” era is optional. Modern concrete patios can be clean and minimal, warm and earthy, or bold and patternedwithout turning your yard
into a theme park.
Popular concrete patio finishes
- Broom finish: A classic textured surface with good slip resistancegreat for everyday patios.
- Exposed aggregate: Decorative stone peeking through the surface for texture and visual interest.
- Stained concrete patio: Adds color variation and depththink “natural stone vibe,” not “painted driveway.”
- Stamped concrete patio: Patterns pressed into the surface to mimic pavers, slate, brick, wood planks, and more.
- Colored or integral color: Pigment mixed into the concrete so the color runs through the slab (not just on top).
Pro-style upgrades that add “wow” without chaos
- Contrasting border: A simple darker band around the edge frames the space.
- Two-zone layout: Dining area + lounge area with a subtle joint line or texture shift.
- Steps and seat walls: Concrete plays well with built-ins when planned early.
- Grip additive in sealer: Especially helpful for stamped finishes near pools or shady areas.
The Anatomy of a Patio Slab (The Nerdy Part That Prevents Heartbreak)
A concrete patio is only as good as what’s underneath it. The surface gets the compliments, but the base does the hard worklike a stage crew in all
black moving props while the actors take the bows.
Typical thickness and base
Many residential patios use a 4-inch thick slab. Under that, a compacted gravel base is common to improve drainage and reduce settling.
Think of it as giving your patio a stable, well-draining mattress so it doesn’t slowly sink into a lumpy mess.
Reinforcement: rebar, wire mesh, or fibers?
Reinforcement doesn’t magically “stop cracks.” It helps keep cracks tighter and improves performance under load. Many patios use wire mesh or rebar
(especially for bigger slabs or heavier features). If you’re planning a hot tub, outdoor fireplace, or thick perimeter seating wall, talk to a pro
about a thicker slab and a reinforcement plan that matches the load.
Joints: controlling cracks like a responsible adult
Concrete shrinks as it cures and moves with temperature. If you don’t create intentional “weak lines,” it will create its ownright where you don’t want
them, usually through the prettiest part of the patio.
- Control joints: Cut or tooled lines that guide cracking. Spacing is often planned so panels are close to square.
- Joint depth: A common target is about 1/4 of slab thickness (so roughly 1 inch deep on a 4-inch patio).
- Isolation joints: Soft separation between the slab and the house/foundation so the patio can move without pushing on the home.
Installation Overview: What “Pouring a Patio” Actually Involves
Concrete day looks simple on time-lapse videos. In real life, it’s choreography. Once the truck arrives, the clock is ticking, and everyone suddenly
becomes very passionate about the exact angle of a screed board.
Step-by-step (high level)
- Layout & excavation: Mark the shape, dig to the proper depth, and remove soft soil.
- Compact subgrade & add base: Compact soil, add gravel, compact again, and shape the slope for drainage.
- Forms: Build sturdy edges (straight or curved) that hold concrete in place and define the finished lines.
- Reinforcement & isolation: Place mesh/rebar correctly and add isolation material against the house.
- Pour, screed, float: Place concrete, level it, embed aggregate, and prep the surface for finishing.
- Finish: Broom finish, stamping, edging, and jointingtiming matters.
- Cure: Keep moisture in the slab so it gains strength and durability instead of drying out too fast.
Curing: where most “good pours” become great (or tragic)
Curing is not optional busywork; it’s a performance upgrade. Proper curing improves strength and durability. A practical approach is to start curing as
soon as possible after finishing and keep moisture conditions favorable for several days. In warm conditions, that’s often around 5 days;
in cooler conditions, 7 days is a common guidance window. Protect fresh concrete from freezing conditions early on.
Weather, Climate, and Concrete’s Mood Swings
Concrete doesn’t care about your weekend plans. Temperature, wind, sun, and moisture affect finishing and curing more than most people expect.
Freeze-thaw regions: air-entrained concrete matters
If your patio will face freezing and thawing cycles (and possibly deicer salts), air-entrained concrete helps resist damage by creating tiny
air bubbles that relieve internal pressure when water freezes. For exterior flatwork, air contents commonly fall in the 4%–7% range,
depending on mix and aggregate size. Also, exterior slabs typically benefit from a textured finish (like broom) for traction.
Hot, dry, windy weather: avoid the “surface dries first” trap
Rapid evaporation can cause shrinkage cracking and finishing headaches. Shading, windbreaks, and early curing steps help. And nosprinkling extra water
on the surface to make finishing easier isn’t a “hack.” It’s a fast-track to a weak, dusty surface.
Concrete Patio Cost: What You’ll Pay (and Why)
Concrete is often cost-effective, but the price range is wide because “concrete patio” can mean anything from a plain slab to a custom stamped showpiece
with borders, coloring, and detailed handwork.
Typical price ranges
- Basic concrete: Often falls into a lower range per square foot compared to pavers, but varies by region and site complexity.
- Stamped concrete patio cost: Usually higher than basic concrete because it adds labor, release agents, stamping mats, and skill.
- Pavers vs. concrete patio: Pavers can cost more upfront but may be easier to repair piece-by-piece later.
A quick example (because math is cheaper than mistakes)
For a 12′ x 16′ patio at 4 inches thick:
- Area: 192 sq ft
- Thickness: 4 in = 0.333 ft
- Volume: 192 × 0.333 ≈ 64 cu ft
- Concrete needed: 64 ÷ 27 ≈ 2.37 cubic yards (order extra for waste and uneven subgrade)
Add-ons that commonly increase cost: demolition of an old slab, site grading, difficult access (wheelbarrows vs. pump truck), thicker concrete for heavy
loads, decorative stamping, multi-color staining, borders, and sealing systems.
Maintenance: Keeping Your Patio Looking Good (Without Babysitting It)
A concrete patio is low maintenance, not zero maintenance. The good news: a little routine care goes a long way.
Cleaning
- Sweep regularly to prevent dirt from becoming a permanent houseguest.
- Wash with mild soap and water for general grime; spot-clean oils quickly.
- Use pressure washing carefullytoo aggressive can damage the surface, especially on decorative work.
Sealing: how often is “often”?
Many contractors recommend resealing every few years depending on climate, traffic, and sealer type. A reasonable expectation is that resealing might fall
somewhere around every 2 to 5 years, with harsher freeze-thaw conditions and deicers pushing the schedule more frequent. For stamped concrete,
resealing is especially important because it helps preserve color and makes cleaning easier.
Winter care tips
- Avoid harsh deicing chemicals early in the slab’s life; they can contribute to surface damage in some conditions.
- Use traction sand if needed, and shovel with a plastic edge to reduce scraping.
Common Concrete Patio Problems (and What to Do About Them)
Hairline cracks
Small cracks are common. If the slab is stable and the crack isn’t widening, it may be mostly cosmetic. You can use a concrete crack filler to keep out
water and debrisespecially in freeze-thaw climates.
Scaling or flaking surface
Scaling is often linked to freeze-thaw exposure, saturation, finishing issues, or deicer use. Prevention is easier than repair: use the right mix,
finish appropriately, and cure well. If scaling is already happening, surface repair products or resurfacing may helpbut severe cases may require
professional evaluation.
Birdbaths (puddles that refuse to leave)
These usually come from poor grading, form issues, or finishing that created low spots. Small low areas can sometimes be corrected with resurfacing
compounds, but significant drainage problems are best solved by a pro (and occasionally by accepting that your patio is auditioning for a koi pond).
DIY vs. Hiring a Pro: A Practical Decision Guide
DIY can work for smaller, simpler patios if you’re prepared with tools, help, and timing. But concrete doesn’t pause so you can run to the store for
“one more thing.” If you’re considering DIY, be honest about access (can you get a truck close?), size (big pours get stressful fast), and finish
complexity (stamped concrete is an art form).
DIY is more realistic when:
- The patio is small and rectangular.
- You’re doing a basic broom finish.
- You have help on pour day and proper compaction tools.
Hire a pro when:
- You want stamping, multiple colors, borders, or complex shapes.
- The site needs significant grading or drainage work.
- You’re supporting heavy loads (hot tub, masonry fireplace, outdoor kitchen).
- You want a clean finish and a warrantyand you’d prefer not to learn concrete finishing the hard way.
Conclusion
A well-built concrete patio is one of the best “quality of life” upgrades you can make outdoors. The magic isn’t just the concreteit’s the planning:
proper slope, solid base compaction, smart joint layout, climate-appropriate mix choices, and patient curing. Get those right, and your patio becomes a
dependable, good-looking space that works for daily living and big gatherings alike.
Experience Notes: Real-World Lessons People Learn the Hard Way (So You Don’t Have To)
If you spend enough time around homeowners, contractors, and the internet’s most passionate weekend warriors, you start noticing patternsmostly the kind
that show up after someone says, “It’ll be fine.” Here are the most common, genuinely useful lessons people report after building or living with a
concrete patio for a while.
1) The base is the whole game, even though nobody wants to talk about it. The exciting part is the finishstain colors, stamp patterns,
maybe a border that makes your neighbors quietly jealous. The unsexy part is hauling gravel, compacting it properly, and grading it to the right slope.
But when a patio settles, rocks, or holds water, the root cause often lives underneath. People who “saved time” by skipping compaction tend to pay for it
later in crack repairs or drainage fixes. The best compliment a base ever gets is silencebecause everything above it behaves.
2) Concrete punishes improvisation. Painting a room can tolerate improvisation. Concrete cannot. Once placement starts, you’re making a
sequence of time-sensitive decisions: where the truck unloads, how quickly it moves, how the surface is finished, when joints are cut, and how curing is
handled. Folks who go in with a plan (tools staged, helpers assigned, forms sturdy, curing materials ready) tend to end the day with a patio. Folks who go
in with “vibes” tend to end the day with a story.
3) “Just add more water” is the beginning of many tragedies. It’s tempting when the mix feels stiff and the surface isn’t cooperating.
But extra water can lower strength and increase shrinkage and surface issues. A lot of long-term patio complaintsdusting, flaking, weak surfacestart
with trying to make finishing easier in the moment. The better move is getting the right mix for the job (and the right finishing timing) instead of
turning your slab into a giant science experiment.
4) Joints aren’t uglyrandom cracks are ugly. Homeowners sometimes push back on control joints because they want a seamless look. Then the
patio develops a dramatic crack that does not respect aesthetics, symmetry, or your feelings. The people happiest long-term are usually the ones who
planned joint placement like it was part of the design: aligned with doorways, centered on the space, or hidden under furniture zones. A joint that looks
intentional reads like style. A crack that appears wherever it wants reads like chaos.
5) Sealing is like sunscreen: you don’t notice it working until you skip it. In mild climates, an unsealed patio might still look decent
for a while. But as years pass, stains set in, colors fade, and cleaning takes more effort. People who reseal on a sensible schedule describe their patios
as “easy to keep looking nice,” while the “I’ll do it later” crowd tends to inherit a permanent oil spot that looks suspiciously like a Rorschach test.
Bonus lesson: traction matters. If you’re sealing stamped concrete, ask about additives that help reduce slipperiness.
6) The best patios are designed for how you live, not how a catalog lives. One of the most consistent happy-outcome stories is when the
patio is sized for real furniture and real traffic patterns. Enough clearance around a dining table so people can pull out chairs without bumping into a
grill. A landing area by the door so you’re not stepping straight onto a muddy edge. A lounge zone that doesn’t force everyone to stare directly into the
afternoon sun. Concrete is flexibleuse that to build a space that fits your life, not a photo.
The punchline is that a concrete patio isn’t just a slabit’s a system: soil, base, slope, mix, finish, joints, and curing all working together. When
those pieces align, you get a patio that feels effortless for years. And that’s the dream: less maintenance, more margaritas.